31 Lists: Pumpkin Recipes

The list that started it all!

As mentioned in my intro post, one of the factors that played a part in me decided to do the #write31days challenge and on what topic came from a Facebook post!

A friend wrote on my wall and said, “Kasia, what are your top 3 pumpkin recipes? I know it might be difficult to narrow down. There are just so many dishes/treats out there and I want to try some new recipes. #ExpertOnAllThingsAutumn”

I don’t know anyone who loves pumpkin things or fall things as much as me, so clearly I jumped at the chance to share! I ended up giving him my six favorites, and now I shall share them with you (plus one extra)!

1. favorite pumpkin cookie recipe – http://www.geniuskitchen.com/recipe/best-pumpkin-cookies-185445 

These soft, fluffy pumpkin spice cookies with penuche glaze were probably my favorite pumpkin recipe to make. I forget to make these cookies some years, but they are THE BEST. The glaze gets a little hard on top of the soft cookie and they are just perfect.

2. favorite pumpkin cake recipe – http://thepioneerwoman.com/cooking/pumpkin-sheet-cake/

I LOVE SHEET CAKES! Ever since I was first introduced to the pampered chef stoneware sheet pan, sheet cakes have been my go-to dessert to make for a group of people. I’ve made lemon, strawberry, Texas sheet cake, white Texas sheet cake, funfetti, cookies and cream, key lime, and more! By far my most used sheet cake recipe is the classic – chocolate texas sheet cake. I use Pioneer Woman’s recipe and it’s foolproof and perfect and EASY. Well, when I discovered she made a PUMPKIN version modeled after her easy chocolate version. SOLD! Best pumpkin dessert to feed a crowd.

3. favorite pumpkin breakfast recipe – https://kasiaskitchen.com/2012/05/30/pumpkin-french-toast-casserole-with-coffee-whipped-topping/

I created this recipe back when I was doing Weight Watchers. Now when I make it I’m usually making it for a brunch or party or Christmas breakfast and go all out with the ingredients. I use Texas toast, real eggs, real butter, evaporated milk/whole milk/half and half/whatever I have, AND homemade caramel sauce instead of the coffee whipped cream. Also, when using Texas toast, I use the whole can of pumpkin, half on the first layer of bread and half on the second. William LOVES this and claims to not love pumpkin. I brought it to a brunch recently and it was devoured. Another fun tip – if you need to make a non-pumpkin breakfast to go alongside this for any pumpkin haters, this recipe is customizable! I’ve used apple butter or Nutella in place of pumpkin before. Obviously, since they are sweetened you’d want to do a smaller layer that you would of the pumpkin and nix the brown sugar and spices for the Nutella version. But it makes a good base recipe!

4. favorite pumpkin dish to bring to Thanksgiving celebrations – https://www.tasteandtellblog.com/pumpkin-cobbler/

I actually don’t love pumpkin pie. But I do LOVE this pumpkin cobbler. I bring it to most Thanksgiving potlucks and to any Thanksgiving meal where I get assigned dessert.

5. favorite savory pumpkin dish – http://www.skinnytaste.com/crockpot-turkey-white-bean-pumpkin/

Okay, so in the name of loving pumpkin I’ve tried a few savory pumpkin dishes. One major fail – pumpkin chicken alfredo… Just say no! However, this savory pumpkin dish was NOT a fail! This pumpkin chili is absolutely delicious.

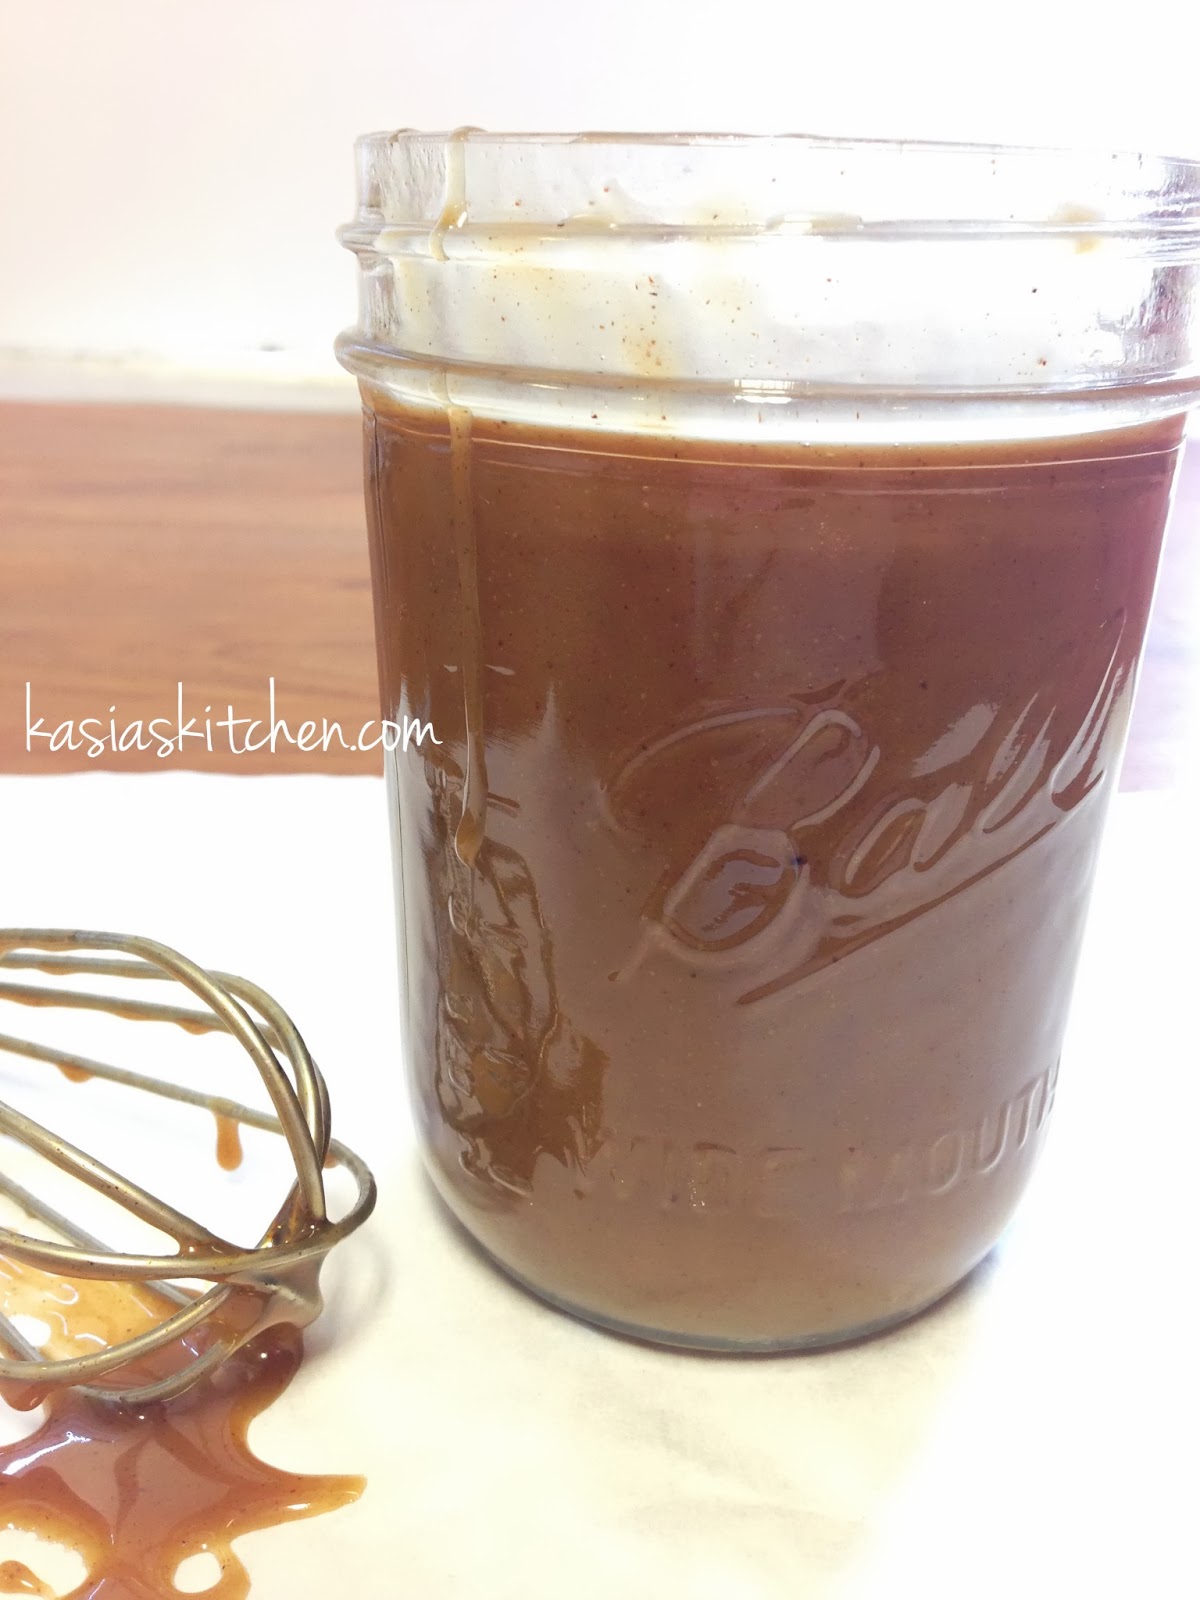
6. favorite pumpkin sauce for coffee – https://www.theartofdoingstuff.com/starbucks/

I linked to this in yesterday’s post, but it’s worth mentioning again. This is the only DIY pumpkin spice latte that’s ever come close to the Starbucks one in my opinion! Most recipes create a syrup, not a sauce, and Starbucks uses pumpkin SAUCE with actually pumpkin in it. I have been keeping a squeeze bottle of this and just squeezing a little in my iced coffee each morning. The sauce is INDULGENT if you use it in the amounts listed. But just a squeeze adds a subtle pumpkiny sweetness to your coffee.

7. favorite unexpected pumpkin recipe – http://www.bhg.com/recipe/pumpkin-corn-bread/

THIS CORNBREAD IS SO GOOD! My cornbread rankings would be 1. southern, salty, buttery, buttermilk cornbread 2. this pumpkin cornbread 3. Cracker Barrelcornbreadd 4. jiffy/other sweet cornbreads 4. all other cornbreads. Two of my former roommates also loved it. It’s so good with chili and soups.

Basically, if it’s pumpkin flavored, I’ve tried it. And these are my top picks! 

img_0127


This is part of my 31 Days of List series. Click here to see the other lists in this series.

Chicken Fajita Stuffed Peppers

I am now taking writing prompt suggestions! Seriously, ask me questions, tell me things you want to read about, ANYTHING! I do want to start posting recipes again for sure. But I just love writing about life and people and Jesus and things even more than I like sharing recipes with you. 31 People(s) was absolutely my favorite writing I’ve ever done. Give me ideas!

In the mean time, I’m dipping into recipes I never posted. I made a batch of these for my work lunches one week and I loved them EVERY SINGLE DAY. I admit that sometimes I don’t love my prepped lunches every day that I planned them for, but this was not one of those weeks. They were healthy and filling and low carb and pretty and delicious! For lunches I ate them with grape tomatoes, strawberries, and topped them with a little avocado and some fiesta sour cream (fat free sour cream or greek yogurt mixed with a taco seasoning packet).

Chicken Fajita Stuffed Peppers

  • Servings: 4
  • Difficulty: easy
  • Print

IMG_2203

CALORIES:  384 for 2 pepper halves, 192 for 1 (via MyFitnessPal)

INGREDIENTS:

  • 4 bell peppers
  • 2 cups diced cooked chicken (I used half a bag of the Kroger pre-cooked frozen diced chicken breast)
  • 1 medium onion, chopped (could also use frozen)
  • 1 can black beans, rinsed
  • 1 cup frozen corn
  • 2 cups kale leaves
  • 2 tbsp taco seasoning
  • 2 tbsp lime juice
  • 1 cup reduced fat fiesta cheese

DIRECTIONS:

Preheat oven to 350. Carefully cute peppers in half length wise. Scoop out the seeds and white ribbed parts. You don’t have to keep the stem in tact, but it makes for pretty presentation! Rinse the pepper halves out and line then up in a 9X13 casserole dish.

Spray a skillet with olive oil cooking spray. Saute sliced onions and diced chicken until chicken is cooked or warmed through. Timing will depend on what kind of chicken you are using. Add frozen corn. Sprinkle chicken with taco seasoning and lime juice. Add black beans and kale and stir until combined and warmed a little.

Fill each pepper with as much topping as you can, packing it in to get the most. Very carefully pour warm water into the casserole dish so it covers the bottom half of the pepper halves. This helps the peppers get soft while they cook. You can also blanch them before to help with softness, but this method is way easier to me. Bake for 30 minutes. Top with cheese and turn the broiler to high. Watch closely, but let the cheese melt and the tops get a tiny bit charred.

Serve with other veggies, rice, or fruit. Top with sour cream, avocado, salsa, or whatever you like!

The Best Breakfast Sandwich

Since it was requested, I thought I’d throw together a quick little post for my current favorite breakfast sandwich. I wanted to name these “Canadian English American McMuffins” since they contain English muffins, American cheese, and Canadian bacon. I decided that was too many words and probably only funny to me. Instead I give you “The Best Breakfast Sandwich” which is actually the same amount of words but easier to say/type. Whatevs. Enjoy!

The Best Breakfast Sandwich

  • Servings: 6
  • Difficulty: EASY
  • Print

IMG_0166

INGREDIENTS:

  • 1 package of cranberry english muffins (or any flavor, but while they are still in season I highly recommend cranberry!)
  • 1 package of Canadian bacon
  • 6 slices of white american cheese
  • 6 eggs
  • green onions
  • seasonings of choice

DIRECTIONS:

Preheat oven to the low broiler setting. Spray a jumbo muffin tin with cooking spray. You can use regular too, I did the first time, but jumbo makes the perfect size. The regular size makes them a little smaller and not as evenly dispersed across the bread. Sprinkle green onions in the bottom of each cup (mine has 6 cups exactly). Crack an egg in each cup. Sprinkle to taste (just a dash of each) with salt, pepper, onion powder, and garlic or whatever seasonings you like. Bake eggs until whites are set, they don’t jiggle in the cups, and yolk is still a little runny (or to whatever stage you like your eggs yolks). Watch closely and I stress LOW broiler. I did high first time and high broiler can go from almost ready to crispy quickly.

IMG_0165

While eggs are cooking slice your english muffins in half and toast them. Layer 2 slices of Canadian bacon and 1 piece of cheese on the toasted halves. Fold the corners of the cheese in to keep all the melty goodness in. When eggs are finished, run a knife along the edge to pop them out and layer an egg for each sandwich too. Wrap in a paper towel and then in plastic wrap. When it’s time to eat, remove plastic wrap and heat for 35 -45 seconds.

Jamaican Jerk Chicken & Potato Foil Packets

Say hello to my new obsession… FOIL PACKETS! I saw the idea from a Hungry Girl Facebook video. If you Google “Hungry Girl foil packets” she has lots of ideas! Her general “recipe” is veggie + meat + seasoning + sauce. This was the version I came up with with that inspiration and the same inspiration I plan on using for MANY other versions. Think of the possibilities! Sweet potatoes, broccoli, brussel sprouts, zucchini, even sausage, Asian flavors, honey mustard, herb-y flavors, etc etc etc. Since I just made this up on a whim I don’t know exact measurements of seasonings, but sprinkles, pinches, and drizzles count right?? Just don’t be too heavy handled, jerk seasoning is spicy! These were super easy, virtually no clean up, and great for portion control. Seriously, I loved this! My roommate and I were both sad when we were done eating it, not because we weren’t full, but just because it was over!

Jamaican Jerk Chicken & Potato Foil Packets

  • Servings: 6
  • Difficulty: easy
  • Print

IMG_3689

INGREDIENTS (IN ORDER OF USAGE):

  • 1 3lb bag of boneless skinless chicken breast
  • 18 red potatoes (3 per packet, used a 3 lb bag of them but there were a couple of rotten ones)
  • 1 large onion
  • Paula Deen House Seasoning (http://www.pauladeen.com/house-seasoning)
  • Jamaican jerk spice (I got mine in a little ziplock at Fresh Market)
  • Jamaican spiced skinny ranch (1 dry ranch dressing packet made per package instructions but subbing mayo for 1 cup Greek yogurt + 1 cup skim milk + couple of pinches of the Jamaican jerk seasoning to taste)
  • 12 pieces of tin foil about a foot long each (length of a 9×13)
  • cooking spray
  • olive oil

IMG_3688

DIRECTIONS:

Spray 6 pieces of the foil with cooking spray. Cube potatoes in pieces as even as possible. I cut three at a time and put them down on their piece of foil. I used my scale to make sure the potato groupings were as similar in weight as possible for even cooking time. Dice onion in similar sized cubes (I cut it in half, then with flat side down sliced it in half again horizontally, then made verticals cuts all the way across then crisscrosses back again to get cubes, not that it matters or that anyone needed that much detail haha, but it’s the most even cut I think!). Divide onion up evenly and add to each piece of foil. Drizzle a little (really just a tiny bit) olive oil over each pile of potatoes and onions. I sprinkled a pinch of house seasoning and a pinch of jerk seasoning on each one then tossed the piles around with my fingers to get the potatoes and onions evenly covered with oil and seasonings.

Rinse thawed chicken breasts and pat them dry with paper towels. A 3lb bag of chicken comes with about 7-8 chicken breasts and two inevitably are usually really tiny. I don’t like the weird fatty/skin/veiny parts so I cut those off. I used my scale and measured the biggest one which was about 5.3 ounces, so used the extra piece of chicken to get each packet to have about 5.3-5.5 ounces of chicken. I left the main piece per packet whole then added in the extra pieces right beside them. Sprinkle the chicken in each packet  with more house seasoning and jerk seasoning until the top is evenly coated as if I had dry rubbed it (not to heavy, just a pinch or two).

Drizzle each packet with a tablespoon of the skinny ranch. Fold in the long sides first and then the short sides. I put 3 packets each on a baking sheet for cooking in case there was any spillage. Bake at 375 for 30 minutes. Carefully slice open the foil (it will be hot!) of the packets you are eating then (I made extra for leftovers). Turn the oven broiler on and leave them in the broiler for 2-3 minutes to brown it just a bit. Each person gets their own fun packet! Use the leftover ranch on side salads to serve with the meal.


The Green Smoothie

If I told you that I have several (16 to be exact) posts saved in my drafts folder with titles and pictures already edited with pretty words on them that are only lacking a few words here and there to be post-ready, would you scold me? (Editor’s note: If I had an editor, or was an editor, he or she would probably add some extra commas in that really long sentence you just read. But alas, no editors here.)

Editor’s notes aside, I should be scolded! And not for my lack of comma usage. Words are the easiest part and I need to get some dang words added to those drafts. One day. One day, or not, but hopefully one day, I’ll easily be able to make time to blog regularly again. But until then, I’ll randomly happen upon a draft every few months and throw a little something out in the blogosphere. Or I’ll type a bunch of spastic thoughts in my iPhone Notes and post it (like I’ve done quite a few times amidst the most “recent” blog posts).

Now I will stop speaking so I can share something that almost seems extinct around this space lately… A RECIPE! This smoothie is a regular staple for me, but super on my mind right now because I did a self-imposed made up burger detox last week. I went to Boston the week before for a work conference and had FOUR burgers. I was only there for 5 days y’all. I needed a healthy eating/living restart anyway. So I’m did smoothies for breakfast (a berry detox smoothie I might post sometime soon) and smoothies for lunch (this green smoothie). This week I’m back to just this smoothie for breakfast and healthy packed by me lunches. (I also must confess that I ate two burgers last weekend immediately following the burger detox that ended Friday. And they were delicious!)

I’m going to post the “base” recipe, but depending on your needs you can add extra things to it. And let me tell you, don’t be scared of the green! This smoothie literally tastes like a peanut banana smoothie. My friend Lindsey introduced me to a version of this and I’ve been hooked since. The spinach is tasteless in this and just adds extra needed nutrients! Lately I’ve been adding protein powder (just basic vanilla whey protein). I started working out again and noticed I wasn’t meeting the protein goals My Fitness Pal sets for me. I looked back at old logs and notice I rarely meet my protein goals! So I decided it was time to supplement. I add two scoops for an extra 90 calories and 15 extra grams of protein (I use this one). Previously I added a tablespoon of chia seeds. So like I said, depending on your needs you can tweak this how ever you need to!

THE Green Smoothie

  • Servings: 1
  • Difficulty: easy
  • Print

IMG_2056

Calories: 260 for 1 serving (via MyFitnessPal)

INGREDIENTS (IN ORDER OF USAGE):

  • 1 medium banana
  • 1 cup of cold water
  • 3/4 cup unsweetened vanilla almond milk
  • 1 cup ice
  • 1 cup frozen strawberries
  • 2 tablespoons PB2 (note, if you use real peanut butter the calorie count will go up)
  • 2 handfuls of raw spinach

DIRECTIONS:

Easy! Add all ingredients randomly or in listed order and blend. For my cheap Black Friday deal way less fancy than the fancy blenders kind of blender, I’ve found this order of ingredients blends the best. Putting the banana on bottom followed by the liquids and remaining ingredients seems helps it get going and blended smoothly. This makes a large serving, about 30 ounces. I drink the whole thing and just that (with protein powder added like I said previously, which is a total of 350 calories) for breakfast (or lunch if a detox week). If you need to not just drink your breakfast, you could split this with your housemates.

One Pot Garlic Parmesan Pasta with Spinach and Sweet Sausage

A RECIPE! I promise I’m gonna try ya’ll. Last year was full of transition. This year shouldn’t be unless God wants to send the bearded, huggable, Jesus loving man I always ask for, and there would be no arguments there! Therefore I should be able to establish some writing, posting, taking pictures of food (oh wait, I never stopped doing that) patterns. Kinda sorta made this dish up for last night’s dinner, and it was a hit! The roommates loved it, it’s pretty healthy for a creamy pasta dish, it was REALLY filling, and it was EASY! I see a new obsession coming with one pot concoctions.

One Pot Garlic Parmesan Pasta with Spinach and Sweet Sausage

  • Servings: 6-8
  • Difficulty: easy
  • Print

Inspired by: this recipe, but I changed it/added to it LOTS

Calories per serving: 427 for 8 servings / 570 for 6 servings (via MyFitnessPal)

Ingredients (in order of usage):

  • 1 tablespoon of olive oil
  • 4 teaspoons of refrigerated minced garlic (or 8 cloves of garlic minced)
  • 2 packages of chicken apple sausage, sliced
  • 2 tablespoons light butter (I used light I Can’t Believe It’s Not Butter)
  • salt, pepper, onion powder, garlic powder, italian seasoning
  • 1 lb pasta (I used Barilla Campanelle, but you can use any)
  • 4 cups of chicken broth (I used chicken bouillon or chicken base + water to make my chicken broth)
  • 2 cups of skim milk
  • 1/2 cup reduced fat parmesan (this kind, not the fancy kind, it blends better into sauces)
  • 1 10oz bag of spinach

Directions:

Heat olive oil over medium high heat in a big stock pot (you’ll need it to be high for when you add the spinach). Add garlic and saute for 30 seconds or until fragrant. Add sliced sausage and saute until browning on the edges. Add all seasonings to taste, probably a teaspoon of each is what I did if I had to guess, maybe a little more for the salt and italian seasoning and a little less of the pepper. Add butter and stir until melted. Add pasta and let it get coated in the yummy stuff. Add milk and broth. Increase heat to high and bring to a boil. Boil for a couple of minutes then reduce heat to medium low. Should be softly bubbling just at the surface. Stir frequently and let simmer for 18-20 minutes or until pasta reaches desired al dente consistency and sauce is thickening. Add parmesan and stir until combined. Add spinach and stir until wilted and combined. DONE! Dinner in 30 minutes.

*How about a MyFitnessPal recipe calculating tip! It’s SO easy to put recipes into MyFitnessPal to figure out calories/track them. If you find a recipe anywhere online, you can actually put the link into MFP from the web or from the app. From the web: on your dashboard page click food, then recipes, then copy and paste the link into recipie importer. You can take away the ingredients you aren’t using, change ingredients like 2% milk to skim milk, and add ones you are, change serving size, etc. From the app: click more, my recipes and foods, the add symbol in the top right corner, then add from the web. You can do the same adding and changing from the app. You can also start from scratch in both and make your own recipe. In the app you can even scan the barcode of the exact ingredients you are using. Just make sure for all ingredients you select the correct portion size, like for pasta in this one I had to select whole container. IT’S SO EASY!

Creamy Kale Dip

A few “fun” facts: 

1. It’s been so long since I’ve posted a recipe, I had to go in search of the last recipe I posted to remember how I format recipe posts.  

2. (insert dramatic pause with gasps and lots of  exaggerated dot dot dots)…

This is the first recipe I’ve posted in 2014… 

… (we needed some dramatic extra dot dot dots here)

… IT’S NOVEMBER! And not just November, but November 19th. What the heck?! I AM SORRY!  

3. The last time I even kind of posted a recipe was on September 20th, 2013. Even then, it was just linking to one of my recipes posted somewhere else. 

4. The last real recipe I posted was on July 13th, 2013.

5. That was 1 year and 4 months ago. That was 495 days ago. That was 70 weeks ago. (Who knew the internet had a date calculator to insert dramatic unnecessary facts.) That was several job interviews, another job, another house, hundreds of cupcakes, over a thousand cookies, way too many pictures of food, unimaginable pounds of butter and cartons of eggs, and a feature article in a food magazine ago. 

6. This is a food blog. Apparently food blog is a loose term and doesn’t always include food. Or anything. Oops. 

I AM SO SORRY! I know I don’t have to apologize to you, but I’m apologizing to me too! I have 16 posts saved in my drafts that I never finished and 500 pictures saved on my phone and on clouds that I never used. Let’s call 2014 the year of transition and the year that I got lost. It was a GREAT year, I hope to write more about just how great it was. But it was busy year. A busy busy busy year. A year where I prided myself on not following other people’s rules, loved myself more than I ever have, and loved my life more than I ever have. But it was also a year where I felt like blogging had too many rules I thought I had to follow and therefore not enough time to make perfect posts to fit into perfect rules. Not the right backgrounds, not the right lighting, not healthy enough, not decadent enough, not unique enough, too wordy, not enough words, too shallow, too deep, too broad, not broad enough, and so on. 

Today, I just want a recipe. And so I’m going to. 


If you’re a post college grad (aka old enough to want to contribute) but still the younger generation in your family like me (aka still the niece/nephew, granddaughter/grandson, daughter/son, etc. and not one of the matriarchs/patriarchs of the family), it’s likely all of the staple holiday dishes are claimed with white knuckles and when you ask what you can bring they tell you ice, cups, or canned cranberry sauce. I declare that instead of getting our own white knuckles in a passionate speech about how you’re an adult now and want to contribute too (maybe I’m the only one who has such speeches prepared), just bring that ice or those cups, and some non-claimed dish to knock their socks off and do all the talking for you (no speeches required). 

If they assign you cranberry sauce, make your own dang homemade cranberry sauce (I’ve been using this recipe for years, and now it’s MY claimed staple). Bring a seemingly fancy secretly easy fall side dish they’ve never thought of  (like pumpkin spiced roasted butternut squash or spicy roasted brussel sprouts with cranberries and toasted pecans). Bake a fall flavored dessert that’s not pie (I’m bringing pumpkin cobbler this year and giving you a pumpkin spice trifle recipe soon). And my favorite idea, MAKE THE APPS! Appetizers, not to be confused with applications. Appetizers are frequently forgotten for holiday feasts, especially Thanksgiving. But what a great idea! Instead of everyone having to sneak bites of turkey behind Mr. Protector of the Turkey’s back while waiting for the Mr. and Mrs. Always Late, be the Miss Thanksgiving Hero with your apps! 

Creamy Kale Dip

  • Servings: LOTS
  • Difficulty: EASY
  • Print

INGREDIENTS (IN ORDER OF USAGE):

  • 1 16 oz bag chopped kale
  • 2 tablespoons olive oil, divided
  • 2 teaspoons minced garlic (the kind in a jar), divided
  • 1 cup fat free mayo (It exists! Kraft brand with a red cap. If you are a mayo snob, it’s in a recipe mixed with other things and is not the main star, so just try it, or go for full fat if you must.)
  • 1 cup fat free plain greek yogurt
  • 1/2 cup fat free sour cream
  • 1/2 cup reduced fat parmesan cheese (the kind you shake on pizza)
  • 3 green onions, chopped
  • 1 teaspoon kosher salt
  • 1/2 teaspoon black pepper
  • 1/2 teaspoon onion powder
  • 1/2 teaspoon garlic powder
  • 1/4 teaspoon cayenne pepper
  • 2 teaspoons hot sauce

DIRECTIONS:

 
Saute kale in two batches. Heat 1 tablespoon of olive oil in a large skillet over medium high heat. Add 1 teaspoon of garlic, distribute around pan, then add half of the kale. Saute for about 3-5 minutes tossing it with tongs until all the leaves are turning a bright green color. Don’t overcook! You just want to bring out the brightness of the kale and infuse it with the garlic and olive oil. Set first batch aside on a baking sheet lined with paper towels and repeat with remaining oil, 1 more teaspoon of garlic, and the rest of the kale. Put the second batch on another baking sheet lined with paper towels to dry.


Mix mayo, greek yogurt, sour cream, parmesan, last teaspoon of garlic, seasonings, and spices together in a large bowl. Set aside. With more paper towels, squeeze out any excess natural waters from the kale. Use a food processor (or a good knife and elbow grease) to chop the kale up finely. Mix finely chopped kale with creamy mixture. Add liquid hot sauce to taste, probably about 2 teaspoons to give it a good kick. Let chill for at least an hour. Hollow out a bread bowl to serve it in for extra fun flare. Serve with carrot chips, celery, bell pepper sticks, crackers, or bread cubes. 
 
Note: I made this for a friend gathering with girls and guys, and everyone loved it and didn’t believe it was healthy!
 

Weight Watchers A to Z

Remember a million years ago when I was doing Weight Watchers and lost 43 lbs and posted all the time about it and was kinda obsessed with it? Well, this week I joined again! Long story short – wanted to lose 100 lbs, lost 43, almost half way there, dad got sick for a while then passed away, grief, stress, lost motivation, gained all but 10 of those 43 lbs back. I’m in a great place emotionally, better than I’ve ever been, more reliant on God and the power of the Holy Spirit in my life than I’ve ever been, and I prayed one day last week about having more energy, being healthier, and positive stress relieving outlets. The prayer wasn’t about losing weight, it was about wanting to be the best version of me that I could be. I asked the Holy Spirit to give me supernatural motivation to workout and said if losing weight can happen and me not get obsessed with it or discouraged by the journey then I need Holy Spirit level supernatural power for that too. That day my place of employment sent out an email saying they needed two more people to sign up for Weight Watchers at Work to be able to start the program. I knew I was supposed to be one of those people. I signed up and that afternoon I worked out for the first time since I hurt my back this past August. A million years ago when I did Weight Watchers, I started a post called Weight Watchers A to Z. I never posted it because I wasn’t practicing Weight Watchers principles anymore. But now… I’M BACK! And back with much excitement and motivation I might add. So I thought I’d finish and post this post as a refresher to myself on the things that worked for me before, and maybe even a help and encouragement to others. 


This will probably be cheesy at times, but you’re use to that because that’s just me. I have thought of every tip and trick I can think of to share, and therefore, this will be LONG. (But full of helpful, useful info, so long is okay right?)

 
1. The NEED TO KNOW WW Blog: Skinny Taste! This blog is a life saver! She posts at least 3 recipes a week and they are all REALLY good and have no weird ingredients. A lot of healthy eating food blogs use weird ingredients like tofu, blech! I want to be able to cook with stuff I’m familiar with and like and she helps achieve that goal. I have made and fed her recipes to lots of people and they always love it. She posts everything! Sweets, pasta dishes, holiday favorites, everything. And she always included the points for each meal. 
 
2. Other great WW friendly blogs:
3. Use Pinterest! Go to Pinterest and type in Weight Watchers. A ton of recipes will come up. There is a big Weight Watchers community on Pinterest. Also… Instagram! Search the hastag #weightwatchers and be inspired by all the other people doing this right along with you and their fantastic meal and snack ideas. 

4. Calculating: To be a dedicated tracker (and you must be for WW to work!), you need a points calculation tool. You can buy the point plus calculator at your WW meeting or from the WW site ($14). You can also sign up for eTools ($15 a month). OR, you can buy a “copy cat” app. I had a calculator, but I lost it! I had eTools for over 2 years, but it actually hurts me more than it helps me (I need to actually go through the process of writing out my points and food on the traditional paper tracker). So I did some research and found an app called Ultimate Value Diary. It does allow you to track your points in the app, but I don’t use it for that. It comes with a points plus calculator function, an activity calculator function, a how many points you get calculator function, a bar code scanner function, and a meal builder function. It was $3.99 and I use it multiple times a day. I’m not advocating for not supporting WW, but I pay for my weekly meetings, and paid for eTools for 2+ years and never used it! So I personally don’t feel bad about using this app. If you do, I support you! Try one of the other methods, but the point is… you need to be able to calculate and you HAVE to track. 
 
5. Quick Tips:
  • Take your points plus calculator to the store with you. Compare things before you decide what to buy. Once you get used to what options are best you won’t need to do this likely! 
  • Once you’ve calculate how many points something is in your fridge or pantry, write it on the container. Later on once you’ve memorized things you won’t need to do this, but it’s REALLY helpful in the beginning. 
  • Buy a cheap food scale at Wal-mart or Target. The food book will say this many points for 4 oz chicken breast, etc. If you guess on how many ounces something is you’re usually wrong. I bought mine for less than 15 dollars at Target. 
  • Make sure you have a good set of measuring cups. The scoop measuring cups like these are easiest. They also sale 1 cup and 1/2 cup measuring spoons at the meetings, which I love. But the scoop cups will work just as well. When it says 1 cup of pasta, 1 cup or rice, 1/4 cup or this or a 1/2 cup of that per serving, measure it out! Don’t guess. 
  • Don’t take the things you love away! Modify them or make space for them. The Weight Watchers motto is that it’s not a diet, it’s a lifestyle. Success comes when you don’t feel like you are keeping your self from things. I bake something usually at least once a week! I use Weight Watchers sites and recipes and do healthier things, but they are still just as yummy and a treat. Even your favorite candy isn’t off limits. 10 M & Ms are 1 point! 1 Dove Chocolate square is 1 point. Don’t deprive! 
 
Quick Tip – Cut off the top of a kiwi and eat/scoop it with a spoon! 
 
6. Breakfast: ALWAYS eat breakfast. It’s proven that people who eat breakfast loose more weight, make better food choices, and splurge less. Some ideas that I love: 
  • I actually blogged about breakfast ideas the last time I did this: http://www.kasiaskitchen.com/2011/06/perfect-summer-wake-up.html
  • Greek Yogurt – This is my go to. It’s easy and comes prepackaged for you! I always thought I hated yogurt, and I do hate normal yogurt, but I love Greek yogurt. Points vary by brand, but 90% of the time a container of Greek yogurt and some sort of fruit is my breakfast of choice. 
  • Crustless Quiches or Egg Muffins – I’ve made minis and regular sized muffins. The minis are 1 point for 2. The biggies are 2 points each. 
  • Banana Pancake Muffins – These are also good to freeze and keep on hand for breakfast. They are 3 points for 4. 
  • Frozen Waffles – I like the multi grain frozen waffles. They are 3 points for 2 and I usually spread them with Nutella or peanut butter if I’m on the go. If I have time to sit down I’ll use Mrs. Butterworths sugar free syrup and some yogurt butter. 
  • Oatmeal – I only like to eat oatmeal when it’s cold outside, but it’s a good, filling, low point breakfast. Just be careful which packets you get. Always check points before buying. 
  • Overnight Oats – Aka cold oatmeal. Yummy, healthy, delicious, and so filling! I have recipes here and here. They range from 7 – 10 points. 
  • Fruit Parfaits – Yogurt, cottage cheese, and fruit yumminess. 
  • Breakfast Burritos – 5 points each and VERY filling. You can make them ahead and freeze them! I like things like that. 
  • Bagel and Cream Cheese – Mini bagels or bagel thins are 3 points each. There are lots of varieties of spreadable cream cheese. 1 tbsp of reduced fat is 1 point. You buy a container of the reduced fat plain or just a block of reduced fat plain (whichever is cheaper) and make you owm cream cheese variations. I’ve done cinnamon (cinnamon and sugar to taste added in and whipped up). I also love pumpkin spice.
  • Breakfast Sandwich – Whole wheat reduced calorie English muffins are 3 points. I toast them, add 3 slices of deli ham for 1 point, and add a piece of reduced fat cheese for 1 and microwave it for 25 seconds. It’s a fake healthy McMuffin type thing. You can also use Oscar Mayer Fully Cooked bacon (2 points for 4 slices!)
  • Cereal – I do like cereal in the summer and spring time because it’s light and cold. Special K varieties are usually good, about 3 points per cup. I’m sure Kashi is good. But my secret favorite is Kroger brand bagged puffed wheat! It’s like sugar smacks without the sugar and 1 cup is 1 point! I usually have 2 cups, add some splenda, 1/2 cup milk, and strawberries or a banana chopped in it. Total it’s 3 points! 2 for the cereal, 1 for the milk. 
  • Fruit – Add fruit. I always always have some fruit item with whatever breakfast I have. It’s 0 points and you are required to get in 5-8 servings of fruit or vegetables a day. I basically eat one or the other with every meal or snack. I also love to take splenda sweetened or no sugar added fruit cups (0 points) and top them with 1/4 cup of fat free or low fat cottage cheese (1 point). 
  • Toast –  I like cinnamon toast for 2 points (2 slices of reduced calorie bread for 2 points. Spray each side with Parkay spray butter for 0 points. Sprinkle with Splenda and cinnamon 0 points). I also like Nutella or peanut butter toast (2 slices of reduced calorie bread for 2 points. 1/2 tbsp of peanut butter or Nutella for 2 points).
  • Banana sandwich – Really filling. 2 slices of reduced calorie bread toasted (2 points). Spread with 1/2 tbsp of peanut butter or 1/2 tbsp Nutella (2 points). Slice a banana and build the sandwich. 4 points total.  
  • Weight Watchers shakes – You can buy the packets from the class. They are 2 points if you use water, 4 if you use skim milk. I like the chocolate, but they do have other flavors too. I always use milk to get in my 2 dairy servings for the day. I have made mine in the blender with frozen strawberries as ice cubes. I’ve also made them with 1 cup of ice and 3 tsp of instant coffee granules. Mocha frappe-ish. 
  • Egg Mugs – These are really good and very easy! You can find tons of recipes here, here, here, here, or here. Hungry Girl does these and most are 2-3 points depending on what ingredients you add. It’s scrambled eggs in a cub basically. My favorite ways are with sundried tomato basil laughing cow cheese and either bacon bits or sliced deli turkey meat and green onions. I always add salt, pepper and onion powder to mine too. 
  • Boiled Eggs – 2 points each
 
7. Lunches: Lunch is hard! The key to doing well at lunch is planning and doing things ahead. Eating out is not recommended, BUT doable if you plan for it. I’ll post eating out tips later. 
  • Sandwiches – I did a post about sandwiches and great sandwich topping and additions:  http://www.kasiaskitchen.com/2011/03/grilled-cheese-and-jesus.html. Sandwiches can be great if you don’t let them get boring. Most deli meat is pretty low fat. I get the 99.6 or 8 or something fat free ones. The thin sliced turkey, chicken, or ham are usually 1 point for 4-6 slices depending on the brand. I prefer the Land O’Frost brand. Add veggies like lettuce, tomatoes, onions, or cucumbers for free. I love the sandwich slider pickles. Dill pickles are 0 points. I also enjoy thinly sliced apple, like super super thin, on my sandwiches some times too. Laughing Cow cheese has lots of great varieties for 1 point a wedge to spread on. Weight Watchers also has 1 point spreadable wedge cheese. Reduced fat sliced cheese isn’t bad either. 1-2 points a slice. Mustard is free! There are so many great varieties of mustard. Dijionaise is free to add a little creaminess. Fat free mayo (a tbsp or less) is also free if you need to have mayo on your sandwiches.
  • Chicken Salad – On Sundays before the work week starts I often mix up a batch of chicken salad and/or tuna salad to use for lunches. DON’T use premade and don’t make it the “normal” mayo heavy way. I buy the big cans (13 oz) of chicken breast from Sam’s in a 5 pack or something. You can buy the 13 oz cans anywhere though. I mix that with 2 tbsp of Kraft Fat Free mayo, 2 tbsp of fat free sour cream (you can also use greek yogurt), 1/2 cup of grapes sliced, 1/4 cup chopped celery, 1 tbsp of dill relish, salt, pepper, a little sage, and some green onions. It makes 4 hearty helpings for sandwiches and is 4 points per serving. 
  • Tuna Salad – I mix 1 can of drained tuna, 2 chopped hard boiled eggs, 2 tbsp of fat free mayo, 2 tsp of mustard, 2 tbsp chopped onion, 1 tbsp of dill relish. Makes 2 servings. 4 points per serving.
  • Avocado Chicken Salad – I’m always obsessed with this when avocados are in season. Recipe here. Use one avocado instead of 2. It makes 4 servings and is 6 points a serving. It’s great on a sandwich or on a salad. 
  • Salads – Salads are great but kind of complicated to bring to work as you need so many containers to not wilt lettuce and such. And then I discovered this idea! I didn’t make mine like hers, but definitely borrowed the idea! Mine looked like this. The key is making sure the dressing doesn’t touch the lettuce. I layer mine with dressing (most low calorie and fat free varieties are pretty good), onions, cucumbers, carrots, tomatoes, mushrooms, reduced fat cheese, chicken, and then salad greens. I used spinach for one and and romaine for the other. They keep for up to 5 days in the fridge. I made a couple on Sunday for lunches for the week. I usually have shredded chicken on hand that I make in the crock pot for salads and recipes, but I also buy bagged precooked chopped chicken from Kroger in the frozen section sometimes. I warm it up in a skillet with some cooking spray and Tony’s. 
  • Sides – Veggies, veggies, veggies! I always bring sliced cucumbers, carrot chips, grape tomatoes, or bell pepper. I often bring a dill pickle spear. All zero points. Every two weeks or so I mix up fat free ranch dip (16 oz container of fat free sour cream, dry ranch packet, mix in the container, 1 point for 1/4 cup). I bring a 1/4 cup of the ranch dip or to dip veggies in to make them more enjoyable. A couple of tbsp of hummus is 2-3 points and good with veggies too. Veggie chips or straws (from Sam’s) are good and usually 3 points for 20 or so. Special K chips are 3 points for 30. Normal chips are 3 points for 15 or less. Stay away. 
  • Leftovers are great too. Just be sure to portion them out and know what you’re eating. (I probably bring leftovers more for lunch than anything else.)
  • Smart Ones frozen meals put Weight Watchers points right on the package. There are other varieties of healthy frozen meals that are low in points too (Healthy Choice, Leah Cuisine, the Great Value healthy options). I like making homemade things too much to eat these often, but in the beginning I did eat them for lunches just because it was so easy (and I didn’t know all the tips I’m sharing with you yet). 
8. Dinner Tips:
  • Plan plan plan plan! I can’t stress that enough. Weight Watchers will be a breeze if you plan. I am an avid meal planner. I post my meal plans every Monday(ish) and wrote a long post on the basics and reasons for meal planning (go here). If you have a recipe builder or meal builder, you can easily figure out how many points your meals and dishes are per serving. You can do it by hand also (add total ingredients and points for everything and then divide by serving size). 
  • Chicken breasts are your friends. Tilapia (or any fish) is your friend. Ground turkey is your friend! I pretty much use ground turkey in the place of any recipe that calls for ground beef. I buy chicken breasts at Sam’s and tilapia there too. Lean meats are lower in points.
  • Swap things out. Use whole grain pasta (Wal-mart and Kroger have cheaper store brands). Use wild rice or brown rice (I still use white rice too though). I still use white flour, but I always keep wheat flower on hand and usually do half and half. I still use sugar, but I substitute Splenda in a lot of things. 
 
Find awesome reusable containers that meet your snacking needs! 
 
9. Snack Smart: Don’t use all your points on meals. Snacks are important. Try to do at least 2 snacks a day. I usually try to keep it to 2 points or less, but sometimes up to 4. I’ll share a few ideas. 
  • FRUIT! It’s free. I include it in almost every snack. Add fat free cool whip to strawberries. Bananas sustain! 
  • Boiled Eggs – they stick with you!
  • Almonds – 1/4 cup is 4 points but they really do last you all afternoon on hunger level AND they are a healthy oil and protein
  • Veggies and Ranch Dip or Hummus
  • Healthier Chips – Special K, Veggie Straws, Etc. 
  • Microwave Mini Cake – 5 points
  • Edamame – 3 points for the individual portioned bags from Sam’s
  • Frozen Yogurt Bites
  • Granola Bar
  • Crackers and Cheese – 5 saltine crackers are only 2 points, I usually have 8 with two slices of reduced fat cheese, melt for a few seconds, quick easy snack
  • Deli meat – 4-6 slices are 1 point! Have a few slices with some grapes 
  • Reduced fat cheese stick
 
Cut up fruits and veggies for easy snacking access. 
 
10. Eating Out: Eating out is part of life! It happens, it’s fun, it’s social. Plan ahead. Most places have menus online. Don’t be afraid to ask to have your meal differently. At Margarita’s my order is so complicated but they do it [mostly] willingly (Fajita Taco Salad, no shell, extra lettuce, no cheese sauce, shredded cheese, sour cream, and guacamole on the side). At Red Lobster (the one time I’ve eaten there in 4 years), I asked them to prepare mine without butter. They listen! Don’t be scared. A tip they always tell you at meetings is to ask for a to go box as soon as you get your food. Split it in half before you eat it and take the rest home. Applebee’s actually has Weight Watchers items on their menu with points listed. There are a couple online resources that have points calculate for many popular restaurants as well. 
 
11. Favorite Products: These are some of my favorite products that I’ve discovered while doing Weight Watchers
  • Wal-mart Brand Splenda – Cheaper than regular
  • Oscar Mayer Full Cooked Bacon – Microwaveable, center cut so less fat, 2 points for 4 slices
  • Fat Free Cottage Cheese – I could never eat it by itself, I add it to baked potatoes, fruit, and salads
  • Fat Free Sweet Condensed Milk – 1 point per tablespoon. I love to drizzle it over strawberries or as an icing glaze on the microwavable cake
  • Fat Free Cool Whip – Walmart doesn’t have a generic brand but Kroger does. 2 tbsp is 0 points. Great on fruit or desserts
  • Fat Free Kraft Mayo – Perfect for dips and salads. 2 tbsp is 0 points
  • Fat Free Greek Yogurt – great to use in place of sour cream or mayo in recipes. 2 tbsp is 0 points 1/4 cup is 1
  • Fat Free Sour Cream – great for dips and adding dollups to things, 2 tbsp is 0 points, 1/4 cup is 1 
  • Brummel & Brown Yogurt Butter – 1 tbsp is 1 point
  • Parkay Spray Butter – O points! Great on toast or baked potatoes
  • Fat Free Salad Dressings – Kraft has lots, they are usually 1 point for 2 tbsp
  • Sugar Free Pudding & Jello – Buy the box and make the mixes. Sugar free pudding is 2 points per serving and sugar free jello is 0
  • Grape Tomatoes – I live on these things. I get the big box of them from Sam’s and it’s $5 for a lot. They are much more expensive at the groceries stores. 
  • Strawberries
  • Angel Food Cake Mix – Lightest easiest cake around. I make it into trifles, add crushed pineapple to it, top it with spelnda sweetened strawberries and fat free cool whip. 
  • Cocoa Roasted Almonds
  • Reduced Fat Cheese Sticks – I get Sargento 2% Cheddar ones, 2 points each
  • Kellog’s Fiber Plus Bars – 4 points but good fiber and filling

Chocolate Chip Bread Pudding with Cinnamon Coffee Sauce

If you know me in real life or follow me on twitter or Facebook, you probably know I’m going to a new church. It’s a new church plant in my town, something I’ve prayed for for two years since I moved here! I specifically prayed over and over again that God would bring a church plant to Clinton, Mississippi. And he did! It’s exciting! I’ve been part of two church plants previously, three now including this one. It’s where my heart is and has been since roughly 2004, almost 10 years!

I love and feel called to church plants for many reasons, which I’d love to talk to you about! But my cooking journey and church plant families hold a special connection for me. Most, I’d venture to say all, churches have events with food. I started going to my first church plant as a college student, right as I begin to explore cooking and baking. I knew I was better at baking than I thought I was when one of my favorite people from my church, sort of a mentor, told me she wanted to learn to bake cookies like my honey oatmeal cookie so she could bring them to her future kid’s school parties and he could say that his mom made the best cookies in the world.

Don’t get me wrong, I love me some traditional church potlucks! However, bigger churches often have potlucks so big that your little dish gets lost or they are too big for potlucks and have events catered OR there are so many sweet grandmas with their classic staple dishes that you don’t even want to try to compete! I’m sure I would have discovered my love for cooking and baking without my supportive church plant families. God is good like that. But I sure am thankful for the part they played in my discovery something I love and feel called to do.

So ALL that to say…

Actually, let me interject again. Have I mentioned that one of my strengths (from the StrengthsFinder assessment) is connectedness? I have discovered recently that not everyone sees the connection to every detail of their life and how it connects to the bigger picture like people with this strength do. Am I thankful I have this strength? Heck yes! Does this strength (paired with my communication strength) means I talk (or type) about A LOT of possibly unnecessary details in every story? Yep! Too much? Maybe. Am I going to stop or do I want to change? Nope. Just felt the need to share with you why I feel the need to share with you!

So again, I say ALLLLLLL that to say, I’M GETTING TO COOK FOR A CHURCH FAMILY AGAIN! Missional community focused church plants tend to put great value on doing life together (the main reason I love church planting!). A big part of doing life together is EATING! Every other week it’s my turn to be part of the team the provides the potluck meal we eat together. I get so excited to plan out what my contribution will be each week. Most of my contributions have been dessert so far, of course. (Though last night I brought some loaded mashed potatoes that were a crazy huge hit! More savory contributions are in the future.) This humble chocolate chip bread pudding with coffee cinnamon sauce was a big hit!

First let’s talk about this sauce… Cinnamon, brown sugar, COFFEE! I mean… I can’t even… Most bread puddings are good as is, but with the right sauce they can be elevated from humble beginnings to a dessert as tasty and classy as any fancy dessert. This, my friends, is THE right sauce. Not only was it delicious, but it was also so pretty! I just kept taking pictures of it.

Ingredients:

  • 1 cup brown sugar
  • 1/2 cup coffee
  • 1/2 cup evaporated milk
  • 4 tablespoons light butter
  • 1 tablespoon vanilla
  • 1 teaspoon cinnamon
  • 1 teaspoon instant coffee powder
  • 1 teaspoon cornstarch

Directions:

Melt butter and brown sugar together in a saucepan over medium heat until bubbly. Add in coffee, instant coffee powder, cinnamon, and cornstarch. Whisk together until combined. Stir in evaporated milk. Continue to whisk, letting it very softly bubble, until it begins to thicken some. Set aside while bread pudding cooks.

Now let’s talk about bread pudding. Not everyone loves bread pudding, and some people genuinely actually don’t like it, BUT some people just haven’t had good bread pudding. I’ve had many people try different versions of bread pudding I’ve made who claim not to like and they liked it! There are a million recipes out there for bread pudding. Many of them suggest fancy breads like brioche, which no doubt is good, but I will continue to stand by my humble bread of choice. Buns! Hamburger or hotdog, they make the most amazing bread pudding. Whole wheat or white can be used.

The thing I love about bread pudding and what gives it charm for me, is that it’s perfectly acceptable, even preferable, to use leftovers. How many cookouts have you been to where there were leftover hotdog or hamburger buns? Most people ask if anyone wants them, most people shrug them off thinking they won’t use them before they go bad. TAKE THEM!!! ALWAYS say yes. I throw them in the freezer until I collect enough to make a bread pudding. Put them in the fridge to allow them to defrost and then impress people with a bread pudding creation of your choice, maybe even this one!

Ingredients:

  • 7-8 cups of cubed bread
  • 4 tablespoons of light butter, melted
  • 2 tablespoons brown sugar
  • 2 tablespoons vanilla
  • 1 1/4 cup semi-sweet chocolate chips
  • 1 can (1 1/2 cups) fat free evaporated milk
  • 1 1/2 cups skim milk
  • 4 large eggs
  • 1 cup sugar

Directions:

Preheat oven to 350. If your bread feels too soft and not quite stale enough, pop in the oven for a few minutes until it feels like stale bread. Spray a 9 x 13 casserole dish with cooking spray and fill it with the bread cubes and chocolate chips, shaking to disperse chocolate chips and bread evenly.

Whisk together melted butter, brown sugar, vanilla, fat free evaporated milk, skim milk, vanilla, and eggs. Stir in sugar until dissolved. Pour liquid mixture over bread cubes.

Now, this is where methods vary, but I stand by my method. It’s messy, but makes the pudding gloriously combine together so it seems like bread transformed into a dessert verses bread stuck together with some liquid and sweet things. I dig in with my hands. I use both hands to mix the bread, liquid, and chocolate chips together. It helps disperse the chocolate chips and keep them from settling in the bottom and helps the bread start to meld together. It should feel squishy and wet to the touch.

Now wash your hands (obviously) and pop it in the oven. Bake for about an hour until golden brown and the center is set. Check at 45 minutes. When you shake it, if it still jiggles it’s not ready. I poke holes in mine with a drinking straw when it comes out and pour over a few tablespoons of the coffee cinnamon sauce over it. Slice into squares and serve with extra sauce. Whipped cream is also a good addition.

One more picture of the sauce. I just can’t help myself!