Creamy Kale Dip

A few “fun” facts: 

1. It’s been so long since I’ve posted a recipe, I had to go in search of the last recipe I posted to remember how I format recipe posts.  

2. (insert dramatic pause with gasps and lots of  exaggerated dot dot dots)…

This is the first recipe I’ve posted in 2014… 

… (we needed some dramatic extra dot dot dots here)

… IT’S NOVEMBER! And not just November, but November 19th. What the heck?! I AM SORRY!  

3. The last time I even kind of posted a recipe was on September 20th, 2013. Even then, it was just linking to one of my recipes posted somewhere else. 

4. The last real recipe I posted was on July 13th, 2013.

5. That was 1 year and 4 months ago. That was 495 days ago. That was 70 weeks ago. (Who knew the internet had a date calculator to insert dramatic unnecessary facts.) That was several job interviews, another job, another house, hundreds of cupcakes, over a thousand cookies, way too many pictures of food, unimaginable pounds of butter and cartons of eggs, and a feature article in a food magazine ago. 

6. This is a food blog. Apparently food blog is a loose term and doesn’t always include food. Or anything. Oops. 

I AM SO SORRY! I know I don’t have to apologize to you, but I’m apologizing to me too! I have 16 posts saved in my drafts that I never finished and 500 pictures saved on my phone and on clouds that I never used. Let’s call 2014 the year of transition and the year that I got lost. It was a GREAT year, I hope to write more about just how great it was. But it was busy year. A busy busy busy year. A year where I prided myself on not following other people’s rules, loved myself more than I ever have, and loved my life more than I ever have. But it was also a year where I felt like blogging had too many rules I thought I had to follow and therefore not enough time to make perfect posts to fit into perfect rules. Not the right backgrounds, not the right lighting, not healthy enough, not decadent enough, not unique enough, too wordy, not enough words, too shallow, too deep, too broad, not broad enough, and so on. 

Today, I just want a recipe. And so I’m going to. 


If you’re a post college grad (aka old enough to want to contribute) but still the younger generation in your family like me (aka still the niece/nephew, granddaughter/grandson, daughter/son, etc. and not one of the matriarchs/patriarchs of the family), it’s likely all of the staple holiday dishes are claimed with white knuckles and when you ask what you can bring they tell you ice, cups, or canned cranberry sauce. I declare that instead of getting our own white knuckles in a passionate speech about how you’re an adult now and want to contribute too (maybe I’m the only one who has such speeches prepared), just bring that ice or those cups, and some non-claimed dish to knock their socks off and do all the talking for you (no speeches required). 

If they assign you cranberry sauce, make your own dang homemade cranberry sauce (I’ve been using this recipe for years, and now it’s MY claimed staple). Bring a seemingly fancy secretly easy fall side dish they’ve never thought of  (like pumpkin spiced roasted butternut squash or spicy roasted brussel sprouts with cranberries and toasted pecans). Bake a fall flavored dessert that’s not pie (I’m bringing pumpkin cobbler this year and giving you a pumpkin spice trifle recipe soon). And my favorite idea, MAKE THE APPS! Appetizers, not to be confused with applications. Appetizers are frequently forgotten for holiday feasts, especially Thanksgiving. But what a great idea! Instead of everyone having to sneak bites of turkey behind Mr. Protector of the Turkey’s back while waiting for the Mr. and Mrs. Always Late, be the Miss Thanksgiving Hero with your apps! 

Creamy Kale Dip

  • Servings: LOTS
  • Difficulty: EASY
  • Print

INGREDIENTS (IN ORDER OF USAGE):

  • 1 16 oz bag chopped kale
  • 2 tablespoons olive oil, divided
  • 2 teaspoons minced garlic (the kind in a jar), divided
  • 1 cup fat free mayo (It exists! Kraft brand with a red cap. If you are a mayo snob, it’s in a recipe mixed with other things and is not the main star, so just try it, or go for full fat if you must.)
  • 1 cup fat free plain greek yogurt
  • 1/2 cup fat free sour cream
  • 1/2 cup reduced fat parmesan cheese (the kind you shake on pizza)
  • 3 green onions, chopped
  • 1 teaspoon kosher salt
  • 1/2 teaspoon black pepper
  • 1/2 teaspoon onion powder
  • 1/2 teaspoon garlic powder
  • 1/4 teaspoon cayenne pepper
  • 2 teaspoons hot sauce

DIRECTIONS:

 
Saute kale in two batches. Heat 1 tablespoon of olive oil in a large skillet over medium high heat. Add 1 teaspoon of garlic, distribute around pan, then add half of the kale. Saute for about 3-5 minutes tossing it with tongs until all the leaves are turning a bright green color. Don’t overcook! You just want to bring out the brightness of the kale and infuse it with the garlic and olive oil. Set first batch aside on a baking sheet lined with paper towels and repeat with remaining oil, 1 more teaspoon of garlic, and the rest of the kale. Put the second batch on another baking sheet lined with paper towels to dry.


Mix mayo, greek yogurt, sour cream, parmesan, last teaspoon of garlic, seasonings, and spices together in a large bowl. Set aside. With more paper towels, squeeze out any excess natural waters from the kale. Use a food processor (or a good knife and elbow grease) to chop the kale up finely. Mix finely chopped kale with creamy mixture. Add liquid hot sauce to taste, probably about 2 teaspoons to give it a good kick. Let chill for at least an hour. Hollow out a bread bowl to serve it in for extra fun flare. Serve with carrot chips, celery, bell pepper sticks, crackers, or bread cubes. 
 
Note: I made this for a friend gathering with girls and guys, and everyone loved it and didn’t believe it was healthy!
 

Super Bowl Party Pizza Puffs

Guess who doesn’t know who is playing in the Superbowl? Guess who didn’t even know that the Superbowl was this weekend and planned a staff dinner party for that night? Guess whose entire staff also didn’t know the Superbowl was on that night or have any desire to change the dinner party to another night? I sure did pick the right 6 girls to be on my staff! So you get it, I don’t like or care about football.

HOWEVER, I do like parties and party foods! Even though I’m having a staff dinner party that’s Greek themed where we might turn on the TV and watch the Superbowl commercials, I totally support Superbowl parties. Go to a Superbowl party if you didn’t make other plans like I did. Go and bring something! Bring something healthy that people won’t even believe is healthy on a pretty plate to steal the show away from the wings and rotel dip. Bring these Party Pizza Puffs and everyone will be talking about your offerings during the commercials (or during the game if you’re going to a party with girls like me).

Party Pizza Puffs

  • Servings: 12
  • Difficulty: EASY
  • Print

Recipe slightly adapted from emilybites.com.

This recipe is for a single batch which makes about 24 mini puffs. I actually trippled it when I made it because I was feeding a lot of people. For an average size Superbowl party I’d for sure double it.

INGREDIENTS:

  • 3/4 cup Heart Healthy Bisquick
  • 1 tablespoon Italian seasoning
  • 1/4th teaspoon red pepper flakes
  • 1/2 teaspoon onion powder
  • 1/2 teaspoon garlic poweder
  • 3/4 cup skim milk
  • 1 large egg
  • 1 cup reduced fat mozzarella cheese
  • 1/4 cup grated Parmesan cheese
  • 4 1/2 ounces of turkey pepperoni, quartered
  • marinara sauce for dipping

DIRECTIONS:

Preheat oven to 350. Use non-stick cooking spray to spray a 24 count mini muffin tin. In a large bowl mix the Bisquick, red pepper, Italian seasoning, garlic powder and onion powder. Add the milk and egg and whisk until combined and lump free. Add the cheeses and pepperoni and stir until combined.

I used a cookie scoop to divide the batter evenly among the muffin cups. Bake for 18-20 minutes or until golden brown. Let them cool slightly on a cooling wrack before serving. Serve with warm marinara for dipping!

I made these for my RAs and for a Christmas Eve party. EVERYONE loves them. Women, men, teenage boys (they really love them), even dieters!

Easter Goodness

This year for Easter my family (due to schedules) decided to have Easter Dinner on Saturday instead of Sunday. Thus, I get to go to two celebrations! My coworkers are getting together tomorrow night and I’ll get to attend since I already spent time with family. Which also means… getting to make more goodies! Today my family did potluck style. I brought Skinny Potato Casserole, Skinny Deviled Eggs, and Coconut Macaroons. Tomorrow is more of an assigned food type thing. I have been asked to bring dessert. I’m bringing more of the Coconut Macaroons, Strawberry Shortcake Trifle, and Orange Pretzel Salad. I am also required to bring Sweet Tea to any event with them. I’ll post those offerings tomorrow. 🙂

Coconut Macaroons
exact recipe from skinnytaste.com
I saw Gina at Skinny Taste post these a couple weeks ago and instantly had to make them. I didn’t even take the time to pin the recipe to make later. I literally went to my kitchen and made them. I love coconut. Today I doubled the recipe to have enough to take to both events. However, the recipe below is for a single batch. I also displayed them a top some pretty green Easter basket grass. The first time I used real egg whites, the second I used liquid. I really couldn’t tell a different and felt less guilty about wasting yolks with the liquid. 
Ingredients: 
  • 10 oz sweetened coconut flakes
  • 3/4 cup egg white (or 5 large egg whites)
  • 2/3 cup white sugar
  • 1/2 tsp almond extract 
  • 1/4 tsp vanilla extract
  • pinch of salt
Directions: 
Preheat oven to 300. In a saucepan combine the coconut and sugar over medium low heat. Slowly stir in egg whites until combined. Note: DO NOT turn the stove eye higher. DO NOT pour the eggs in first. You will end up with coconut scrambled egg whites. Trust me. I almost did. Stir until completely combined and not soupy. About 7-12 minutes. It will still be sticky and wet. Place pan in the refrigerator on a plate or towel and let cool for 30 minutes. If you double the recipe, it will take longer. I ended up putting mine in the freezer. Spoon packed tablespoons full on a parchment lined baking sheet. You can put the cookies close together because they don’t spread. Bake for about 30 minutes. Bottoms will be golden and look like toasted coconut. The tops will start to brown just slightly. 
They are 3 points on Weight Watchers for 2 cookies. 

————————————————–
Skinny Cheesy Potato Casserole
recipe from EmilyBites.com
I used her recipe exactly, I just put in extra onion (I love onion). 
Ingredients: 
  • 32 oz bag of frozen cubed potatoes, defrosted
  • 1 medium chopped onion (she said 1/4 cup)
  • 1 cup fat free sour cream
  • 1 can of 98% fat free cream of chicken soup
  • 1 cup 2% sharp shredded cheddar cheese
  • salt and pepper to taste
  • 1 cup corn flakes, slightly crushed
Directions: 
Preheat oven to 350. Mix all ingredients in a large bowl except corn flakes until well combined. Don’t forget to add salt and pepper. Spread evenly into a lightly sprayed 9 x 13 baking dish. Top with corn flakes and bake for 1 hour.
For 8 servings it’s 5 points per serving. However, at a potluck no one is eating 1/8th of the casserole so it’s probably less. 1/8th is a hearty portion for a side. 
————————————————–
Skinny Deviled Eggs
recipe from RecipeDiaries.com

I used her recipe exactly, even the egg cooking method! The only thing I did differently was double the recipe and use 1/2 green onions and 1/2 chives. The recipe below is for a single batch. 
Ingredients: 
  • 12 large hard-boiled eggs, peeled
  • 1/3 cup fat free cottage cheese
  • 1/4 cup low-fat mayo
  • 3 tbsp chopped green onion tops or fresh chives (or 2 tbsp dried chives)
  • 1 tbsp sweet pickle relish
  • 2 tsp yellow mustard
  • 1/8 tsp salt
  • paprika, for garnish
Directions: 

Okay. I know this may sound crazy. It did to me at first too, but when I realized it was Alton Brown’s method for hard-cooked eggs, I decided to give it a try. These “boiled” eggs weren’t boiled at all! I preheated the oven to 325,  sat the eggs straight on the oven rack, and baked them for 30 minutes. Put a sheet pan under it just in case one cracks. One of mine did indeed crack, but I let it cook anyway. I was so excited to break it open and see that it actually worked!

The little guy who didn’t quite make it. 


Immerse the eggs in an ice bath and let them cool down for about 30 minutes. If you want to do the tried and true boiling way, you can too! But these made the creamiest yolks, perfect for deviled eggs. Once your hard cooked eggs of choice are cooked and peeled, cut them in half and discard the yolks of 4 of the eggs. Add the remaining 8 egg yolks (16 halves) in a food processor. Add all other ingredients except egg white halves. Process until smooth and creamy. Spoon mixture into a ziplock bag. Arrange egg white halves on a plate in a pretty fashion. Cut the tip off the ziplock bag and pipe the mixture into each half. Sprinkle with paprika for garnish. 


They are 1 point on Weight Watchers per egg half. These were so good! Everyone in my family loved them, no one could tell they were lighter at all, and no one could guess the secret ingredient (cottage cheese) either! 


Enjoy your Easter celebrations. The meaning of this holiday truly is one of my favorites and the greatest. He is risen and we are forgiven. What are you cooking for your celebrations? 


Veggie Fries & Skinny Sweet Onion Dip

As a meal planning maniac, I’m always on the look out or new ways to do veggies. Veggies are good for you and many are free points on Weight Watchers. I also hate being repetitive in my cooking or getting bored with the idea of anything I want/plan to cook. Therefore, I mix it up often. As I meal plan, I always start with the main dish and build around it. When I picked BLT Lettuce Wraps as a main dish for the weekly menu, I thought it would be a good time to incorporate something still healthy, but a little less healthy than my normal zero or as close to zero point veggie side attempts.

This past September a friend and I had just discovered Pinterest. We were obsessed and looking at recipes and DIY projects like crazy. She found a baked zucchini sticks recipe with a rich onion dipping sauce. I found a cute wreath idea. And thus began our afternoon. The sticks and dip were divine! I knew someday I’d make them again. The baked zucchini sticks were perfect as is, low fat and tasty. The dip however, needed some Weight Watcher friendly adjustments calling for 1 cup of full fat mayo in the original recipe (which is exactly how we made it the first time).

I like things in threes. It’s more pleasing to the eye and it just makes sense. A meal doesn’t feel rounded to me unless it has three. What pairs well with BLT Lettuce Wraps and Baked Zucchini Sticks? Sweet potato fries of course. It officially became a meal I was super excited to make.

Anything that stars with caramelized onions is a winner in my book. Onions cooking on a stove top truly is one of the best smells in the world to me. So let’s start with the dip. (In actual chronological cooking/prep order, I wouldn’t do the dip first. Cut the veggies and let them do their assigned marinating/liquid shedding tasks first. While they do that, work on the dip.)

Skinny Sweet Onion Dip

  • Servings: 8
  • Difficulty: EASY
  • Print

adapted recipe from kingarthurflour.com’s

INGREDIENTS:

  • 2 yellow or white onions, sliced
  • 1 tbsp olive oil
  • 1 tsp powdered sugar (optional)
  • 2 tbsp cider vinegar
  • 2 tbsp honey
  • 1 tbsp spicy brown mustard
  • 1 cup Kraft Fat Free Mayo
  • 1/4 tsp salt

DIRECTIONS:

Heat oil over medium-low heat. Add onions and cook, stirring occasionally. Even though it’s tempting, don’t turn the temperature up to cook them faster. Medium-low, 4 or 5 on my stove, is perfect. Let them get caramelized and browned. You want to see brown. It’s essential for the flavor and color of the dip. They should cook for 25 minutes. When there is 5 minutes remaining, you can sprinkle some powdered sugar over the onions. I feel like this helps them brown a little more and adds to their sweet caramelized flavor.

Add vinegar, honey, and mustard into a small food processor. I used my big one because I enjoy using it. A blender would also work if you don’t have a food processor. When the onions finish add them to the processor. Pulse until it sort of resembles the consistency of apple sauce. Fold in mayo until onion mixture and mayo are combined, smooth, and creamy. Stir in salt.

Now to go with our amazing savory sweet oniony dip, we need things to dip.

Baked Zucchini Sticks

  • Servings: 4
  • Difficulty: moderate
  • Print

Original recipe at kingarthorflour.com. I pretty much followed her instructions and recipe exactly, but I used egg beaters instead of eggs, Italian seasoning instead of pizza seasoning, and part reduced fat parmesan and part regular shredded.

INGREDIENTS:

  • 3 – 4 small to medium straight zucchinis
  • 1 tbsp salt
  • 1/2 cup Egg Beaters (or 2 large eggs beaten)
  • 1 cup Panko bread crumbs
  • 1/4 cup shredded parmesan
  • 1/4 cup reduced fat parmesan

DIRECTIONS:

Wash zucchini and cut into 3 inch sticks. She posts a perfect picture on how to cut them (I forgot to take one during that step). The way it worked best for me was to cut it in half, not lengthwise, but down the middle. Think hamburger cut not hot dog cut. Cut off the ends. Stand each half on a flat end. Cut in nines. Like a tic tac to board sort of. Two cuts north to south and two cuts across west to east. You’ll end up with 9 pieces from each half, 18 per each zucchini. Put all the pieces in a strainer and place a bowl under it. Sprinkle the entire tablespoon of salt over the sticks. Sit the zucchini in the refrigerator for at least an hour and let the salt work it’s magic. DON’T skip this step! It’s essential for ending up with firm crisp sticks and not soggy wet ones. It really does drain a lot of water (see above picture with odd light green looking liquid).

Once the hour passes, preheat over to 425. Discard zucchini liquid and rinse the sticks well with cold water. Lay them out on a clean kitchen towel and dry. Pat gently to remove any excess liquid. Dip sticks one by one in the egg and then roll in the crumbs. Use the one wet hand one dry hand method and really do them one at a time. If you dump them all in the crumbs mixture it will get gloppy and you’ll have to add more. Place on a parchment lined baked sheet close together. Bake for 12 minutes and then flip them. You can use a spatula to flip, but I find it easier to just quickly do it by hand. Bake an additional 15 minutes until browning and crisp. To reheat leftovers bake for 10-15 minutes on 375.


Spicy Baked Sweet Potato Fries

  • Servings: 3
  • Difficulty: moderate
  • Print

Original recipe at tastykitchen.com. I followed the recipe exactly. I just subbed the cayenne for Tony’s like a true Mississippian/Louisianan would do.

INGREDIENTS:

  • 1 sweet potato
  • 2 tbsp olive oil
  • 1/2 tsp kosher salt
  • 1/4 tsp freshly ground black pepper
  • 1/2 tsp Tony’s

DIRECTIONS:

Preheat oven to 425 (I cooked the potatoes and zucchini at the same time and same temp). Wash and peel sweet potato. Cut into 1/2 inch sticks. Toss the sweet potato sticks, olive oil, and seasonings in a bowl until coated. Arrange fries evenly on a parchment lined cookie sheet. Bake for 15 minutes and turn them. Bake for 15 minutes longer or until firm and crisping.

Happy April Fools Day! Fool some people with these healthy baked “fries.” They’ll never miss the oil and deep fryers.

It’s the Most Wonderful Time of Year!

Nope. Not Christmas… AUTUMN! Okay… technically it’s not until September 22nd, but almost! It’s close enough for me to begin celebrating all things fall!! Living in the Louisiana (the land of few trees and even fewer than change colors) for the past four autumns, I forgot that Mississippi and places in the south can actually have autumn! Some of the trees are starting to change already. Driving down the interstate, a breeze of wind caught the leaves of a cute little yellow tree and they magically fluttered through the air. I actually got tears in my eyes and squealed “fall” in utter bliss with a big smile while driving in my car. So in my world, it is officially time to light the fall candles, put out the fall candy (it’s so cute in a mason jar!), bake all the fall things, and hang my homemade fall wreath!

And so this weekend, the official weekend of the end of summer, I fully welcomed autumn with all the love I could deliver! How you might ask? A party with the kitchen, a few cans of pumpkin, and me! I’m so thankful for this season coming now! After a month of all the chaos that is the beginning of a school year in the higher education world, I’m finally back. Life has been so busy, three weeks of training, and the first hectic week of school and students moving in. I haven’t been able to workout or eat properly at all! The good news, I didn’t gain! The bad news, I didn’t loose anything but my motivation. The coming of the season I love was just what I needed to find my motivation. I literally haven’t cooked or planned a meal in a month (food provided, eating out, lots of cereal, etc.). This week, that all changed. I planned meals for the next three weeks and had a pumpkin/autumn extravaganza!

———————————————————-

Pumpkin Spiced Cream Cheese

I took this recipe directly from my favorite recipe blog skinnytaste.com. I didn’t have agave nectar, so I added 3 extra tablespoons of brown sugar instead of the 2 tablespoons of agave. She mentioned that agave was sweeter. So, I started with 2. It wasn’t quite sweet enough, so I added 1 more. It’s SOOO good. I’ve been eating it with apples, but I can’t wait to try it on bagel thins as well. The recipe makes a little over a cup. It’s made with 1/3 less fat cream cheese and 1 point per tablespoon. I am fairly certain I will keep this in my fridge until spring reappears! 
———————————————————-
Pumpkin Butter

This recipe also came directly from skinnytaste.com . I didn’t make any changes at all. She suggests 1-2 teaspoons of pumpkin pie spice, according to your taste. I LOVE pumpkin pie spice, so I used two. She says you can use apple cider or juice, I used juice. 2-3 cinnamon sticks, I used 3. I used Libby’s canned pumpkin puree (not pumpkin pie filling). Can I just tell you, this is amazing! In the comments on her blog post people asked how long it would last in the fridge, and she says 3 days. It makes A LOT, like 4 cups a lot. I plan on using it past 3 days though. I did some research and most places said you could use apple and pumpkin butters longer, up to 3 weeks. BUT still, there is no way I’d use 4 cups, so I am freezing some in ice cube trays for individual portions to store in a freezer ziplock bag. I do believe I will eat this for breakfast every day this week! It would be fabulous on pancakes, waffles, biscuits… Oh my gosh… MUST MAKE BISCUITS! My mouth is watering thinking about this yummy spread on biscuits. It’s only 3 points for a 1/4 cup! This yummy pumpkin butter is also a the key ingredient in….

———————————————————-

Pumpkin Spiced Lattes


Another recipe straight from my favorite! Anyone else anticipate the re-release of Starbucks’ pumpkin spiced latte every year? Or the pumpkin spiced coffee creamer that only comes out around the holidays each year. I am ecstatic when this happens every autumn! Gina (Skinny Taste’s author) to the rescue again! I followed the recipe exactly, except… It makes 2 serving and I definitely drank all of it! 3 points a serving (or 6 if you drink both like me). You need this! I also looked up how to make espresso in a coffee pot. 1 tablespoon of coffee per 1/4 cup of needed espresso. So I brewed 2 cups of water + 8 tablespoons of coffee. I’ll save the rest for another batch tomorrow. 
———————————————————-
And then, with all the yummy sweet pumpkiny things. I had to have an equally yummy fall dinner right? What better way to do that than in the crock pot?! My crock pot, Tyler Duff Crock Pot to be exact, is my favorite cooking tool for autumn and winter. It’s just so warm and cozy! Chicken was on sale at Sam’s, which isn’t a typical crock pot meat, but I worked with what I had and threw some stuff together that came out really yummy!
Fall in a Crock Pot Chicken


For sounding more professional, in the picture I named it Autumn in a Pot. But doesn’t fall in a crock pot sound so funny? Funny image for sure. But really, the ingredients kind of did fall in the crock pot! 
Ingredients:
-1 large sweet onion
-3 sweet potatoes, cubed
-3 boneless skinless chicken breast
-1 cup dried cranberries
-3 or 4 small Gala apples, sliced
-1 package chicken gravy mix
-chicken broth
-McCormick Smokehouse Maple Seasoning
-salt
-pepper
I tossed the onions in first, cut in half, quarters, and then once more. Threw the cubed potatoes on top of that. Sprinkled them with salt, pepper, and the McCormick seasoning. Seasoned the chicken breast on both sides with the same seasonings. Sprinkled the gravy mix over all of that. Tossed the apples and cranberries on top, poured over 1 cup of chicken low sodium, fat free chicken broth. I finished it with a little more of the maple seasoning, some nutmeg, and a cinnamon stick. Put the lid on, cook on high for 4 hours, and don’t touch. It was really yummy! Very much an autumn meal: cozy, warm, and filling. 
———————————————————-
AND since I’m determined to eat healthy this week, I whipped up some fruity chicken salad to use for lunches. I usually do good with breakfast and dinner but not so good with lunch unless I have leftovers or plan! Breakfast this week will be full of pumpkin goodness! Since canned chicken was also on sale at Sam’s, chicken salad sandwiches will make my lunches happy!
I don’t use any full fat mayonnaise! I use a tad of fat free mayo and for the rest of the “wet” I use fat free sour cream.  A big can of chicken, dried chives, ground sage, salt, pepper, onion powder, and garlic powder to taste. Red seedless grapes and 1 gala apple chopped. Perfect as a sandwich and yummy on crackers too! 
———————————————————-
Stay tuned tomorrow for Brownie Batter Dip, Strawberry Fluff, and Pumpkin Bread Pudding with Homemade Caramel Sauce! Also, if you haven’t heard of pinterest.com, you are missing out! It’s a virtual pin board! You can “pin” things you find on the web and like or things you make yourself (I’ve started pinning all my recipes). BUT the best part is browsing other pins. Everything from food, to DIY projects, to clothes, to crafts, EVERYTHING! You should follow me: pinterest.com/kasialindsay!
I hope you can enjoy and celebrate fall too! Or mourn the last official weekend of summer, if you must. (If you are one of *those* people, hehe kidding, I love you even if you don’t love the coming season as much as me!) Happy healthy eating!

Dips and Sauces

This post is all about some of my go-to dips and sauces. In the words of my dear friend Stacy, “if there’s dip, it’s a party!”

Pumpkin Pie Dip

(from skinnytaste.com)

INGREDIENTS:

  • 15 oz can pumpkin
  • 3/4 cup brown sugar (Splenda would work too)
  • 1 tsp vanilla
  • 1/8 tsp cinnamon
  • 1/8 tsp pumpkin pie spice (or more to taste)
  • 6 oz fat free Greek yogurt (I used Kroger brand)
  • 8 oz cool whip free (or Kroger brand fat free whipped topping)
  • cut up apples to dip

DIRECTIONS:

Mix pumpkin with brown sugar, vanilla and spices, blend well. Mix in yogurt. Fold in cool whip and chill in refrigerator until ready to eat. Makes about 6 cups. 3 points for 1/2 cup serving.

Tzatziki Sauce

(from skinnytaste.com)

INGREDIENTS:

  • 8 oz fat free greek yogurt
  • 1 small cucumber, peeled and seeded (1 cup grated and drained)
  • 1 clove garlic, crushed
  • 1 tsp lemon juice
  • 1 tbsp fresh dill, chopped
  • 1 tbsp fresh chives, chopped
  • kosher salt and fresh pepper

DIRECTIONS:

Strain yogurt using a metal strainer or a coffee filter for a few hours to remove as much liquid as possible. Set aside. Scoop seeds out of peeled cucumber with a spoon. Place cucumber in a mini food processor or grate with a box cheese grater. Drain the liquid from the  cucumber in ametal strainer and sprinkle with a little salt (this helps release the liquid). You may want to use the back of a spoon to help squeeze out any excess liquid. Combine strained cucumber, garlic, yogurt, salt, pepper, lemon juice, dill, chives and refrigerate for a few hours before serving. Makes about 2 cups. Store in refrigerator for about a week. ¼ cup is is 0 points! ½ cup is 1.

Bleu Cheese Dressing

(from skinnytaste.com)

INGREDIENTS:

  • 1/2 cup crumbled bleu cheese
  • 6 oz fat free yogurt
  • 1 tbsp light mayonnaise (I used olive oil mayo)
  • 1 tbsp lemon juice
  • 1 tbsp white wine vinegar
  • 1/8 teaspoon garlic powder
  • salt and freshly ground black pepper

DIRECTIONS:

Smash the blue cheese and yogurt together with a fork. Stir in mayo, lemon juice, vinegar, and garlic powder until well blended. Season to taste with salt and pepper. Makes 1 cup. 2 tablespoons is 1 point! It’s also really yummy with a baked buffalo chicken recipe I altered.

Baked Buffalo Chicken

INGREDIENTS:

  • 4 (4 ounce) chicken breasts
  • 1/4 cup hot sauce
  • 1 tablespoom vinegar
  • 1 tablespoon of parkay spray butter
  • 1 teaspoon dried dill (it called for celery seed but I didn’t have it)
  • 1/8 teaspoon pepper
  • 1/2 cup above blue cheese dressing 

DIRECTIONS:

Preheat oven to 400 degrees. Spray skillet with cooking spray. Add chicken and cook 4 minutes each side until browned. Place chicken in an 9X13 baking dish coated with cooking spray. Combine hot sauce and next 4 ingredients. Pour over chicken and bake uncovered for 25 minutes. Serve with bleu cheese dressing.

Okay so, bake buffalo chicken isn’t a dip, but it has a killer homemade buffalo sauce AND is best served with homemade bleu cheese dressing.

And then there is the ever faithful staple in my fridge – dry ranch + 16 oz of fat free sour cream = 1 pt per 1/4 cup! Never choke down boring raw veggies. If there’s dip, it’s a party! 

Recipes, Recipes, Recipes

More recipes! My lovely friend, Sam Jones, has requested quite a list of the listed recipes. I could just email them to her… Or I could post them here for everyone to enjoy! I chose that option.

Chicken Ranch Cheeseball

  • Difficulty: EASY
  • Print


INGREDIENTS:

  • 1 big can of canned white meat chicken
  • 1 package of dry ranch dressing mix
  • 1 package of cream cheese, softened
  • 1 small package of nuts (I liked chopped pecans or sliced walnuts best)

DIRECTIONS:

Drain chicken and shred in a bowl with a fork, it comes out of the can in chunky pieces. Mix thoroughly with cream cheese and ranch mix. I use a fork and just stir and smash and stir and smash until it all looks the same. Now… get messy! Scoop all of it up with your hands and roll it into a ball. Roll the ball up in plastic wrap and let chill as long as you can. You can do it as little as 30 minutes or as long as overnight. Roll it in the nuts before serving. If transporting roll in nuts and cover with plastic wrap again. Serve with crackers or toast.

I bring this to almost every potluck or party food type thingy I go to. So easy and EVERYONE loves it.


SCALLOPED POTATOES

I didn’t change this recipe in the slightest. I know it sounds weird and not like traditional scalloped potatoes and like it won’t be cheesy but oh my stars it’s good! Don’t change it! The thyme and nutmeg make it. It’s so good! Perfect for a Thanksgiving side dish. AND I mean… hello… Tyler Florence made it! My once-upon-a-time-future-husband-until-I-realized-he-was-married made it!

Please DO NOT try to slice all these potatoes by hand! I started doing that, and then realized my cheese grater has a slicer on the slide. Use a slicer! There is no way you can get them as thin as they should be by hand plus it is way quicker!

http://www.foodnetwork.com/recipes/tyler-florence/scalloped-potato-gratin-recipe/index.html


Stuffed Turkey Burgers

  • Servings: 2-3
  • Print


INGREDIENTS:

  • 1 lb of ground turkey
  • seasonings
  • 1 egg
  • bread crumbs (or crushed crackers)
  • sliced onion
  • sliced mozzarella (or any cheese you like)
  • spinach leaves
  • mushrooms
  • whatever you want to stuff with!

DIRECTIONS:

1 lb makes two BIG burgers or 3 medium burgers. 4 are doable, but they are really small and hard to form with the stuffed stuff (that’s fun to say). Mix meat and what ever seasonings you like (I used Tony’s, red pepper flakes, onion powder, garlic powder, and parsley flakes). Use seasonings generously. Turkey is blander than ground beef. Mix in the egg and a little bread crumbs to make it stick and hold. If you are making 2 burgers, separate meat into 4 equal sections. If you are making 3 burgers, separate into 6 sections. Flatten our each section. Take one section and top with a slice or wedge of cheese, sliced onions, spinach leaves, etc. Don’t use too much! It won’t close if you do. Take another flattened section and place it on top. Fold and mash the edges together until all the stuffed stuff goodness is packaged inside the meat. You can grill these or bake them. I’ve done it both ways. If you bake, bake at 350 for 30ish minutes. You have to judge your oven. Turkey is poultry so make sure it is done, but don’t overcook. Just watch it close. On the grill 7-10 minutes on each side. Yummy on a bun or without! I like them with A1 too. Good with homemade onion rings or sweet potato fries or potato salad!


THE SECRET LIFE OF HUMMUS

So… I LOVE hummus. Like, I know you say you love hummus, but I REALLY LOVE hummus. The Sabra brand in the store and one other are the only ones that compare to real Mediterranean hummus (or the restaurant versions I’ve experienced). They are supper yum and I could eat the whole container with a spoon, BUT it’s still not as good as the restaurant one. I’ve attempted to make hummus before, and it was okay, but just not as good. I discovered a year or so ago that tahini is the secret to hummus. Since that discovery, I have been on the hunt for tahini. Who knew it was so hard to find where I live?! I finally found it at a gas station, of all places, in Slidell that sales Mediterranean food. It looks like a jar of liquidy peanut butter. I followed the recipe I found exactly except for one fun fact the guy at the gas station told me!

This very nice Mediterranean man told me the secret to great hummus! It sounds crazy… but it works! So follow the recipe but make two small adjustments. Before you dump the chick peas in the food processor, heat them up just a little bit. Maybe like 45 seconds. Just enough to give them a little warmth. And then… the secret! Add 1 cup of ice. Yes ICE! It sounds crazy but somehow it works! It makes is silky smooth just like they serve it in Mediterranean restaurants. Mix all the ingredients with the ice in the food processor until all the ice is crushed. It should be a creamy, smooth, velvety texture. Drizzle a little olive oil on top and sprinkle with paprika or salt and pepper to make it all pretty! Serve with warm pita bread or pita chips or spoons! Okay well only serve it with spoons if I’m there. I told Mr. Nice Mediterranean man that I’d keep the secret, but he gave me permission to share.

http://www.food.com/recipe/hummus-11424


Roasted Pinenut and Feta Couscous

  • Servings: 4
  • Difficulty: EASY
  • Print


INGREDIENTS:

  • 1 cup of couscous
  • 1 cup chicken stock
  • salt
  • olive oil
  • 2 ounce bag of pine nuts
  • 1/4 cup of feta cheese
  • juice of two lemons (4 tablespoons)

DIRECTIONS:

Bring chicken stock, salt, and olive oil to a boil. Add couscous, stir, and remove from heat. Cover for 5 minutes then fluff with a fork. Add pine nuts (you could toast them first if you wanted), lemon juice, and feta.


TWICE BAKED POTATOES

 Instead of using 4 big potatoes I used 8-10 small red potatoes. I did it exactly like the recipe. Be careful when you scoop not to break the shell/skin since it holds the filling. I also used Real Bacon bits instead of bacon. These are really good! They are really pretty as well. I topped mine with green onions.

http://www.food.com/recipe/best-twice-baked-potatoes-79595


Hashbrown Casserole

  • Difficulty: EASY
  • Print

INGREDIENTS:

  • 2 pounds frozen hash browns
  • 1/2 cup melted margarine
  • 1 teaspoon salt
  • 1/2 teaspoon pepper
  • 1/4 cup minced onion
  • 1 can cream of chicken soup
  • 1 pint sour cream
  • 2 cups grated cheese (I use sharp cheddar)

DIRECTIONS:

Thaw potatoes. Mix first 8 ingredients together and place in a 9×13 casserole dish. Add topping. Bake at 350 for 45 minutes to an hour. You can use low fat soup and sour cream and 2% cheese for a lower calorie casserole.

This recipe makes a lot! Perfect for a potluck or side disk. I made it for me with baked apples for dinner. I ate leftover MANY times and still had quite a bit to freeze.

Stay tuned! More recipes requested by Sam (and posted for everyone to enjoy) to come!

Chopsticks and Cheesecake

You know how I love to make things over? Well, any time I have a meal with just plain white rice, I always plan to make extra and later that week make chicken fried rice. So, when I was planning my meals and knew I wanted roast with rice and gravy, I knew the following cooking night I’d make chicken fried rice. I learned to make fried rice from Tyler Florence and watching them do it at hibachi grills. It was a trial and error process that I think I’ve perfected pretty well. My friend Molly loves it, and I always invite her over when I make it now. So I invited Molly, and her boyfriend was in town, so then it was a dinner party! Hey… three can be a party. In the words of my dear friend Stacy, “If there is dip, it’s a party.” And there was!

So me, in all my perfectionistic, over-achieving wonder, just had to try my best to impress and out do myself. Had it just been me, or just me and Molly, chicken fried rice would have been plenty. But that would just not do for MY dinner party! I found it a challenging task to figure out what to serve with chicken fried rice as an entree. Meat and starch are covered in the entree. I didn’t want to do stir fry veggies because fried rice is sort of stir fry, AND I just don’t have that many skillets (now accepting hand me down skillets, or any kitchen tool, donations, hehe). Other chinese-y/asian-y things are fried (egg rolls, wontons, crab ragoon, etc), and I just hate frying. A. Frying is greasy and fatty. B. Grease pops and hurts! C. Your entire house ends up smelling fried. I will shallow fry on occasion and just air freshen my house like crazy and wear a full body protective suit (I exaggerate a tad). You can get egg rolls and such prepackaged and bake them, but it’s just not as impressive when they ask how you made it to say, “Oh, I just bought it and heated it.” FYI, I am not dissing prepackaged stuff at all! Works great, yummy stuff, easy, I use it often. I just wanted to make my dinner party impressive. I haven’t gotten to entertain in a while and I just had to!


I tossed around a few things, but the final menu was:

Entree: Chicken fried rice
Side: Roasted mini vegetable kabobs with fresh pineapple, zucchini, red onion, and red, green and orange bell pepper marinaded in pineapple and lime juice with chopped garlic, soy, salt and pepper
Sauce: Homemade sweet and sour
Appetizer/Side: Crab ragoon dip with baked parmesan wonton chips
Dessert: Mini cheesecakes alternately topped with mini semi sweet chocolate chips, mini white chocolate chips, and homemade caramel sauce
Utensils: CHOPSTICKS! I found chop sticks for cheap at the grocery store!


Everything came out so good! It was so fun to cook. I actually took the day off of work to cook all day! I have to use my vaca days before the end of September anyway and it was a fun use of time for me. And don’t be intimidated, it wasn’t an all day meal. I just wanted to spend a relaxing day cleaning, doing food prep, watching the Food Network, etc. Most of my recipes came from food.com. For those recipes, to save your eyes from miles and miles of my typing, I’ll post links and note changes. If it’s pink, it’s a link (and it rhymes just on time)! *It’s late and I’ve written a lot today. What can I say, I’m cheesy and can’t pass up a rhyme.*


Chicken Fried Rice

Okay. This is going to be a very “little of this little of that” recipe. I tried to pay attention to how much of what I used, but really have no idea. It will have to be a to your taste trial and error project for you too :).

Make rice the day before! It makes the process much quicker. I use a rice cooker. Cheap tool that makes perfect and effortless rice. Use how ever much you want to make. I made ALOT this time to take to work the next day. I used about 9 cups of cooked rice and it made about 12 servings. You probably don’t want that much unless you’re feeding an army. I’d probably use 4ish cups of rice if you are making it for an entree for your family. Think 1ish cups of cooked rice per person. Just use your eyes. Consider your eyes your best measuring tool for this dish.

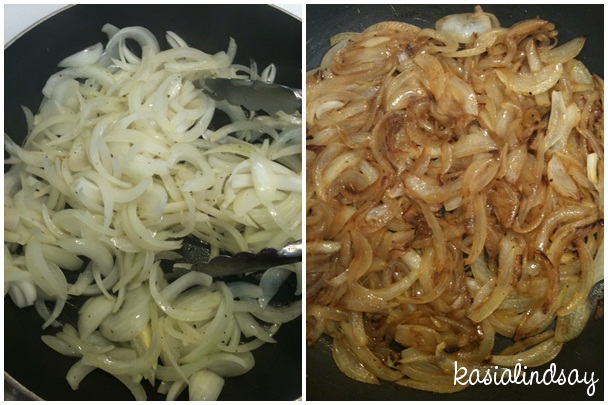
This really can be whatever you want it to be! You can add anything you like. Doesn’t have to be chicken fried rice, can just be fried rice, vegetable fried rice, shrimp, whatever! I always use chicken or just veggies. Use the amount of chicken (or ingredients) that you want. I usually think 1/2 to 3/4ths of a boneless chicken breast per person cut into little bite size pieces. I always use carrots. You want them to be finely chopped. You should know by now, I hate chopping carrots and chop them no other way than with my mini-food-chopper-processor-thingy. Again its to your taste. I usually do 1/4th whatever the amount of rice you have ratio. Always always use onions, chopped. I do about equal amount of onion and carrot. 2-3 gloves of garlic chopped. I start the onions, garlic, and carrots in a little olive oil in the biggest skillet (or wok, which I don’t have) that you have. Salt and pepper them. Then add your chicken. I add Chicken Magic seasoning. Cook until chicken is done. It’s perfect okay and yummy for the veggies to maintain some crunch.

While chicken is cooking, add a little vegetable oil in a separate pan and get it hot. Wisk 3-4 eggs in a bowl, pour in hot oil and scramble. Set to side. Add some butter, margarine, or oil to the chicken veggie pan (I do a little smart balance). Dump the rice in. Add soy. Again, use your eyes. You want it a light brown color, light! Don’t add too much, people can add their own. Aim for the color of fried rice that you’ve had. Constantly stir, this is the “frying” the rice process. If it seems too dry, add more butter.

Taste and add salt, pepper, soy, whatever you think it needs. Add in scrambled eggs once you think it tastes good and stir. Turn off pan and pour in about a handful of frozen peas and stir. The heat of the rice cooks them just enough, you don’t want them mushy. Stir in 2-3 chopped green onions, saving some of the tops. I top with sesame seeds and green onion and done!


Mini Veggie Kabobs

I found mini skewers at the grocery store. I soaked them. And added a piece of onion, fresh pineapple, either red, green, or orange bell pepper, and zucchini, all cut into 1/2-ish inch pieces. I just poured some pineapple juice, probably about 1 cup, the juice of one small lime, zest of half of the lime, little soy, few cloves of chopped garlic in a bowl. I poured the mixer over the kabobs in a baking dish and sprinkled with sea salt and cracked pepper. I marinaded them for a few hours. I roasted them at 375 until they were roasty, still crunchy but the edges getting soft and toasty.


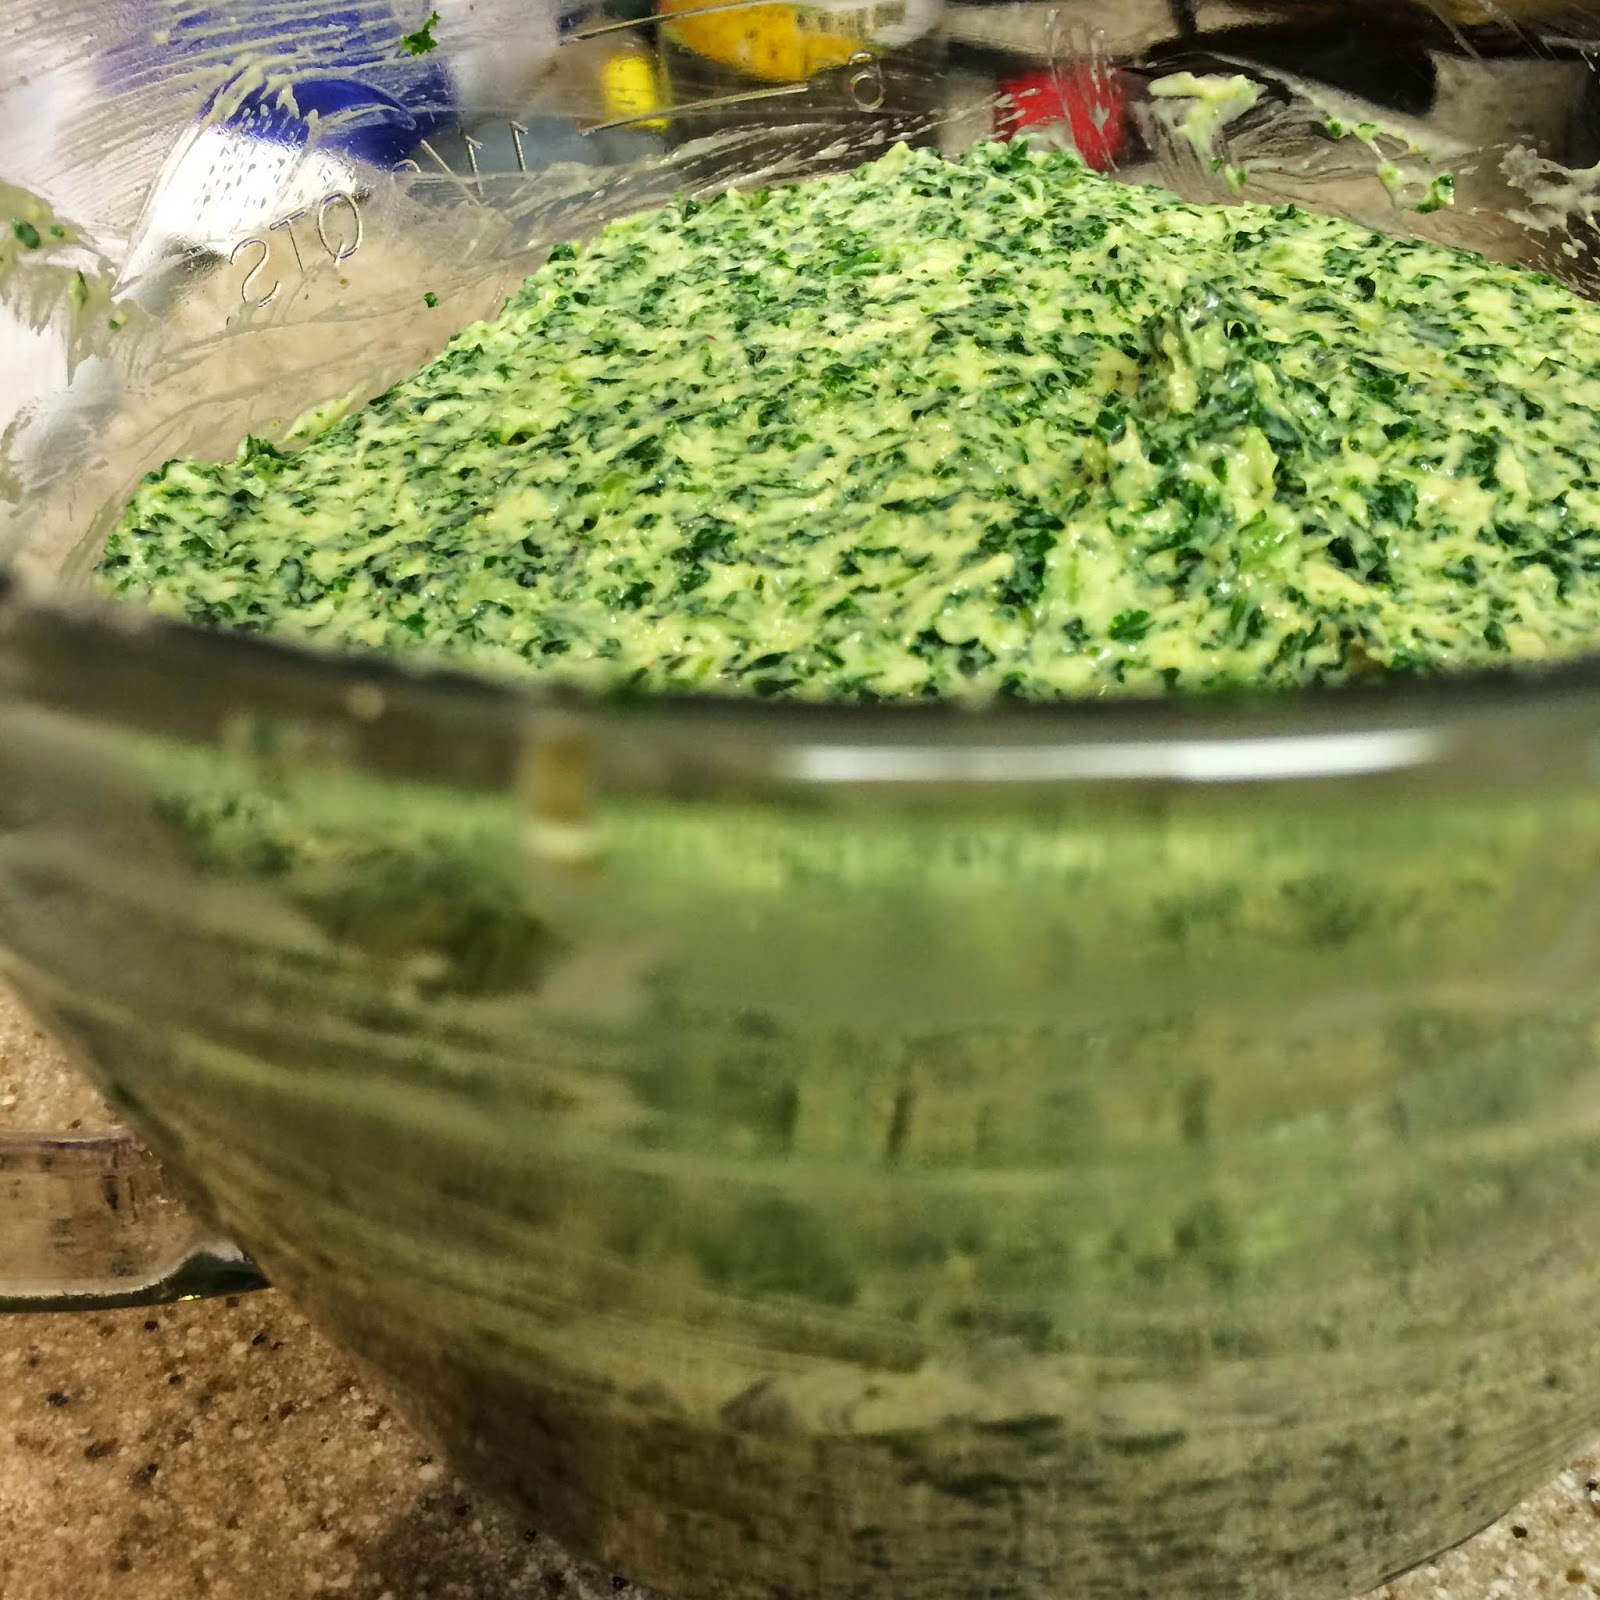
Crab Ragoon Dip with Baked Parmesan Wonton Chips

This is so good! It was Molly and Shawn’s favorite part. It’s basically the inside of those yummy fried crab ragoon things you get at chinese restaurants, but healthier (because it’s not fried). I made it exactly like the recipe in my Kitchenaid mixer. I tossed it all in and just kept mixing until the crab was pretty finely mixed in. Get the flaky crab and not the sticks. I saved out a few pinches of green onion tops to add on the top. I didn’t put sweet and sour sauce on top, that was weird to me and it didn’t need it at all. I separated it in mini individual bowls and heated those right before serving. I topped with green onion tops.

I sliced the wonton wrappers in half diagonally to make triangles instead of strips. Sprayed the pan, sprayed the chips, sprinkled on shredded parmesan and sea salt. You really only have to cook them for 5 minutes like it says. They really do make great chips! I think I like them better than homemade pita chips because they are so thin and crispy.


Sweet and Sour Sauce

Ignore the chicken part of the recipe and just skip to the sauce, though the chicken looks like a good recipe too, but fried and I hate frying! This sauce would be really good on chicken nuggets. Made it exactly as directed. I dipped my veggies in it. You could also put it on your rice.


Mini Cheesecakes

These are so good and perfect! I didn’t use the fruit topping because I don’t really like canned fruit toppings. I topped mine with either mini semi sweet chocolate chips, mini white chocolate chip, or homemade caramel sauce (which was super easy to make and soooo yummy!). Note that it says 1 16 oz package of cream cheese. I just saw the 1 package part and didn’t have enough. Had to run to the store. I’ve never seen a 16 oz package, so 2 – 8 oz packages. I doubled it and took them to work. Foil liners work best I think and they mold best if you actually use your muffin tin. I did one batch in the muffin tin and one on a cookie sheet because I only had one muffin tin. They were all yummy, but the muffin tin ones were prettier and perfect. If you use the mini chips, I sprinkled them on right when the cakes came out. With fruit or caramel wait until they cool. Cooling for an hour before eating is vital! They really set and are super yummy!


Whew! That’s a lot to digest (literally hehe). The entire meal is good for a dinner party, but the individual parts are great alone, with other meals, etc. If you make anything, make the cheesecake and crap ragoon dip! SO so good. Entertaining is so fun, IF you don’t get stressed out. To prevent the day of party stress, make a cooking itinerary. I did it! Be specific with every detail: cut up veggies for rice, cut up veggies for kabobs, make tea, etc. Sit down with your recipes and plan it out before hand. It will all come out and be ready at the same time if you do this. Do prep work in advance. Veggies can always be cut the night before and many things can be made, mixed, cut, or prepped the day before. Make it fun! Add special simple touches like chopsticks. It will cause you be more excited about your meal. Be confident in your cooking and if you mess up, you are the only one that cares! So don’t fret over it. Enjoy it! Feel good about your work, and then rest your feet!