Chocolate Chip Bread Pudding with Cinnamon Coffee Sauce

If you know me in real life or follow me on twitter or Facebook, you probably know I’m going to a new church. It’s a new church plant in my town, something I’ve prayed for for two years since I moved here! I specifically prayed over and over again that God would bring a church plant to Clinton, Mississippi. And he did! It’s exciting! I’ve been part of two church plants previously, three now including this one. It’s where my heart is and has been since roughly 2004, almost 10 years!

I love and feel called to church plants for many reasons, which I’d love to talk to you about! But my cooking journey and church plant families hold a special connection for me. Most, I’d venture to say all, churches have events with food. I started going to my first church plant as a college student, right as I begin to explore cooking and baking. I knew I was better at baking than I thought I was when one of my favorite people from my church, sort of a mentor, told me she wanted to learn to bake cookies like my honey oatmeal cookie so she could bring them to her future kid’s school parties and he could say that his mom made the best cookies in the world.

Don’t get me wrong, I love me some traditional church potlucks! However, bigger churches often have potlucks so big that your little dish gets lost or they are too big for potlucks and have events catered OR there are so many sweet grandmas with their classic staple dishes that you don’t even want to try to compete! I’m sure I would have discovered my love for cooking and baking without my supportive church plant families. God is good like that. But I sure am thankful for the part they played in my discovery something I love and feel called to do.

So ALL that to say…

Actually, let me interject again. Have I mentioned that one of my strengths (from the StrengthsFinder assessment) is connectedness? I have discovered recently that not everyone sees the connection to every detail of their life and how it connects to the bigger picture like people with this strength do. Am I thankful I have this strength? Heck yes! Does this strength (paired with my communication strength) means I talk (or type) about A LOT of possibly unnecessary details in every story? Yep! Too much? Maybe. Am I going to stop or do I want to change? Nope. Just felt the need to share with you why I feel the need to share with you!

So again, I say ALLLLLLL that to say, I’M GETTING TO COOK FOR A CHURCH FAMILY AGAIN! Missional community focused church plants tend to put great value on doing life together (the main reason I love church planting!). A big part of doing life together is EATING! Every other week it’s my turn to be part of the team the provides the potluck meal we eat together. I get so excited to plan out what my contribution will be each week. Most of my contributions have been dessert so far, of course. (Though last night I brought some loaded mashed potatoes that were a crazy huge hit! More savory contributions are in the future.) This humble chocolate chip bread pudding with coffee cinnamon sauce was a big hit!

First let’s talk about this sauce… Cinnamon, brown sugar, COFFEE! I mean… I can’t even… Most bread puddings are good as is, but with the right sauce they can be elevated from humble beginnings to a dessert as tasty and classy as any fancy dessert. This, my friends, is THE right sauce. Not only was it delicious, but it was also so pretty! I just kept taking pictures of it.

Ingredients:

  • 1 cup brown sugar
  • 1/2 cup coffee
  • 1/2 cup evaporated milk
  • 4 tablespoons light butter
  • 1 tablespoon vanilla
  • 1 teaspoon cinnamon
  • 1 teaspoon instant coffee powder
  • 1 teaspoon cornstarch

Directions:

Melt butter and brown sugar together in a saucepan over medium heat until bubbly. Add in coffee, instant coffee powder, cinnamon, and cornstarch. Whisk together until combined. Stir in evaporated milk. Continue to whisk, letting it very softly bubble, until it begins to thicken some. Set aside while bread pudding cooks.

Now let’s talk about bread pudding. Not everyone loves bread pudding, and some people genuinely actually don’t like it, BUT some people just haven’t had good bread pudding. I’ve had many people try different versions of bread pudding I’ve made who claim not to like and they liked it! There are a million recipes out there for bread pudding. Many of them suggest fancy breads like brioche, which no doubt is good, but I will continue to stand by my humble bread of choice. Buns! Hamburger or hotdog, they make the most amazing bread pudding. Whole wheat or white can be used.

The thing I love about bread pudding and what gives it charm for me, is that it’s perfectly acceptable, even preferable, to use leftovers. How many cookouts have you been to where there were leftover hotdog or hamburger buns? Most people ask if anyone wants them, most people shrug them off thinking they won’t use them before they go bad. TAKE THEM!!! ALWAYS say yes. I throw them in the freezer until I collect enough to make a bread pudding. Put them in the fridge to allow them to defrost and then impress people with a bread pudding creation of your choice, maybe even this one!

Ingredients:

  • 7-8 cups of cubed bread
  • 4 tablespoons of light butter, melted
  • 2 tablespoons brown sugar
  • 2 tablespoons vanilla
  • 1 1/4 cup semi-sweet chocolate chips
  • 1 can (1 1/2 cups) fat free evaporated milk
  • 1 1/2 cups skim milk
  • 4 large eggs
  • 1 cup sugar

Directions:

Preheat oven to 350. If your bread feels too soft and not quite stale enough, pop in the oven for a few minutes until it feels like stale bread. Spray a 9 x 13 casserole dish with cooking spray and fill it with the bread cubes and chocolate chips, shaking to disperse chocolate chips and bread evenly.

Whisk together melted butter, brown sugar, vanilla, fat free evaporated milk, skim milk, vanilla, and eggs. Stir in sugar until dissolved. Pour liquid mixture over bread cubes.

Now, this is where methods vary, but I stand by my method. It’s messy, but makes the pudding gloriously combine together so it seems like bread transformed into a dessert verses bread stuck together with some liquid and sweet things. I dig in with my hands. I use both hands to mix the bread, liquid, and chocolate chips together. It helps disperse the chocolate chips and keep them from settling in the bottom and helps the bread start to meld together. It should feel squishy and wet to the touch.

Now wash your hands (obviously) and pop it in the oven. Bake for about an hour until golden brown and the center is set. Check at 45 minutes. When you shake it, if it still jiggles it’s not ready. I poke holes in mine with a drinking straw when it comes out and pour over a few tablespoons of the coffee cinnamon sauce over it. Slice into squares and serve with extra sauce. Whipped cream is also a good addition.

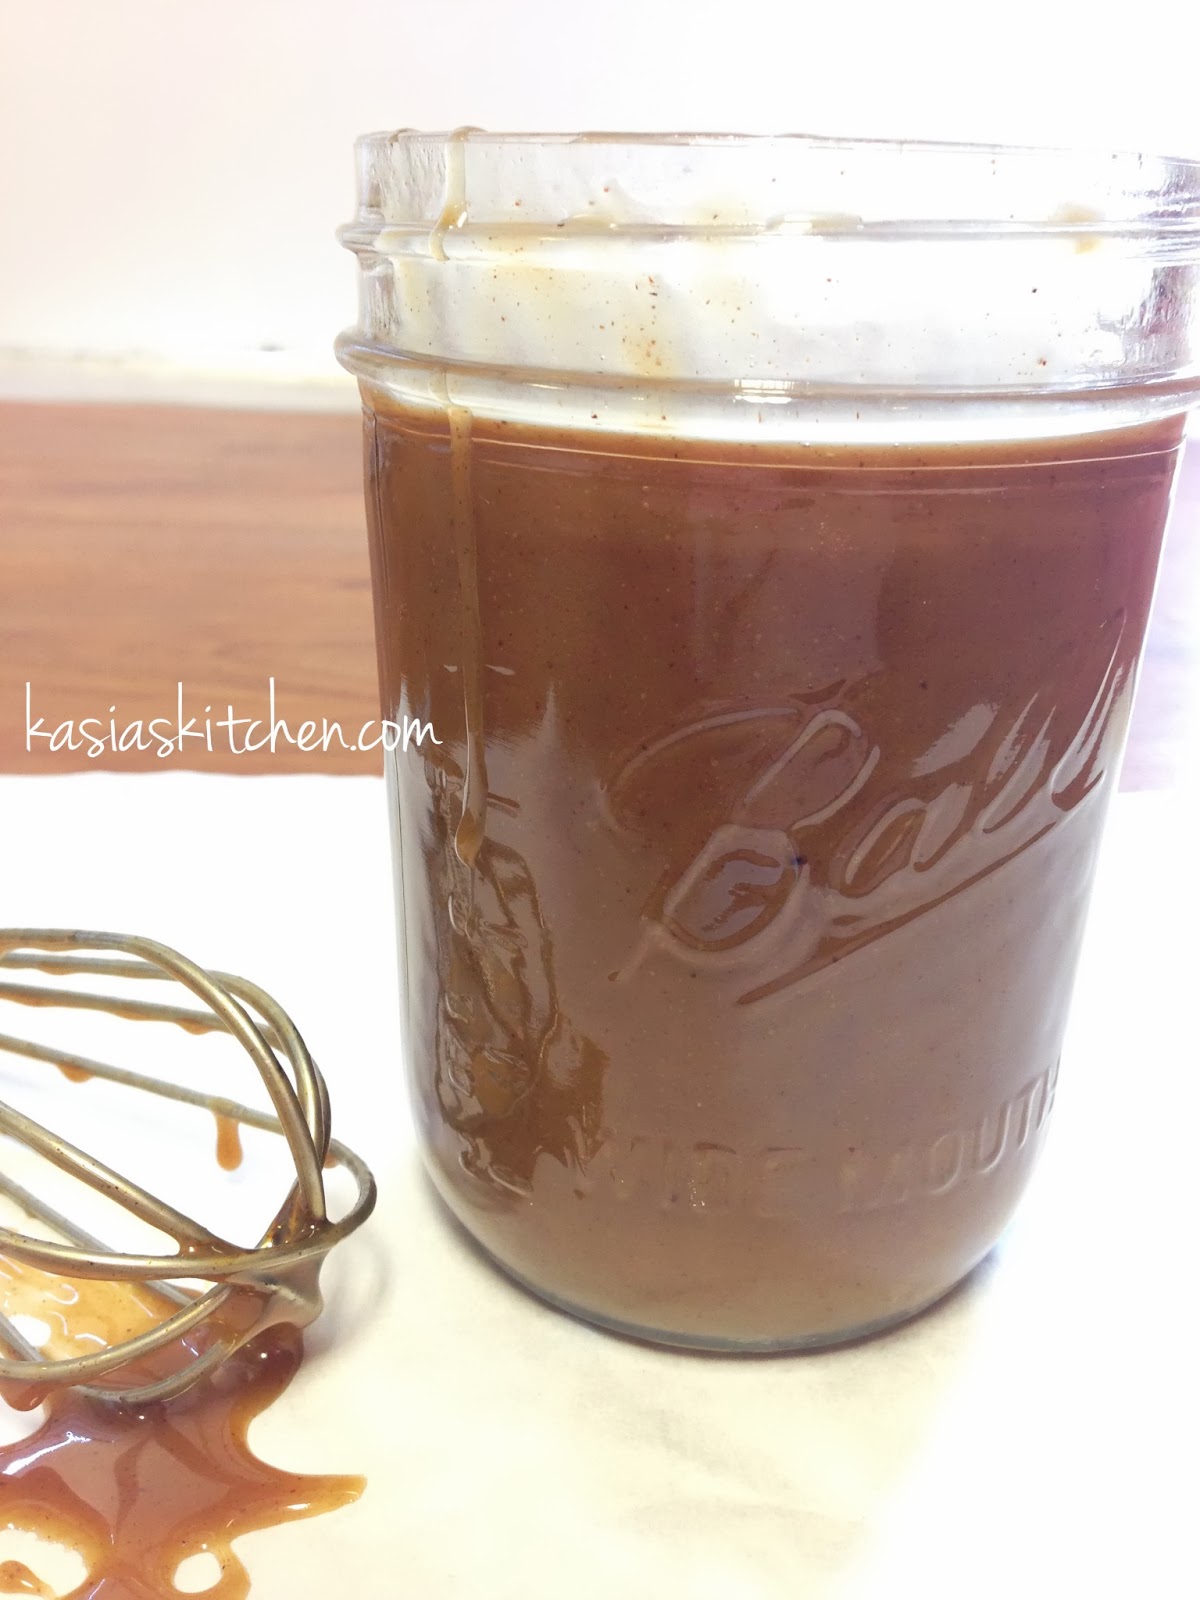
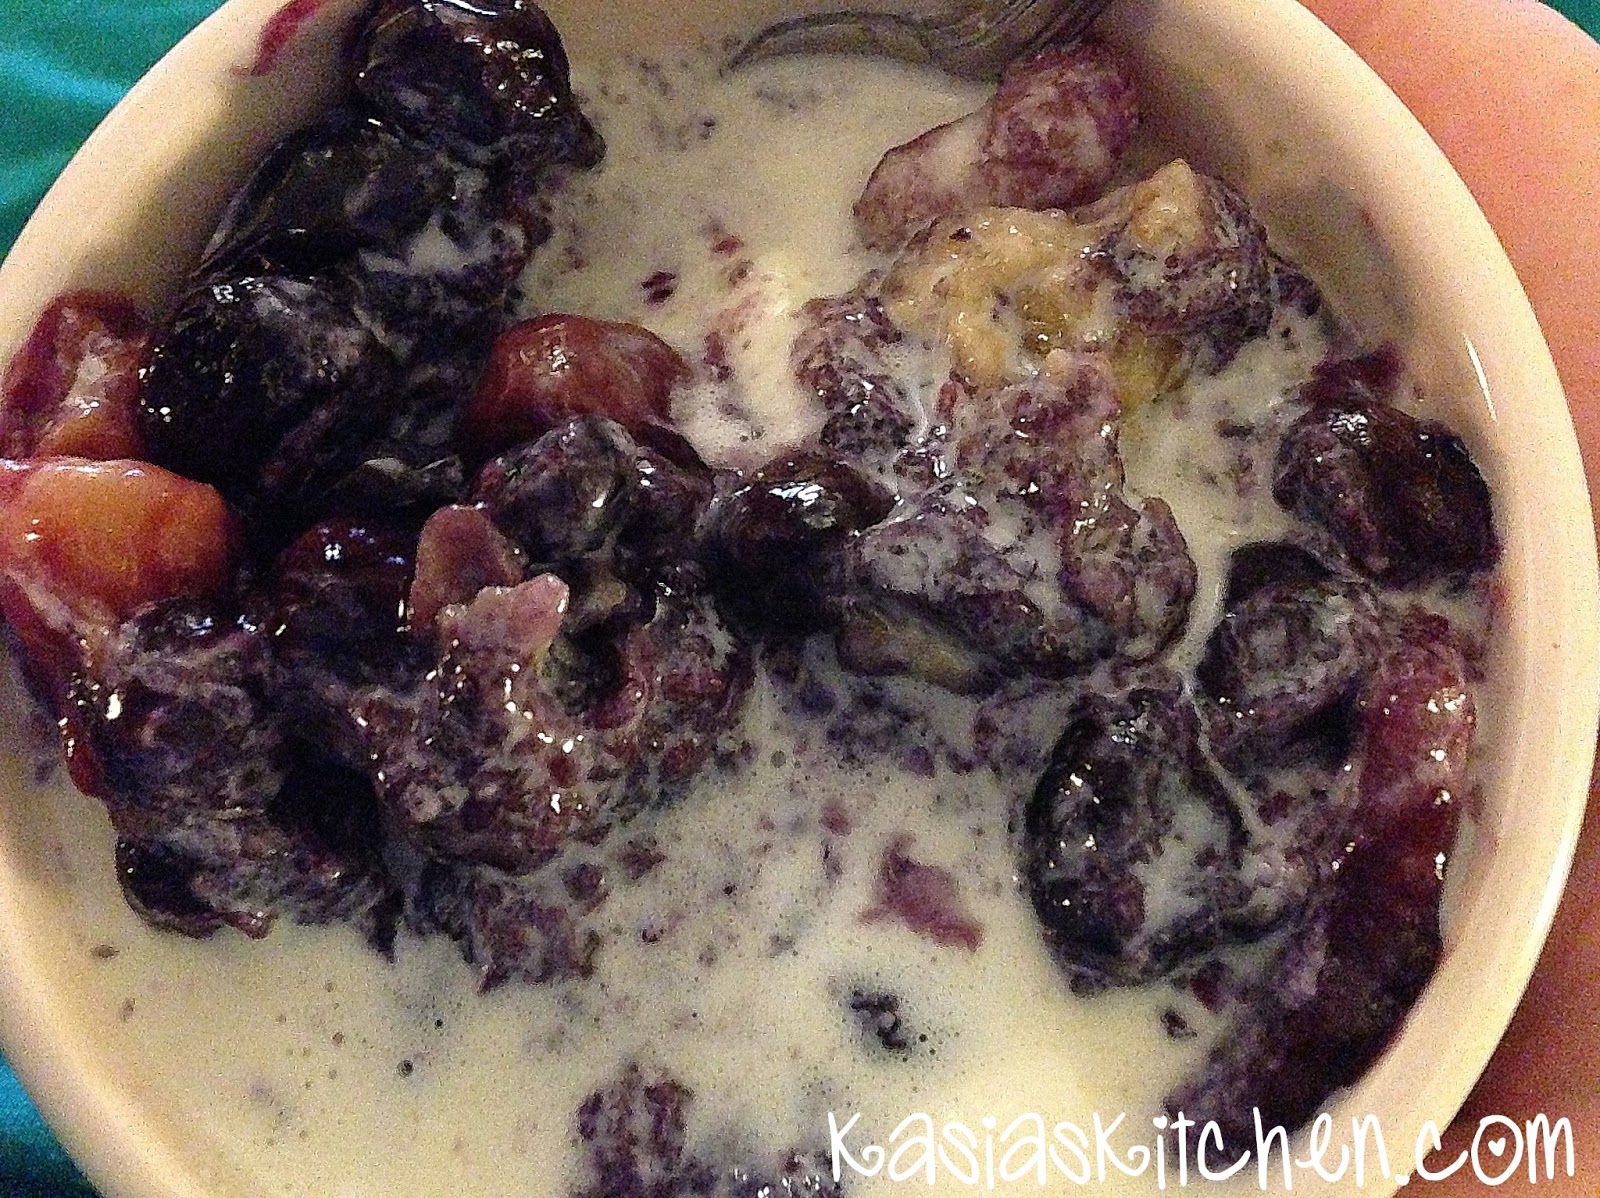
One more picture of the sauce. I just can’t help myself!

Leftover Candy Skillet Sugar Cookie

Pin It

One of the hardest sales to resist, aside from nail polish, is clearance holiday candy! Who doesn’t love festive candy? I mean there are some crazies out there who don’t I guess, but most people do! Even some of the healthiest people I know can’t resist candy once in a while. I made this skillet sugar cookie back when I happened upon an after Easter candy sale. Guess what today is? (Happy 4th by the way!) Guess what’s on sale?! Patriotic candy!

After you recover from your holiday celebration, go get some clearance candy and make this! Regular candy can be used too of course, but festive is just more fun. 
Original recipe from Munchkin Munchies

Ingredients: 

  • sugar cookie mix (I used the 17.5 ounce package and mixed it per package instructions)
  • 1 cup M&M candies (If you shake in a few extra no one will mind.)
  • 2 – 4 tablespoons colorful sprinkles

Directions:

Preheat oven to 350. Mix sugar cookie dough per package directions. Add M&Ms to the dough, saving out a few. Grease your cast iron skillet with coconut oil and a paper towel. Press cookie dough into skillet. Pour the sprinkles over the dough. Press in a the reserved M&Ms on the top of the dough. Bake for 12-18 minutes or until edges brown and center is golden. Cut into slices and enjoy! 

Summer Fruit Pizza

Pin It

If I was going to a 4th of July potluck, I’d definitely bring this fruit pizza. If you haven’t decided what to make for your Independence Day celebration, make this! One of the simplest but most crowd pleasing summer desserts ever. A quick story about this fruit pizza. Once my RAs and I made one. The 7 of us devoured it in one sitting. The next night we really wanted leftover fruit pizza. Of course there weren’t leftovers because we ate all of it! So… we made it again the very next night. Kids love it. Grown ups love it. You could even only use red and blue fruit to make it more festive. However, if I was making it this week I’d definitely add fresh peaches. Strawberries, peaches, and blueberries. Yum! The recipe below is the easy version using refrigerated packaged sugar cookie dough. We like easy for parties right?! But I’ve done this three ways. 1. The refrigerated packaged sugar cookies dough roll. 2. Dry sugar cookie mix, adding in my own eggs and oil. 3. Homemade sugar cookie dough. You get to decide!

Ingredients: 

  • 1 roll refrigerated sugar cookie dough
  • 1 package 1/3 less fat cream cheese, softened
  • 1/3 cup sugar
  • 1/2 teaspoon vanilla
  • 3 cups assorted fruit, sliced if necessary – I used blueberries, kiwi, and strawberries. For a festive 4th of July option use strawberries, blueberries, blackberries, raspberries and/or bananas. For a fruit that’s fresh and delicious right now version use strawberries, peaches, and blueberries. 

Directions: 

Heat oven to 350. Spray a pizza stone or round pizza pan with cooking spray. Press the refrigerated dough into the pan or stone, creating a round edge. Bake 15-20 minutes or until golden brown. Let cool completely. 
Beat cream cheese, sugar, and vanilla together until fluffy. Spread cream cheese over cooled cookie crust. Arrange fruit in a pretty design on top of cream cheese mixture. Serve immediately or chill for 30 minutes. Slice in wedges or squares. 

Peach Cobbler Trifle

Pin It

Hey! Remember me? It’s been exactly a month since I posted. Yikes! I told you May was insane. It got the best of me! I’ll update you soon on important things (LIKE TURNING 30!), but I couldn’t bare it being OVER a month since I posted. Someone a month exactly seemed a little less depressing that OVER A MONTH! I go to a conference in Idaho next week, but after that Meal Plan Monday will also return! I’m liking the feeling of my fingers on these keys creating words and paragraphs to type in this little blog box… So beware, I will be up and running and shooting posts your way soon!

What better way to kick things back off than with a lovely summer dessert recipe?! Confession… I made this dessert almost an entire year ago! I forgot to post it and found the pictures in late fall. You know how I am about seasonal foods… Peach Cobbler Trifle is a summer dessert! I prepped the post and patiently waited for summer to arrive again so I could share it with you. My pictures aren’t the greatest. I brought it to a baby shower, indoor lighting, night time, etc. BUT… IT’S SO GOOD! Everyone raved about it. I’ll definitely be making it ASAP… as soon as I can get my hands on some fresh ripe peaches.

Ingredients: 

  • 2 small packages of sugar free french vanilla instant pudding
  • 1 cup reduced fat sour cream 
  • 1 1/2 cup skim milk
  • zest of one orange
  • 1/2 cup powdered sugar
  • 2 cups heavy whipping cream
  • 2 Sara Lee style frozen loaf pound cakes thawed (like this one)
  • 4 cups diced fresh peaches 
  • 2 tablespoons sugar
  • 1 tablespoon lemon juice
Crumble Mixture:
  • 1 cup crushed graham crackers
  • 3/4 cup sugar
  • 1/4 cup quick oats
  • 1 teaspoon cinnamon
  • 1/4 teaspoon nutmeg
  • dash of ground glove
  • 6 tablespoons melted butter

Directions: 

Preheat oven to 350. Stir the crumble mixture ingredients (graham cracker crumbs, sugar, oats, cinnamon, nutmeg, clove, and melted butter) together and spread on a parchment lined baking sheet. Bake until light golden brown. Remove from oven and let cool. 
Cut the cake in to small cubes, set aside. Whip heavy cream into a whipped cream until it peaks, set aside. Whip milk, pudding, powdered sugar, and zest until it begins to thicken. Fold in sour cream. Once mixture is smooth and combined fold in whipped cream. 

Clean, peel, and dice peaches. Mix with with the lemon juice and 2 tablespoons of sugar to prevent browning and produce a little juice. 
In a trifle dish or large bowl start layering! Layer pound cake, pudding mixture, crumble mixture, and peaches. Continue to layer and repeat until the disk is full. Top with peach mixture. Chill for 30 minutes to 1 hour before serving. Perfect summer dessert! 

Eclair Cake

It’s Sunday! I love Sundays. I love sunny Sundays. I love naps on sunny Sundays, preferably outside, preferably in a hammock. I love grocery stores on Sundays with all the people in their church clothes buying fried chicken. I love church on Sundays and the people at church on Sundays and the sense of hope at church on Sundays. I love spring sunny Sundays because there is no Sunday football. I love the intentional efforts of most people to rest on the last few moments of the weekend before work week on Sundays. Sundays are simple and cozy. I like them a lot.
In my later years of life, I’ve felt drawn to [theologically sound] church plant type churches, newer churches that are a bit more contemporary. I love contemporary worship music, small groups, the sense of Biblical community, and many of the things that contemporary churches do well. However in my earlier years, I grew up in a traditional small country church. Know what I miss about churches like that? Dinner on the Ground! If you didn’t grow up in small country church world, Dinner on the Ground isn’t actually on the ground at all. In my church, and most, it took place the fifth Sunday of every month, four in a year, one every quarter, and was usually followed by “5th Sundee Singin.”
Dinner on the Ground is a church wide potluck on the church grounds, usually the fellowship hall. Everyone brings a dish and everyone eats. When I was growing up, there was always grocery store fried chicken, at least three different plates and versions of deviled eggs, gallons and gallons of sweet tea, too many casseroles to name, several pound cakes, and way too many other options to fill your styrofoam plate. This recipe reminds me of Dinner on the Ground. I never had it at Dinner on the Ground, but many offerings found on the dessert table are made in 9×13 casserole dishes. I can think of at least three my grandmother makes often to take to these church gatherings (Banana Split Cake, Chocolate Sin, Pineapple Delight). This recipe is simple, yummy, not a calorie killer, and totally Dinner on the Ground/potluck worthy! It’s also made the night before, stress-free! 
For further funny explanation about the Southern tradition of Dinner on the Ground check out this post on the Stuff Southern People Like Blog. It’s hilarious (and true)! 

Ingredients:

  • 2 small packages of sugar free french vanilla pudding
  • 1 small package of sugar free cheese cake pudding
  • 3 1/2 cups skim milk
  • 12 oz (1 and 1/2 of 8 ounce packages) of fat free cool whip
  • 2 packages of graham crackers
Frosting: 
  • 6 tablespoons butter
  • 6 tablespoons milk
  • 6 tablespoons cocoa powder
  • 1 cup powdered sugar

Directions: 

Blend milk and dry pudding mix for about 2 minutes. Fold in whipped topping. In a 9×13 glass pan, layer graham crackers to cover the bottom of the dish. You can break them to fit into odd spaces. Pour half of the pudding/whipped topping mixture on top and smooth out. Put another complete layer of graham crackers on top. Spread the remaining pudding over the crackers. Put the final layer of graham crackers on top with the bumpy side down (to ensure the frosting goes on smoothly). 
For the frosting, microwave the butter and milk just enough so that the butter is melted into the milk, it doesn’t need to boil. Add cocoa powder and powdered sugar, stir together until smooth. This frosting will be somewhere between a frosting and a glaze, not thick but not completely liquid. Pour the frosting over the top of the graham crackers and smooth out with a rubber spatula or frosting spreader. Refrigerate overnight and serve! 

The graham crackers end up having the texture of thin layers of cake! It’s totally no-bake, easy, and delish! Kid and adult friendly.


Pin It

Skillet Peach Blueberry Crumble (Sugar Free)

I know, I know. On January 2nd I gave you my list of New Year’s Resolutions, which included a commitment to blog more. Yes, I am aware it’s now January 19th, over 2 weeks later. BUT… I hadn’t forgotten! I was steadily cooking and snapping pictures and fully committed to blog more. I was just also incorporating some of my other resolutions and getting used to adding those into daily life too. I’m 6 for 6 this week with taking intentional time out of my day to not be in my apartment having idle time and to be somewhere else without distractions where I won’t find TV shows to watch, things to clean, or things to eat (aka Starbucks, and another coffee shop once). I’m starting to like being at Starbucks more than being at my apartment… I get a little upset when I walk in and someone is at MY table. I mean don’t they know?! Since Starbucks breeds productivity for me apparently, I decided to try it out for blog stuff too. So productive! In addition to reading, journaling, praying, and listening to my Bible app, I also edited pictures for 3 blog posts, prepped all 3 to go out this week, AND organized all my other pictures into folders labeled with the recipe (or DIY project) and put them all into a BLOG ME folder! Aren’t you proud?! 
First up… Sugar Free Skillet Peach Blueberry Crumble! 

A healthy one to kick off my commitment to blogging! You know I love sugar and am by no means committed to a sugar free lifestyle. I mean I do want to open a bakery the summer of 2014 and buy stock in sugar. However, this is one of the best sugar free things I’ve ever made and/or eaten! One of my RAs made a New Years resolution to not eat sugar. I like a challenge, so I decided to try and make something yummy and sugar free that she could eat and that the rest of us would like. AND I got to use one of my new cast iron skillets to do it!

Don’t be fooled though. I start boot camp next week, so I’ve been taking every last moment to eat unhealthy things while I can. Confession – my first thing to make in a cast iron skillet was donuts. Fried biscuit dough donuts covered in glaze. And I made them twice in two weeks. I also ate Zaxby’s for lunch today. Monday. Monday things are getting serious! I mean it is a competition and one of the winning prizes is a gift certificate to take a class at a cooking school. I’m gonna win, duh! And thus the cast irons will only be used for healthy things until April. They probably would have been mad at me if I didn’t use them to make donuts at least once though right??

Skillet Sugar Free Beach Berry Crumble

Recipe adapted from myrecipes.com.

Ingredients: 

  • 1 bag of frozen blueberries (12 oz)
  • 1 bag of frozen peaches (16 oz)
  • 2/3 cup Splenda (can replace with equal amount of sugar)
  • 1/4 cup plus 2/3 cup water
  • 1/4 cup corn starch
  • Zest from 1 lemon
  • 3/4 cup whole wheat flour 
  • 1/2 cup old-fashioned rolled oats (not quick cooking)
  • 1/4 cup Splenda brown sugar (can replace with brown sugar, increase to 1/2 cup)
  • 1/2 teaspoon ground nutmeg
  • 3/4 cup light butter (I used Brummel and Brown), melted
  • Optional – vanilla ice cream for topping

Directions:

Preheat oven to 400. Spray a 10-inch cast iron skillet with cooking spray. Combine frozen blueberries, frozen peaches, Splenda, and 1/4 cup water in a medium saucepan. Bring to a simmer over medium heat, stirring occasionally. Whisk together the cornstarch and remaining 2/3 cup water in a small bowl until smooth. Stir the cornstarch mixture into the peach berry mixture. Gently stir in the lemon zest and reduce heat to low. Continue simmering the fruit, gently stirring, until the juices have thickened and the mixture is more on the clear side than the creamy side. Remove the saucepan from the heat and scoop the mixture into the prepared skillet.

Stir together flour, oats, brown sugar, and nutmeg in a small bowl. Add the melted light butter, stirring until butter is mixed evenly. Using your hands, work the butter into the flour mixture, squeezing until crumbly. Sprinkle the topping over the peach berry filling.

Bake until the topping is nicely browned, 30 to 40 minutes. Top with vanilla ice cream or whipped cream or eat just like it is!

My personal preference, is to top it with a small scoop of ice cream and let it completely melt until it looks messy and not quite as pretty and picture perfect. I love melted ice cream with berry desserts.

How are your New Year’s Resolutions going? 


Pin It

Single Serving Blueberry Cobbler

It’s officially the weekend. I have a love hate relationship with weekends. I tend to splurge and make unhealthier choices on weekends. You know… watch an entire season of Pretty Little Liars in one day while I don’t shower and stay in my pjs. Just me? This weekend I’m determined to make healthy and wise choices that mostly have nothing to do with eating. But, just in case you feel like splurging this weekend but don’t want to eat an entire pan of brownies while watching an entire season of , I wanted to share this recipe with you! 

A. It’s healthy. B. It’s a single serving! You can eat the entire thing and not feel even a little bit bad. You can also make it your own with any kind of fruit you have on hand. It would be deliciously yummy with frozen or even canned peaches, strawberries, or blackberries. You know.. it would even be food with a 1/2 cup of pumpkin and some pecans. Done! I will be making a pumpkin version of this cobbler this weekend. Oh and sauteed apples! Okay. I’m glad I decided to share this recipe with you because I’m totally experimenting with new flavors this weekend.

Single Serving Blueberry Cobbler

Used the exact recipe from sparkrecipes.com just used blueberries – Cup O’ Cobbler Recipe


Ingredients:

  • 1/2 cup fresh or frozen blueberries
  • 1/2 teaspoon sugar
  • 1/2 tablespoon Brummel and Brown yogurt butter
  • 2 tablespoons whole wheat flour
  • 1 1/2 tablespoons Splenda
  • 1/4 teaspoon baking powder
  • 2 tablespoons skim milk
  • Dash of nutmeg
  • Dash of cinnamon

Directions: 

Mix blueberries and sugar in a small bowl and set aside so the sugar can do it’s juicy job. You can smash your berries a little to help this process along. Prehat oven to 350. Spray a small ramekin with butter flavored cooking spray and then add the butter. Heat the ramekin in the oven until the butter is bubbly. 
Note: Heating the dish with the butter in it makes the recipe great. It makes the cobbler more well… cobbler like! It adds the crispy and chewy components to the crust. 
Mix flour, Splenda, baking powder, milk, cinnamon and nutmeg together in a separate small bowl. Spread the mixture into the hot ramekin. Add the sugared fruit in the center of the batter, leaving a rim of batter around the edges. Bake for 20-30 minutes until the batter is golden brown around the edges and the center looks set. 
Remember those Frozen Yogurt Bites I made? Three of the vanilla ones on this was AMAZING! 

If you count the blueberries in the recipe, it’s 5 points for the whole thing. If you don’t (and sometimes I don’t because fruit is free if you eat it plain!), then it’s 4 points! Plus whatever topping you may or may not add. If you add just a dollop of fat free cool whip or a frozen yogurt bite or two, nothing extra! It’s also perfectly fine with nothing extra at all. 


Pin It

Pineapple Dreamsicle Fluff

You know I don’t love summer. I’m admittedly a little bit of a diva and I hate sweating. If I could have it my way, I’d live in a place where people had the same hospitality and helpful spirit as my great Mississippi, cooked just as well, but the temperatures would be quite different. All year round it would never be too hot to wear cardigans. In Cardiganland I’d never sweat or be hit in the face with pea soup thick humidity that makes my hair look like a mess. 
Dislike for Mississippi heat and summers aside, there are parts of summer I like. I like afternoon storms, even the ones with lightening and hail like we had yesterday. I like snow balls. I like popsicles. I like Smith County watermelons. I like paper sacks full of home grown veggies from my pawpaws garden. I like cookouts and BBQs. I like sandals. I like swimming pools. And despite my love obsession with fall and all its flavors, I actually love the flavors that go along with the rising temperatures of summer. This little easy to make treat is guilt free, full of summer flavors and reminds me of my favorite snow ball, dreamsicle! 

Pineapple Dreamsicle Fluff

Ingredients:

  • 1 can mandarin oranges, drained (in Splenda)
  • 1 can crushed pineapple, not drained (in Splenda)
  • 1 package sugar free vanilla pudding (big box)
  • 1 container of fat free cool whip 
  • coconut shavings (optional edible garnish)

Directions: 

Stir together pudding mix, cool whip, drained oranges, and pineapple with its juice until combined. Chill and eat!

Yields 5 cups and 10 – 1/2 cup servings. Each 1/2 cup serving is 1 point on Weight Watchers! Totally guilt free. I sprinkled a little shaved coconut on top of mine. 1 tablespoon of sweetened coconut is 1 point, but I didn’t use a whole tablespoon. I’m certain I will keep my refrigerator stocked with this all summer. 

What’s your favorite summer treat? 

Pin It

Dr. Pepper Ten Brownies

Weight Watcher’s at home chefs and bakers have to be some of the most innovative people out there! Tips and tricks are passed down at every meeting. Shortcuts and substitutes can be found on any food blog that shares Weight Watcher recipes. Some of my favorite recipes are the SUPER easy ones. The mix this with a box of that and done ones! Lower in points and easier? Win win! 
Cake mix recipes mixed with cans of diet soda (or assorted cans of fruit) are all over the place. I haven’t actually had a cake mix with soda that I like yet. (However, I do enjoy cake mixes mixed with pumpkin or pineapple.) But… when I saw this Diet Coke Brownies recipe, my interest was stirred. It helped that it came from a healthy eating blog that I trust. Craving chocolate probably helped a bit too. Needless to say, I found myself having to try out a version of these brownies. Dr. Pepper Ten is my all time favorite diet soda and I always have it. If I don’t, I’m mad at someone for drinking the last one. I think it was the perfect diet soda for these easy peasy brownies. 

Ingredients: 

  • 1 box of brownie mix
  • 1 can of Dr. Pepper Ten (or diet soda of choice)

Directions: 

Stir brownie mix and soda together until smooth. Pour into a sprayed 9×13 pan. Bake at 350 for 30 – 40 minutes. Follow the package directions for cooking, but you may have to cook it a tad longer. Just rely on the tooth pick trick. 
Now… if you want to be good and very self controlled, you can (and should) stop there. However… Since we’re not adding eggs or oil, why not add a little coconut shavings? I mean aren’t they just so pretty and just in need of being the perfect topping for something? 

Since we’re adding things, a few chocolate chips sprinkled on hot right out of the oven brownies are the inseparable best friend to coconut shavings. 
Then… the fat free sweet condensed milk just felt left out! He asked nicely to be drizzled atop. I just couldn’t bring myself to tell him no. 

And that’s how Dr. Pepper Ten Brownies became Coconut Dr. Pepper Ten Brownies.

The Weight Watcher’s Recipe Builder was down tonight, so I couldn’t add it the little extras. But word to the wise, make these for people! They are dangerously good and easy to snack on. Without the extras, according to the recipe I used as a base, they are 4 points each for 18 servings. Mine made 12 large servings or 24 small ones.


Pin It

5 Minute Fruit Crisp

As you surely know, I love Weight Watchers. It’s the only “diet” that works for me, even if it’s not working so well right now. Okay well even if I’m not doing it so well right now. Shhhhh. Don’t judge my lack of motivation and efforts. Students will be gone soon and there will be no more late night parties, end of the year celebrations, midnight movie premiers, or “hey look, I bought a dozen Krisy Kreme donuts and I’m bringing them to your apartment to share” moments until August! Don’t get me wrong, I will totally miss those faces like crazy. In trying to be positive about summer transitions, I got super excited about the mostly unlimited possibilities to eat healthier for a few solid months and catch back up on my weight loss. 
However, weight loss doesn’t exist or work for me without dessert! Call me crazy, but I definitely loose more weight knowing I can have dessert than cutting it out. I love to make healthy desserts and made over desserts. Without RAs or students here to feed made over (or not so made over in some cases) desserts to, a problem arises! Even healthy made over desserts have leftovers. Desserts are good for treats, not constant access! So what do we do? Oh I know! Make individual 5-minute microwaveable desserts. 
5-minute microwaveable desserts are totally in right now. This summer without RAs and living in a foreign kitchen, microwaveable desserts will be my weight loss dieting life savers. I was inspired for this particular recipe by Jo and Sue’s Blog. Check them out! They have a ton of 5-minute desserts. This one is my new favorite, inspired by their 5 Minute Apple Crisp
Pro tip – keep these in your freezer! I’m fairly certain there are endless dessert and treat possibilities found in this bag. 

5 Minute Peach Berry Crisp

Kasia’s Kitchen original, inspired by Jo and Sue

Ingredients: 

  • 3/4 cup of frozen peaches, chopped
  • 1/2 cup strawberries, chopped
  • 2 packets of Splenda
  • 2 teaspoons of cornstarch
  • 2 tablespoon brown sugar, packed
  • 3 tablespoons quick oats
  • 1 tablespoon Brummel and Brown yogurt butter
  • 1 tablespoon whole wheat flour
  • 1/4 teaspoon cinnamon
  • splash of vanilla
  • dash of salt

Directions: 

Microwave chopped peaches in a ramekin for 2 minutes. FYI – the peaches are really easy to chop even in their frozen state. Add strawberries, Splenda and cornstarch to the peaches and stir until well combined. Return to microwave and heat for 1 minute. 
In a separate bowl combine the remaining ingredients. Mix with a fork until combined and crumbly. (Or you could just jump in there with your fingers and get messy like I did. It was fun.) 
Top peach and strawberry mixture with the crumble. Return to microwave for 1 minute. Tip – put a napkin in the microwave for this step! The first time I didn’t and had spillage all over the microwave plate. This time I did, see? The napkin caught the spill. 
Yields one large serving. On Weight Watchers recipe builder if you could the fruit it’s 8 points and if you don’t it’s 6. I choose not to count the fruit because fruit is free if it’s without your 5-8 servings a day! You can make that choice for yourself. 
Remember when I made frozen yogurt bites? Three of the little bites make this perfect quick and easy treat even better. It feels like a fruit crisp with ice cream, but way healthier! 

Pin It