Weight Watchers A to Z

Remember a million years ago when I was doing Weight Watchers and lost 43 lbs and posted all the time about it and was kinda obsessed with it? Well, this week I joined again! Long story short – wanted to lose 100 lbs, lost 43, almost half way there, dad got sick for a while then passed away, grief, stress, lost motivation, gained all but 10 of those 43 lbs back. I’m in a great place emotionally, better than I’ve ever been, more reliant on God and the power of the Holy Spirit in my life than I’ve ever been, and I prayed one day last week about having more energy, being healthier, and positive stress relieving outlets. The prayer wasn’t about losing weight, it was about wanting to be the best version of me that I could be. I asked the Holy Spirit to give me supernatural motivation to workout and said if losing weight can happen and me not get obsessed with it or discouraged by the journey then I need Holy Spirit level supernatural power for that too. That day my place of employment sent out an email saying they needed two more people to sign up for Weight Watchers at Work to be able to start the program. I knew I was supposed to be one of those people. I signed up and that afternoon I worked out for the first time since I hurt my back this past August. A million years ago when I did Weight Watchers, I started a post called Weight Watchers A to Z. I never posted it because I wasn’t practicing Weight Watchers principles anymore. But now… I’M BACK! And back with much excitement and motivation I might add. So I thought I’d finish and post this post as a refresher to myself on the things that worked for me before, and maybe even a help and encouragement to others. 


This will probably be cheesy at times, but you’re use to that because that’s just me. I have thought of every tip and trick I can think of to share, and therefore, this will be LONG. (But full of helpful, useful info, so long is okay right?)

 
1. The NEED TO KNOW WW Blog: Skinny Taste! This blog is a life saver! She posts at least 3 recipes a week and they are all REALLY good and have no weird ingredients. A lot of healthy eating food blogs use weird ingredients like tofu, blech! I want to be able to cook with stuff I’m familiar with and like and she helps achieve that goal. I have made and fed her recipes to lots of people and they always love it. She posts everything! Sweets, pasta dishes, holiday favorites, everything. And she always included the points for each meal. 
 
2. Other great WW friendly blogs:
3. Use Pinterest! Go to Pinterest and type in Weight Watchers. A ton of recipes will come up. There is a big Weight Watchers community on Pinterest. Also… Instagram! Search the hastag #weightwatchers and be inspired by all the other people doing this right along with you and their fantastic meal and snack ideas. 

4. Calculating: To be a dedicated tracker (and you must be for WW to work!), you need a points calculation tool. You can buy the point plus calculator at your WW meeting or from the WW site ($14). You can also sign up for eTools ($15 a month). OR, you can buy a “copy cat” app. I had a calculator, but I lost it! I had eTools for over 2 years, but it actually hurts me more than it helps me (I need to actually go through the process of writing out my points and food on the traditional paper tracker). So I did some research and found an app called Ultimate Value Diary. It does allow you to track your points in the app, but I don’t use it for that. It comes with a points plus calculator function, an activity calculator function, a how many points you get calculator function, a bar code scanner function, and a meal builder function. It was $3.99 and I use it multiple times a day. I’m not advocating for not supporting WW, but I pay for my weekly meetings, and paid for eTools for 2+ years and never used it! So I personally don’t feel bad about using this app. If you do, I support you! Try one of the other methods, but the point is… you need to be able to calculate and you HAVE to track. 
 
5. Quick Tips:
  • Take your points plus calculator to the store with you. Compare things before you decide what to buy. Once you get used to what options are best you won’t need to do this likely! 
  • Once you’ve calculate how many points something is in your fridge or pantry, write it on the container. Later on once you’ve memorized things you won’t need to do this, but it’s REALLY helpful in the beginning. 
  • Buy a cheap food scale at Wal-mart or Target. The food book will say this many points for 4 oz chicken breast, etc. If you guess on how many ounces something is you’re usually wrong. I bought mine for less than 15 dollars at Target. 
  • Make sure you have a good set of measuring cups. The scoop measuring cups like these are easiest. They also sale 1 cup and 1/2 cup measuring spoons at the meetings, which I love. But the scoop cups will work just as well. When it says 1 cup of pasta, 1 cup or rice, 1/4 cup or this or a 1/2 cup of that per serving, measure it out! Don’t guess. 
  • Don’t take the things you love away! Modify them or make space for them. The Weight Watchers motto is that it’s not a diet, it’s a lifestyle. Success comes when you don’t feel like you are keeping your self from things. I bake something usually at least once a week! I use Weight Watchers sites and recipes and do healthier things, but they are still just as yummy and a treat. Even your favorite candy isn’t off limits. 10 M & Ms are 1 point! 1 Dove Chocolate square is 1 point. Don’t deprive! 
 
Quick Tip – Cut off the top of a kiwi and eat/scoop it with a spoon! 
 
6. Breakfast: ALWAYS eat breakfast. It’s proven that people who eat breakfast loose more weight, make better food choices, and splurge less. Some ideas that I love: 
  • I actually blogged about breakfast ideas the last time I did this: http://www.kasiaskitchen.com/2011/06/perfect-summer-wake-up.html
  • Greek Yogurt – This is my go to. It’s easy and comes prepackaged for you! I always thought I hated yogurt, and I do hate normal yogurt, but I love Greek yogurt. Points vary by brand, but 90% of the time a container of Greek yogurt and some sort of fruit is my breakfast of choice. 
  • Crustless Quiches or Egg Muffins – I’ve made minis and regular sized muffins. The minis are 1 point for 2. The biggies are 2 points each. 
  • Banana Pancake Muffins – These are also good to freeze and keep on hand for breakfast. They are 3 points for 4. 
  • Frozen Waffles – I like the multi grain frozen waffles. They are 3 points for 2 and I usually spread them with Nutella or peanut butter if I’m on the go. If I have time to sit down I’ll use Mrs. Butterworths sugar free syrup and some yogurt butter. 
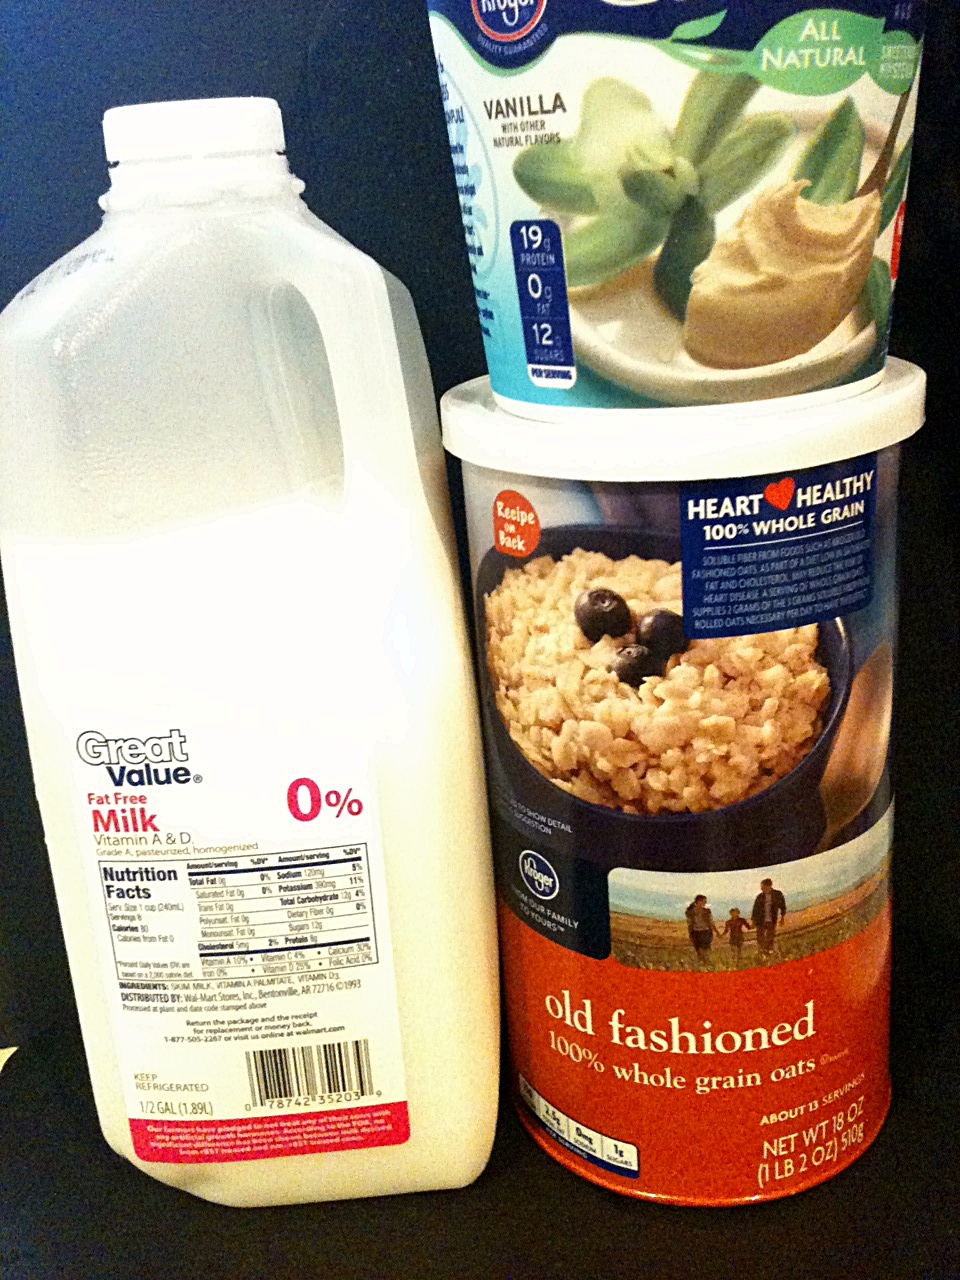
  • Oatmeal – I only like to eat oatmeal when it’s cold outside, but it’s a good, filling, low point breakfast. Just be careful which packets you get. Always check points before buying. 
  • Overnight Oats – Aka cold oatmeal. Yummy, healthy, delicious, and so filling! I have recipes here and here. They range from 7 – 10 points. 
  • Fruit Parfaits – Yogurt, cottage cheese, and fruit yumminess. 
  • Breakfast Burritos – 5 points each and VERY filling. You can make them ahead and freeze them! I like things like that. 
  • Bagel and Cream Cheese – Mini bagels or bagel thins are 3 points each. There are lots of varieties of spreadable cream cheese. 1 tbsp of reduced fat is 1 point. You buy a container of the reduced fat plain or just a block of reduced fat plain (whichever is cheaper) and make you owm cream cheese variations. I’ve done cinnamon (cinnamon and sugar to taste added in and whipped up). I also love pumpkin spice.
  • Breakfast Sandwich – Whole wheat reduced calorie English muffins are 3 points. I toast them, add 3 slices of deli ham for 1 point, and add a piece of reduced fat cheese for 1 and microwave it for 25 seconds. It’s a fake healthy McMuffin type thing. You can also use Oscar Mayer Fully Cooked bacon (2 points for 4 slices!)
  • Cereal – I do like cereal in the summer and spring time because it’s light and cold. Special K varieties are usually good, about 3 points per cup. I’m sure Kashi is good. But my secret favorite is Kroger brand bagged puffed wheat! It’s like sugar smacks without the sugar and 1 cup is 1 point! I usually have 2 cups, add some splenda, 1/2 cup milk, and strawberries or a banana chopped in it. Total it’s 3 points! 2 for the cereal, 1 for the milk. 
  • Fruit – Add fruit. I always always have some fruit item with whatever breakfast I have. It’s 0 points and you are required to get in 5-8 servings of fruit or vegetables a day. I basically eat one or the other with every meal or snack. I also love to take splenda sweetened or no sugar added fruit cups (0 points) and top them with 1/4 cup of fat free or low fat cottage cheese (1 point). 
  • Toast –  I like cinnamon toast for 2 points (2 slices of reduced calorie bread for 2 points. Spray each side with Parkay spray butter for 0 points. Sprinkle with Splenda and cinnamon 0 points). I also like Nutella or peanut butter toast (2 slices of reduced calorie bread for 2 points. 1/2 tbsp of peanut butter or Nutella for 2 points).
  • Banana sandwich – Really filling. 2 slices of reduced calorie bread toasted (2 points). Spread with 1/2 tbsp of peanut butter or 1/2 tbsp Nutella (2 points). Slice a banana and build the sandwich. 4 points total.  
  • Weight Watchers shakes – You can buy the packets from the class. They are 2 points if you use water, 4 if you use skim milk. I like the chocolate, but they do have other flavors too. I always use milk to get in my 2 dairy servings for the day. I have made mine in the blender with frozen strawberries as ice cubes. I’ve also made them with 1 cup of ice and 3 tsp of instant coffee granules. Mocha frappe-ish. 
  • Egg Mugs – These are really good and very easy! You can find tons of recipes here, here, here, here, or here. Hungry Girl does these and most are 2-3 points depending on what ingredients you add. It’s scrambled eggs in a cub basically. My favorite ways are with sundried tomato basil laughing cow cheese and either bacon bits or sliced deli turkey meat and green onions. I always add salt, pepper and onion powder to mine too. 
  • Boiled Eggs – 2 points each
 
7. Lunches: Lunch is hard! The key to doing well at lunch is planning and doing things ahead. Eating out is not recommended, BUT doable if you plan for it. I’ll post eating out tips later. 
  • Sandwiches – I did a post about sandwiches and great sandwich topping and additions:  http://www.kasiaskitchen.com/2011/03/grilled-cheese-and-jesus.html. Sandwiches can be great if you don’t let them get boring. Most deli meat is pretty low fat. I get the 99.6 or 8 or something fat free ones. The thin sliced turkey, chicken, or ham are usually 1 point for 4-6 slices depending on the brand. I prefer the Land O’Frost brand. Add veggies like lettuce, tomatoes, onions, or cucumbers for free. I love the sandwich slider pickles. Dill pickles are 0 points. I also enjoy thinly sliced apple, like super super thin, on my sandwiches some times too. Laughing Cow cheese has lots of great varieties for 1 point a wedge to spread on. Weight Watchers also has 1 point spreadable wedge cheese. Reduced fat sliced cheese isn’t bad either. 1-2 points a slice. Mustard is free! There are so many great varieties of mustard. Dijionaise is free to add a little creaminess. Fat free mayo (a tbsp or less) is also free if you need to have mayo on your sandwiches.
  • Chicken Salad – On Sundays before the work week starts I often mix up a batch of chicken salad and/or tuna salad to use for lunches. DON’T use premade and don’t make it the “normal” mayo heavy way. I buy the big cans (13 oz) of chicken breast from Sam’s in a 5 pack or something. You can buy the 13 oz cans anywhere though. I mix that with 2 tbsp of Kraft Fat Free mayo, 2 tbsp of fat free sour cream (you can also use greek yogurt), 1/2 cup of grapes sliced, 1/4 cup chopped celery, 1 tbsp of dill relish, salt, pepper, a little sage, and some green onions. It makes 4 hearty helpings for sandwiches and is 4 points per serving. 
  • Tuna Salad – I mix 1 can of drained tuna, 2 chopped hard boiled eggs, 2 tbsp of fat free mayo, 2 tsp of mustard, 2 tbsp chopped onion, 1 tbsp of dill relish. Makes 2 servings. 4 points per serving.
  • Avocado Chicken Salad – I’m always obsessed with this when avocados are in season. Recipe here. Use one avocado instead of 2. It makes 4 servings and is 6 points a serving. It’s great on a sandwich or on a salad. 
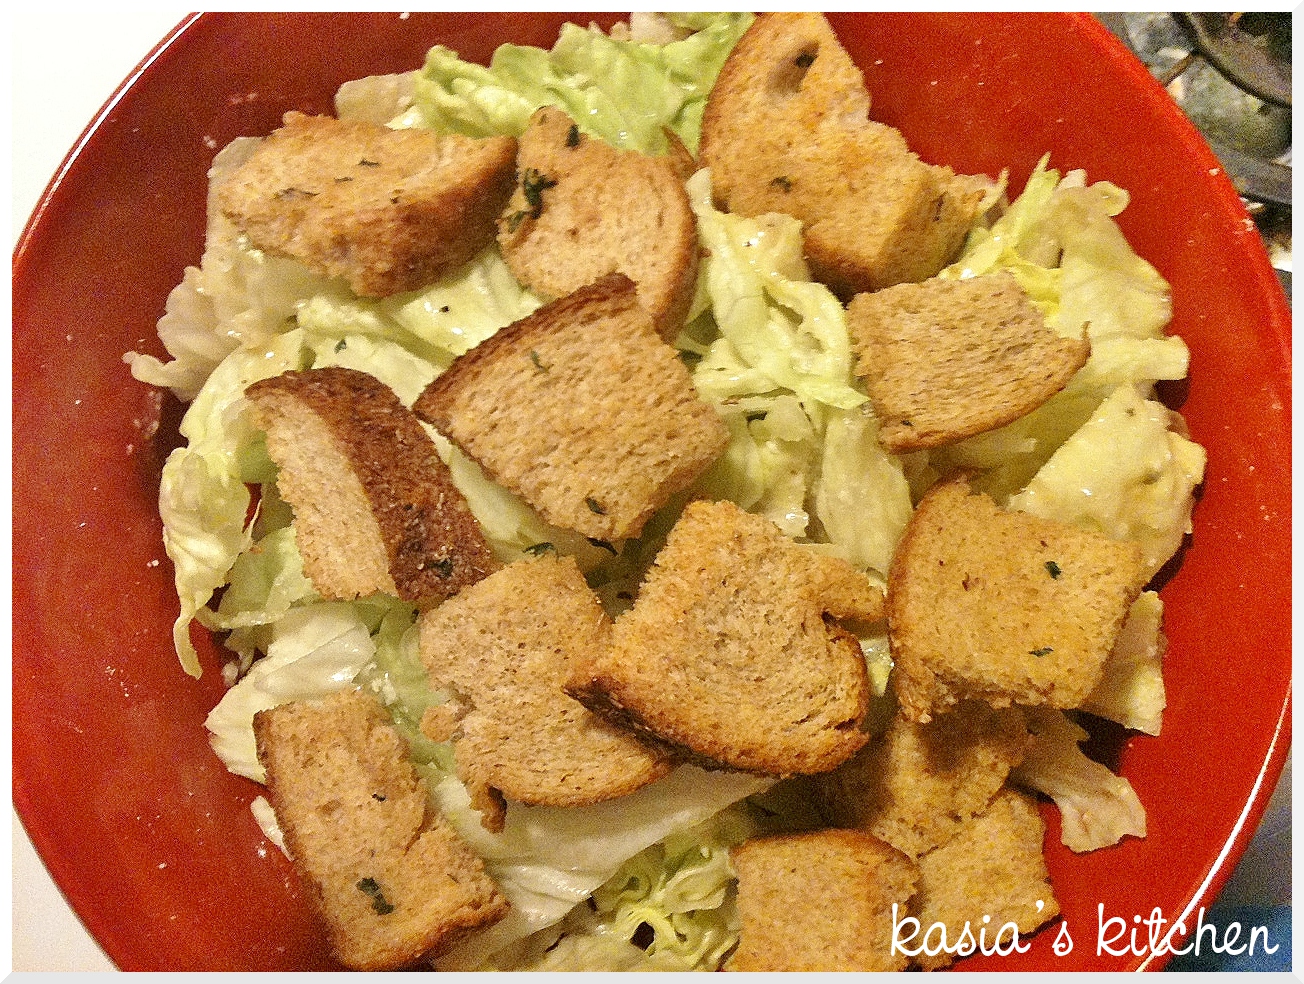
  • Salads – Salads are great but kind of complicated to bring to work as you need so many containers to not wilt lettuce and such. And then I discovered this idea! I didn’t make mine like hers, but definitely borrowed the idea! Mine looked like this. The key is making sure the dressing doesn’t touch the lettuce. I layer mine with dressing (most low calorie and fat free varieties are pretty good), onions, cucumbers, carrots, tomatoes, mushrooms, reduced fat cheese, chicken, and then salad greens. I used spinach for one and and romaine for the other. They keep for up to 5 days in the fridge. I made a couple on Sunday for lunches for the week. I usually have shredded chicken on hand that I make in the crock pot for salads and recipes, but I also buy bagged precooked chopped chicken from Kroger in the frozen section sometimes. I warm it up in a skillet with some cooking spray and Tony’s. 
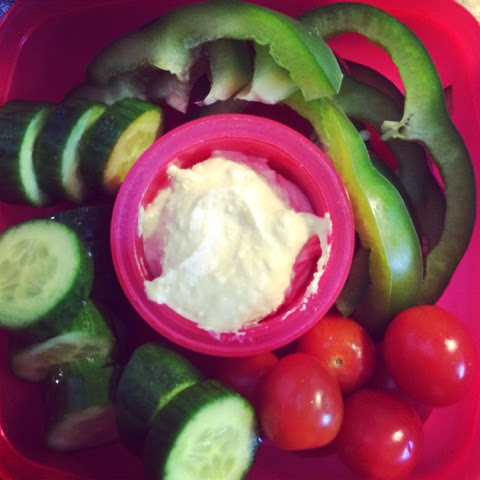
  • Sides – Veggies, veggies, veggies! I always bring sliced cucumbers, carrot chips, grape tomatoes, or bell pepper. I often bring a dill pickle spear. All zero points. Every two weeks or so I mix up fat free ranch dip (16 oz container of fat free sour cream, dry ranch packet, mix in the container, 1 point for 1/4 cup). I bring a 1/4 cup of the ranch dip or to dip veggies in to make them more enjoyable. A couple of tbsp of hummus is 2-3 points and good with veggies too. Veggie chips or straws (from Sam’s) are good and usually 3 points for 20 or so. Special K chips are 3 points for 30. Normal chips are 3 points for 15 or less. Stay away. 
  • Leftovers are great too. Just be sure to portion them out and know what you’re eating. (I probably bring leftovers more for lunch than anything else.)
  • Smart Ones frozen meals put Weight Watchers points right on the package. There are other varieties of healthy frozen meals that are low in points too (Healthy Choice, Leah Cuisine, the Great Value healthy options). I like making homemade things too much to eat these often, but in the beginning I did eat them for lunches just because it was so easy (and I didn’t know all the tips I’m sharing with you yet). 
8. Dinner Tips:
  • Plan plan plan plan! I can’t stress that enough. Weight Watchers will be a breeze if you plan. I am an avid meal planner. I post my meal plans every Monday(ish) and wrote a long post on the basics and reasons for meal planning (go here). If you have a recipe builder or meal builder, you can easily figure out how many points your meals and dishes are per serving. You can do it by hand also (add total ingredients and points for everything and then divide by serving size). 
  • Chicken breasts are your friends. Tilapia (or any fish) is your friend. Ground turkey is your friend! I pretty much use ground turkey in the place of any recipe that calls for ground beef. I buy chicken breasts at Sam’s and tilapia there too. Lean meats are lower in points.
  • Swap things out. Use whole grain pasta (Wal-mart and Kroger have cheaper store brands). Use wild rice or brown rice (I still use white rice too though). I still use white flour, but I always keep wheat flower on hand and usually do half and half. I still use sugar, but I substitute Splenda in a lot of things. 
 
Find awesome reusable containers that meet your snacking needs! 
 
9. Snack Smart: Don’t use all your points on meals. Snacks are important. Try to do at least 2 snacks a day. I usually try to keep it to 2 points or less, but sometimes up to 4. I’ll share a few ideas. 
  • FRUIT! It’s free. I include it in almost every snack. Add fat free cool whip to strawberries. Bananas sustain! 
  • Boiled Eggs – they stick with you!
  • Almonds – 1/4 cup is 4 points but they really do last you all afternoon on hunger level AND they are a healthy oil and protein
  • Veggies and Ranch Dip or Hummus
  • Healthier Chips – Special K, Veggie Straws, Etc. 
  • Microwave Mini Cake – 5 points
  • Edamame – 3 points for the individual portioned bags from Sam’s
  • Frozen Yogurt Bites
  • Granola Bar
  • Crackers and Cheese – 5 saltine crackers are only 2 points, I usually have 8 with two slices of reduced fat cheese, melt for a few seconds, quick easy snack
  • Deli meat – 4-6 slices are 1 point! Have a few slices with some grapes 
  • Reduced fat cheese stick
 
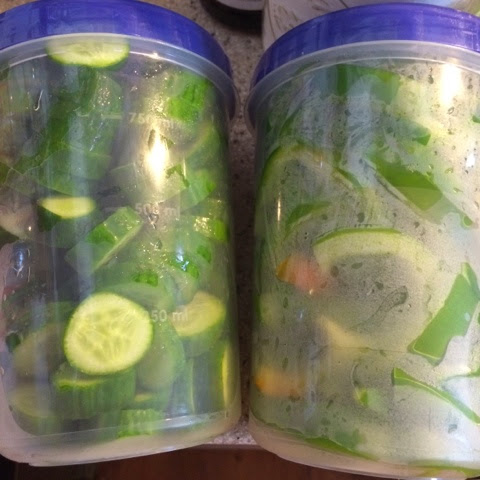
Cut up fruits and veggies for easy snacking access. 
 
10. Eating Out: Eating out is part of life! It happens, it’s fun, it’s social. Plan ahead. Most places have menus online. Don’t be afraid to ask to have your meal differently. At Margarita’s my order is so complicated but they do it [mostly] willingly (Fajita Taco Salad, no shell, extra lettuce, no cheese sauce, shredded cheese, sour cream, and guacamole on the side). At Red Lobster (the one time I’ve eaten there in 4 years), I asked them to prepare mine without butter. They listen! Don’t be scared. A tip they always tell you at meetings is to ask for a to go box as soon as you get your food. Split it in half before you eat it and take the rest home. Applebee’s actually has Weight Watchers items on their menu with points listed. There are a couple online resources that have points calculate for many popular restaurants as well. 
 
11. Favorite Products: These are some of my favorite products that I’ve discovered while doing Weight Watchers
  • Wal-mart Brand Splenda – Cheaper than regular
  • Oscar Mayer Full Cooked Bacon – Microwaveable, center cut so less fat, 2 points for 4 slices
  • Fat Free Cottage Cheese – I could never eat it by itself, I add it to baked potatoes, fruit, and salads
  • Fat Free Sweet Condensed Milk – 1 point per tablespoon. I love to drizzle it over strawberries or as an icing glaze on the microwavable cake
  • Fat Free Cool Whip – Walmart doesn’t have a generic brand but Kroger does. 2 tbsp is 0 points. Great on fruit or desserts
  • Fat Free Kraft Mayo – Perfect for dips and salads. 2 tbsp is 0 points
  • Fat Free Greek Yogurt – great to use in place of sour cream or mayo in recipes. 2 tbsp is 0 points 1/4 cup is 1
  • Fat Free Sour Cream – great for dips and adding dollups to things, 2 tbsp is 0 points, 1/4 cup is 1 
  • Brummel & Brown Yogurt Butter – 1 tbsp is 1 point
  • Parkay Spray Butter – O points! Great on toast or baked potatoes
  • Fat Free Salad Dressings – Kraft has lots, they are usually 1 point for 2 tbsp
  • Sugar Free Pudding & Jello – Buy the box and make the mixes. Sugar free pudding is 2 points per serving and sugar free jello is 0
  • Grape Tomatoes – I live on these things. I get the big box of them from Sam’s and it’s $5 for a lot. They are much more expensive at the groceries stores. 
  • Strawberries
  • Angel Food Cake Mix – Lightest easiest cake around. I make it into trifles, add crushed pineapple to it, top it with spelnda sweetened strawberries and fat free cool whip. 
  • Cocoa Roasted Almonds
  • Reduced Fat Cheese Sticks – I get Sargento 2% Cheddar ones, 2 points each
  • Kellog’s Fiber Plus Bars – 4 points but good fiber and filling

Single Serving Blueberry Cobbler

It’s officially the weekend. I have a love hate relationship with weekends. I tend to splurge and make unhealthier choices on weekends. You know… watch an entire season of Pretty Little Liars in one day while I don’t shower and stay in my pjs. Just me? This weekend I’m determined to make healthy and wise choices that mostly have nothing to do with eating. But, just in case you feel like splurging this weekend but don’t want to eat an entire pan of brownies while watching an entire season of , I wanted to share this recipe with you! 

A. It’s healthy. B. It’s a single serving! You can eat the entire thing and not feel even a little bit bad. You can also make it your own with any kind of fruit you have on hand. It would be deliciously yummy with frozen or even canned peaches, strawberries, or blackberries. You know.. it would even be food with a 1/2 cup of pumpkin and some pecans. Done! I will be making a pumpkin version of this cobbler this weekend. Oh and sauteed apples! Okay. I’m glad I decided to share this recipe with you because I’m totally experimenting with new flavors this weekend.

Single Serving Blueberry Cobbler

Used the exact recipe from sparkrecipes.com just used blueberries – Cup O’ Cobbler Recipe


Ingredients:

  • 1/2 cup fresh or frozen blueberries
  • 1/2 teaspoon sugar
  • 1/2 tablespoon Brummel and Brown yogurt butter
  • 2 tablespoons whole wheat flour
  • 1 1/2 tablespoons Splenda
  • 1/4 teaspoon baking powder
  • 2 tablespoons skim milk
  • Dash of nutmeg
  • Dash of cinnamon

Directions: 

Mix blueberries and sugar in a small bowl and set aside so the sugar can do it’s juicy job. You can smash your berries a little to help this process along. Prehat oven to 350. Spray a small ramekin with butter flavored cooking spray and then add the butter. Heat the ramekin in the oven until the butter is bubbly. 
Note: Heating the dish with the butter in it makes the recipe great. It makes the cobbler more well… cobbler like! It adds the crispy and chewy components to the crust. 
Mix flour, Splenda, baking powder, milk, cinnamon and nutmeg together in a separate small bowl. Spread the mixture into the hot ramekin. Add the sugared fruit in the center of the batter, leaving a rim of batter around the edges. Bake for 20-30 minutes until the batter is golden brown around the edges and the center looks set. 
Remember those Frozen Yogurt Bites I made? Three of the vanilla ones on this was AMAZING! 

If you count the blueberries in the recipe, it’s 5 points for the whole thing. If you don’t (and sometimes I don’t because fruit is free if you eat it plain!), then it’s 4 points! Plus whatever topping you may or may not add. If you add just a dollop of fat free cool whip or a frozen yogurt bite or two, nothing extra! It’s also perfectly fine with nothing extra at all. 


Pin It

Overnight Oats

You know how I have all those weird seasonal food aversions? No soup, grilled cheese sandwiches, or hot coffee unless it’s cold out. No watermelon, or any melons for that matter, unless it’s hot out. I also kind of feel this way about oatmeal. I LOVE a bowl of warm cozy oatmeal in the fall and winter, but I’m not a huge fan in the summer. 
I kept seeing cold overnight oatmeal on Pinterest. I didn’t buy into it at first because I thought the texture might be weird and most recipes called for chia seeds, which freaked me out a little. Chia pets. Chair seeds. They are the same things. I’m not a picky eater, but that made me hesitant. Since then I’ve discovered it’s normal and okay to eat chia seeds. I’m not scared of them, but still haven’t tried them. Apparently they are really good for pregnant women. One day when/if I get pregnant, I’ll add chia seeds to my oats. For now I’ll save my self a trip to a health food store. 
All that to say, try these! You don’t have to have the fancy chia seeds. My pregnant friend made them first (with chia seeds) and highly recommended them to me. We have similar food likes, so I trusted her recommendation. I’m in love! I got obsessed and game up with EIGHT flavor combinations. I’m gonna work on a pumpkin version next week. This is one thing that will not be a seasonal food. I love them for summer to take the place of hot oatmeal, but I love them so much I will definitely eat them year round. 

Base Recipe:

  • 1/2 cup old fashioned oats (NOT the instant kind)
  • 1/2 cup skim milk
  • 1/2 cup non fat Greek vanilla yogurt

Directions: 

Pour yogurt, oats and milk in a pint sized mason jar. Shake it until all ingredients are combined. At this point your jar will be about 3/4ths full. 

Add your toppings of choice, and shake until mixed. You may have to shake a little extra for some toppings. If it’s not combining well, stir in the toppings to combine all ingredients. 

Refrigerate overnight. I made four at once and they were good up to 4 days. I don’t think I’d go more than 4 or 5 days because fruit and non-fat yogurt can produce excess water.

For pretty presentation you can save out tiny bits of your toppings to garnish the tops. 

Each base recipe is 7 points on Weight Watchers. Extra points for different topping combinations are listed below. 

Peach Melba

  • 2 small nectarines (or peaches) diced
  • 2 tablespoons raspberry jam

Add 2 points for jam.

Peaches and Cream

  • 2 small nectarines (or peaches) diced
  • dash of cinnamon
  • drizzle of honey

Add 1 point for honey.

Strawberry Banana

  • 1 medium banana, diced (I sliced it, halved the slices, then quartered the slices)
  • 2 tablespoons strawberry jam

Add 2 points for jam.

Banana Nutella

  • 1 medium banana, diced (I sliced it, halved the sliced, then quartered the slices)
  • 1 tablespoon Nutella (one really is enough, Nutella is SWEET)

Add 3 points for Nutella.

Banana Peanut Butter

  • 1 medium banana, diced  (I sliced it, halved the sliced, then quartered the slices)
  • 1 tablespoon reduced calorie peanut butter (2 if you like more)
  • drizzle of honey

Add 2 points for 1 tablespoon of peanut butter + 1/2 teaspoon of honey.

Banana Chocolate (for those who like chocolate, but not Nutella)

  • 1 medium banana, diced  (I sliced it, halved the sliced, then quartered the slices)
  • 1 tablespoon cocoa powder
  • 1 packet of Splenda

No extra points! 1 tablespoon of cocoa powder is zero. According to recipe builder you’d count the points for bananas in recipes, but I say if they’re free as a snack they are free as a topping!

Banana Nut

  • 1 medium banana, diced  (I sliced it, halved the sliced, then quartered the slices)
  • 1 tablespoon honey
  • 1/4 cup chopped nuts
Add 2 points for honey and how every many points for the nuts you choose. 

Apple and Cinnamon

  • 1 apple, diced
  • 1/2 tablespoon brown sugar
  • 1/2 teaspoon cinnamon
  • Parkay spray butter
Saute diced apple with a little Parkay spray butter, cinnamon, and brown sugar until they loose a tiny bit of their crispness. Add 1 point for brown sugar.

Stir into base recipe. Shake to combine completely. 


Pin It

Blueberry Cinnamon Rolls

We all deal with stress differently. Some people sleep. Some exercise. Some avoid. You’ve heard of stress eating right? Well I stress bake. Stress baking is almost as bad for you as stress eating when no RAs are around to feed your baking projects to! Remember that time I ate four blueberry cinnamon rolls for dinner and just that? Oops. I’m gonna need to move back into my apartment soon and have access to my craft box for other means of stress relief!

But seriously, if anything stuck with me from counseling it was the bit about doing mastery and pleasure activities in times of overwhelming sadness or anxiety. Translation… doing things you know you can master, finish and accomplish well and things that bring your soul pleasure. Knowing this is going to help me make it through the difficult times that lie ahead with my dad’s health. Baking definitely meets both of those needs for me. I wish you could have seen my face when I opened the oven to the beautiful creation above. On second thought… I’m kind of glad you couldn’t see me. I’m certain I looked like a super dork. But I was ecstatic! I had been crying for hours, got up, baked, and pulled that out of the oven! I was so happy and proud of my creation. I think I may have even bounced on my heels a little.

I’m claiming this recipe as my own because it really was mostly me. The cinnamon roll recipe was from food.com, but I altered it to be a healthier version using egg beaters, heart healthy mix, and low calorie butter. The blueberry part was inspired by recipes I’ve seen but my combination of ingredients. The glaze was thrown together by me.

Ingredients

Blueberry Filling:

  • 1 cup blueberries
  • 1 1/2 tablespoons sugar
  • 1 teaspoon cornstarch
  • 1 1/2 teaspoons lemon juice
  • 1/4 cup + 2 tablespoons water
  • Additional 1/2 cup of blueberries

Cinnamon Rolls: 

  • 2 1/2 cups Heart Healthy Bisquick
  • 1/3 cup of skim milk
  • 1/4 cup Egg Beaters (or 1 large egg)
  • 2 tablespoons Brummel and Brown yogurt butter
  • 1/4 cup sugar
  • 2 teaspoons cinnamon

Lemon Cream Cheese Glaze:

  • 3 tablespoons reduced calorie whipped cream cheese
  • 2/3 cup powdered sugar
  • 3 tablespoons lemon juice
  • splash of milk
  • Directions 

    Dough: 

    Preheat oven to 375. Mix baking mix, milk, and egg until a soft dough forms, I used my stand mixer dough hook for the first time! Place dough ball onto lightly floured parchment paper or a lightly floured clean surface. I’m OCD about germs so I always use parchment or wax paper to do dough work. Gently kneed the dough until mostly smooth. Roll dough into a 8 x 10 (ish) rectangle. If your dough is looking more round and not square enough, fold in the ends and keep rolling. Combine cinnamon and the 1/4 cup of sugar. Sprinkle cinnamon and sugar mixture over buttered dough.

    Filling: 

    Combine 1 cup blueberries, sugar, cornstarch, lemon juice and water in a small saucepan. Cook on medium low heat until blueberries start to burst. I used a potato smasher to break mine down a bit more and thicken the sauce. When the sauce is a good consistency remove from heat and allow to cool slightly. Spread the blueberry sauce on top of the cinnamon and butter topped dough. Sprinkle additional 1/2 cup of blueberries.

    Baking:  

    Roll up tightly starting with the long side. Pinch the edges of the dough closed. Place on a parchment lined baking sheet. Cut 3/4 to 1 inch slits going almost through the bottom using a sharp knife. Don’t go all the way to the bottom! It should make 8 rolls, 10 smaller ones. Bake for about 20 minutes or until light golden brown. 

    Glaze: 

    Mix cream cheese, powdered sugar, lemon juice, and a splash of milk in a small bowl or a large measuring cup and stir! I used my immersion blender and it made it a quick and easy job.

  • Just look at it! They are so very good and just pretty! In the words of a coworker I shared one of these cinnamon rolls with, “These things are gourmet!” Easy and impressive. You can never have enough recipes like that. 

    I’m not suggesting that these as “healthy” BUT they are a much healthier version of most cinnamon desserts and cinnamon rolls. According to the Weight Watcher’s Recipe Builder they are 7 points with the glaze. For comparison, a Starbucks Morning Bun (their cinnamon roll) is 10 points with no icing or glaze. A Corner Bakery Cinnamon Roll is 17 points! A Pillsbury Supreme Cinnamon Rolls is 10 points. 7 doesn’t seem bad at all in comparison!

    Pin It

    Pumpkin French Toast Casserole with Coffee Whipped Topping

    I know what you’re thinking. Pumpkin? You? In May? I know, right? I totally broke my pumpkin belongs in the Fall and Winter months rule to make this recipe. And guess what? I loved it. It gave me the same warm and cozy feeling I get when I watch Gilmore Girls and see the red and orange leaved trees. 
    Just like my Gilmore Girls, I’ll still save pumpkin for special moments out of season and bask in it like crazy in season, but I might occasionally break my rule now. I did break it for a good reason. We had one of our potluck breakfast meals at work. A coworker who started post fall, had heard about my Pumpkin French Toast Casserole and then I didn’t have a choice! I like it when people request my food! I just can’t say no. 
    The other factor that pushed me over the edge to saying yes to making a pumpkin dish? Coffee whipped cream. Let’s just start things off right and talk about this! 

    Coffee Whipped Cream 

    Ingredients:

    • 1 package Starbucks Via
    • 1 container fat free cool whip

    Directions: 

    Combine. Stir. Seriously, that’s it. It’s the simplest thing every but oh man is it good. I mean how can you say not to anything topped with Coffee Whipped Cream? My coworkers love to put it in their coffee too. It compliments anything pumpkin flavored magically and also just spoon. It’s the perfect topping for a good old spoon.

    Did I mention it’s also guilt-free? 0 points for 2 tbsp or 1 point for 1/4 cup.

    Pumpkin French Toast Casserole

    Ingredients:

    • 1/2 cup Brummel and Brown Yogurt Butter
    • 12 slices Sara Lee Delightful 45 Calorie Bread (I’ve used Multigrain and Whole Wheat)
    • 1/2 cup brown sugar
    • 1 1/2 teaspoon pumpkin pie spice
    • 1 teaspoon cinnamon
    • 1/2 cup – 1 cup canned pumpkin
    • 1/2 teaspoon vanilla
    • 1 1/4 cups Egg Beaters
    • 1 1/2 cups skim milk

    Directions: 

    Melt Brummel and Brown butter and pour into a 9 x 13 pan. Mix the brown sugar, cinnamon and pumpkin pie spice in a small bowl. In a separate bowl whisk eggs, milk, and vanilla together. I like to shake in a little extra cinnamon and pumpkin pie spice into the liquid mixture.

    Time to layer. Layer 6 pieces of bread in the pan. Spread a thin layer of pumpkin across the bread. Sprinkle half of the brown sugar mixture over the bread. Layer the other 6 pieces of bread on top and spread with pumpkin. Pour the liquid mixture over the bread. Sprinkle the remaining brown sugar mixture over everything.

    Cover and refrigerate overnight. The next morning, cover the dish with tinfoil and bake at 350 for 30 minutes. Remove from the oven, uncover and bake an additional 15 minutes. It should be golden brown and set.

    Sprinkle with powdered sugar to make it pretty. Serve with syrup, butter, whipped cream OR COFFEE WHIPPED CREAM.

    Yields 12 medium sized servings at 4 points each or 6 large servings at 8 points each.

    If the summer heat is getting to you and you’re missing fall as much as me, I highly recommend this dish now!

    Pin It

    Pineapple Dreamsicle Fluff

    You know I don’t love summer. I’m admittedly a little bit of a diva and I hate sweating. If I could have it my way, I’d live in a place where people had the same hospitality and helpful spirit as my great Mississippi, cooked just as well, but the temperatures would be quite different. All year round it would never be too hot to wear cardigans. In Cardiganland I’d never sweat or be hit in the face with pea soup thick humidity that makes my hair look like a mess. 
    Dislike for Mississippi heat and summers aside, there are parts of summer I like. I like afternoon storms, even the ones with lightening and hail like we had yesterday. I like snow balls. I like popsicles. I like Smith County watermelons. I like paper sacks full of home grown veggies from my pawpaws garden. I like cookouts and BBQs. I like sandals. I like swimming pools. And despite my love obsession with fall and all its flavors, I actually love the flavors that go along with the rising temperatures of summer. This little easy to make treat is guilt free, full of summer flavors and reminds me of my favorite snow ball, dreamsicle! 

    Pineapple Dreamsicle Fluff

    Ingredients:

    • 1 can mandarin oranges, drained (in Splenda)
    • 1 can crushed pineapple, not drained (in Splenda)
    • 1 package sugar free vanilla pudding (big box)
    • 1 container of fat free cool whip 
    • coconut shavings (optional edible garnish)

    Directions: 

    Stir together pudding mix, cool whip, drained oranges, and pineapple with its juice until combined. Chill and eat!

    Yields 5 cups and 10 – 1/2 cup servings. Each 1/2 cup serving is 1 point on Weight Watchers! Totally guilt free. I sprinkled a little shaved coconut on top of mine. 1 tablespoon of sweetened coconut is 1 point, but I didn’t use a whole tablespoon. I’m certain I will keep my refrigerator stocked with this all summer. 

    What’s your favorite summer treat? 

    Pin It

    Dr. Pepper Ten Brownies

    Weight Watcher’s at home chefs and bakers have to be some of the most innovative people out there! Tips and tricks are passed down at every meeting. Shortcuts and substitutes can be found on any food blog that shares Weight Watcher recipes. Some of my favorite recipes are the SUPER easy ones. The mix this with a box of that and done ones! Lower in points and easier? Win win! 
    Cake mix recipes mixed with cans of diet soda (or assorted cans of fruit) are all over the place. I haven’t actually had a cake mix with soda that I like yet. (However, I do enjoy cake mixes mixed with pumpkin or pineapple.) But… when I saw this Diet Coke Brownies recipe, my interest was stirred. It helped that it came from a healthy eating blog that I trust. Craving chocolate probably helped a bit too. Needless to say, I found myself having to try out a version of these brownies. Dr. Pepper Ten is my all time favorite diet soda and I always have it. If I don’t, I’m mad at someone for drinking the last one. I think it was the perfect diet soda for these easy peasy brownies. 

    Ingredients: 

    • 1 box of brownie mix
    • 1 can of Dr. Pepper Ten (or diet soda of choice)

    Directions: 

    Stir brownie mix and soda together until smooth. Pour into a sprayed 9×13 pan. Bake at 350 for 30 – 40 minutes. Follow the package directions for cooking, but you may have to cook it a tad longer. Just rely on the tooth pick trick. 
    Now… if you want to be good and very self controlled, you can (and should) stop there. However… Since we’re not adding eggs or oil, why not add a little coconut shavings? I mean aren’t they just so pretty and just in need of being the perfect topping for something? 

    Since we’re adding things, a few chocolate chips sprinkled on hot right out of the oven brownies are the inseparable best friend to coconut shavings. 
    Then… the fat free sweet condensed milk just felt left out! He asked nicely to be drizzled atop. I just couldn’t bring myself to tell him no. 

    And that’s how Dr. Pepper Ten Brownies became Coconut Dr. Pepper Ten Brownies.

    The Weight Watcher’s Recipe Builder was down tonight, so I couldn’t add it the little extras. But word to the wise, make these for people! They are dangerously good and easy to snack on. Without the extras, according to the recipe I used as a base, they are 4 points each for 18 servings. Mine made 12 large servings or 24 small ones.


    Pin It

    5 Minute Fruit Crisp

    As you surely know, I love Weight Watchers. It’s the only “diet” that works for me, even if it’s not working so well right now. Okay well even if I’m not doing it so well right now. Shhhhh. Don’t judge my lack of motivation and efforts. Students will be gone soon and there will be no more late night parties, end of the year celebrations, midnight movie premiers, or “hey look, I bought a dozen Krisy Kreme donuts and I’m bringing them to your apartment to share” moments until August! Don’t get me wrong, I will totally miss those faces like crazy. In trying to be positive about summer transitions, I got super excited about the mostly unlimited possibilities to eat healthier for a few solid months and catch back up on my weight loss. 
    However, weight loss doesn’t exist or work for me without dessert! Call me crazy, but I definitely loose more weight knowing I can have dessert than cutting it out. I love to make healthy desserts and made over desserts. Without RAs or students here to feed made over (or not so made over in some cases) desserts to, a problem arises! Even healthy made over desserts have leftovers. Desserts are good for treats, not constant access! So what do we do? Oh I know! Make individual 5-minute microwaveable desserts. 
    5-minute microwaveable desserts are totally in right now. This summer without RAs and living in a foreign kitchen, microwaveable desserts will be my weight loss dieting life savers. I was inspired for this particular recipe by Jo and Sue’s Blog. Check them out! They have a ton of 5-minute desserts. This one is my new favorite, inspired by their 5 Minute Apple Crisp
    Pro tip – keep these in your freezer! I’m fairly certain there are endless dessert and treat possibilities found in this bag. 

    5 Minute Peach Berry Crisp

    Kasia’s Kitchen original, inspired by Jo and Sue

    Ingredients: 

    • 3/4 cup of frozen peaches, chopped
    • 1/2 cup strawberries, chopped
    • 2 packets of Splenda
    • 2 teaspoons of cornstarch
    • 2 tablespoon brown sugar, packed
    • 3 tablespoons quick oats
    • 1 tablespoon Brummel and Brown yogurt butter
    • 1 tablespoon whole wheat flour
    • 1/4 teaspoon cinnamon
    • splash of vanilla
    • dash of salt

    Directions: 

    Microwave chopped peaches in a ramekin for 2 minutes. FYI – the peaches are really easy to chop even in their frozen state. Add strawberries, Splenda and cornstarch to the peaches and stir until well combined. Return to microwave and heat for 1 minute. 
    In a separate bowl combine the remaining ingredients. Mix with a fork until combined and crumbly. (Or you could just jump in there with your fingers and get messy like I did. It was fun.) 
    Top peach and strawberry mixture with the crumble. Return to microwave for 1 minute. Tip – put a napkin in the microwave for this step! The first time I didn’t and had spillage all over the microwave plate. This time I did, see? The napkin caught the spill. 
    Yields one large serving. On Weight Watchers recipe builder if you could the fruit it’s 8 points and if you don’t it’s 6. I choose not to count the fruit because fruit is free if it’s without your 5-8 servings a day! You can make that choice for yourself. 
    Remember when I made frozen yogurt bites? Three of the little bites make this perfect quick and easy treat even better. It feels like a fruit crisp with ice cream, but way healthier! 

    Pin It

    Pineapple Right Side Up Cupcakes

    Did you know that April 20th is National Pineapple Upside Down Cake Day? I totally didn’t! The moment I found out (via a tweet or blog or something), I became mildly obsessed with the notion that I MUST make something involving pineapple, cherries, cake and brown sugar. And so I do! I find a healthy pineapple cupcake recipe on my favorite healthy eating blog, skinnytaste.com, and adapted it to be a pineapple upside down cake-esque dessert. I fed these to a bunch of college girls and they all loved them.

    Pineapple Right Side Up Cupcakes

    Original recipe by Skinny Taste (I made mine to be more Pineapple Upside Down Cake-ish).

    Ingredients

    Cupcakes:

    • 1 box of yellow cake mix
    • 20 oz can crushed pineapple in juice (do not drain)
    • 1/4 cup brown sugar

    Frosting:

    • 8 oz 1/3 less fat cream cheese
    • 20 oz can of pineapple in juice, drained (squeeze really well in your hands to get out all the juice)
    • 1 1/2 cup marshmallow cream
    • maraschino cherries for garnish (optional)

    Directions

    Mix cake mix and 1 can of pineapple WITH the juice. I used my KitchenAid stand mixer. Use an ice cream scoop to fill lined cupcake tins about 2/3 full. Bake according to cake mix directions or until a toothpick inserted comes out clean. Set aside to allow to cool completely on cooling racks.

    Drain the other can of pineapple. Like super crazy drain! I drained it in a mesh strainer and then put it in my hands, freshly washed of course, and squeezed out the excess juice. Combine cream cheese, crushed pineapple and marshmallow cream and mix until combined well. Again, used my stand mixer. Spread on completely cooled cupcakes.

    For a fun garnish and to get the Pineapple Upside Down Cake Day theme across, I added maraschino cherries. I took the stems off half of the cherries and stuffed one inside each cupcake for a little filling surprise. I garnished each with a stem on cherry. On a couple that I presented to others, I dusted a little brown sugar on top to set in the purpose of the cupcake even more.

    Cupcakes with no icing are 3 points each according the Weight Watchers Recipe Builder. With just icing they are 4 points each. With icing and cherries they are 5 points each. Even at their highest, they are way better than any regular cupcake a far as points values go.

    Yields 24 servings. 

    Pin It

    Homemade Garlic Herb Croutons

    Do you like salads? If you do, I bet you don’t like them with just lettuce or only green things (and if you do, I’m impressed). How do you feel about croutons? I happen to love them. They add a nice crunch and flavor. Croutons are to salads as pearls are to a cute sundress. It’s true. Salads need accessories too.

    Now let’s talk about bread. I bet you have it. I bet on occasion you end up tossing some pieces that get old or moldy. Allow me to share my collection of bread tips.

    1. If you do end up with moldy bread on occasion, you can lengthen the life of your bread like whoa by keeping it in the fridge. I’m just me with no husbands or kids to eat bread and a loaf usually last me a month.

    2. Don’t care for the ends? Don’t toss them! Keep a bag in a the freezer and collect any bread butts (that’s what I call them), funky pieces or smooshed pieces. Things to also toss in that bread freezer bag: extra bread of any sort that will soon go bad – hotdog buns, hamburger buns, white bread, wheat bread. ALL THINGS BREAD.

    3. Don’t like the texture of your refrigerated longer shelf life bread? Two options. 1 – Toast it. I love a sandwich on toast. I also just love toast. Toast with Nutella, toast with peanut butter and bananas, toast with yogurt butter, cheese toast, cinnamon toast. 2. Microwave it for 5-10 seconds. It will be as fluffy and soft as new.

    4. So you have a bag of frozen bread… Now what? My favorite choices are bread puddings, homemade bread crumbs (which I also keep in the freezer after I make them and have for the many recipes that call for them), and now… CROUTONS!

    I am almost certain you have everything you need to make your own croutons which means… A. FREE, sorta. I mean you bought the stuff you have to make them at some point. But in comparison to buying croutons, FREE. B. You can make them healthier. C. They taste way better. 

    Homemade Garlic Croutons

    Recipe inspired by Savory Sweet Life

    Ingredients: 

    • 6 slice of bread (I used Sara Lee Delightful 45 Calorie Wheat Bread)
    • 3 tablespoons melted Brummel and Brown yogurt butter
    • 2 teaspoon garlic powder
    • 1/4 teaspoon salt
    • 1 1/2 teaspoons dried parsley flakes

    Directions: 

    Preheat oven to 300 degrees. Cube the six slices of bread. If you don’t like crusts, you can removed them, but I like them and leave them on. I cut them in threes each way. Mix melted butter, garlic powder and parsley flakes together until garlic powder is dissolved. Toss the butter mixture and bread cubes in a large bowl together until the bread is evenly coated. 
    Spread the coated bread cubes on a parchments or foil lined baking sheet. Bake for 15 minutes and check to see if they are dry, crispy and golden brown. Stir the croutons around and bake for additional minutes according to your preference. I cooked mine for about 20 minutes total, but I like them with just a touch of softness. Store croutons in a ziplock bag (or any air tight container, I’m partial to mason jars) and they will keep fresh for a few days. 
    I like making these because you can make as many as you need, less or more than this recipe even. I even like them as mouth popable little snacks. 
    Yields 6 servings of 1/3 cup portions. Each serving is 2 points on Weight Watchers according to the recipe builder. 
    I made Crock Pot Caesar Chicken on English muffin rolls with side Caesar salads complete with these yummy croutons. As a Round 2 recipe I did big Chicken Caesar salads with leftover shredded chicken and croutons of course. 

    Pin It