Meal Prep Monday

This week had another one of my favorite parts, Monday off! Although, it kind of doesn’t count. Being Easter weekend, everyone here had Monday off. This means I should also get Friday off, don’t you think? 
Well wait… If I have Friday off, I’ll sleep in, and then I will jump right to lunch and skip breakfast. And then… I’ll have to miss out on eating one of these amazing Breakfast Burritos. Okay, I’ll work on Friday. 
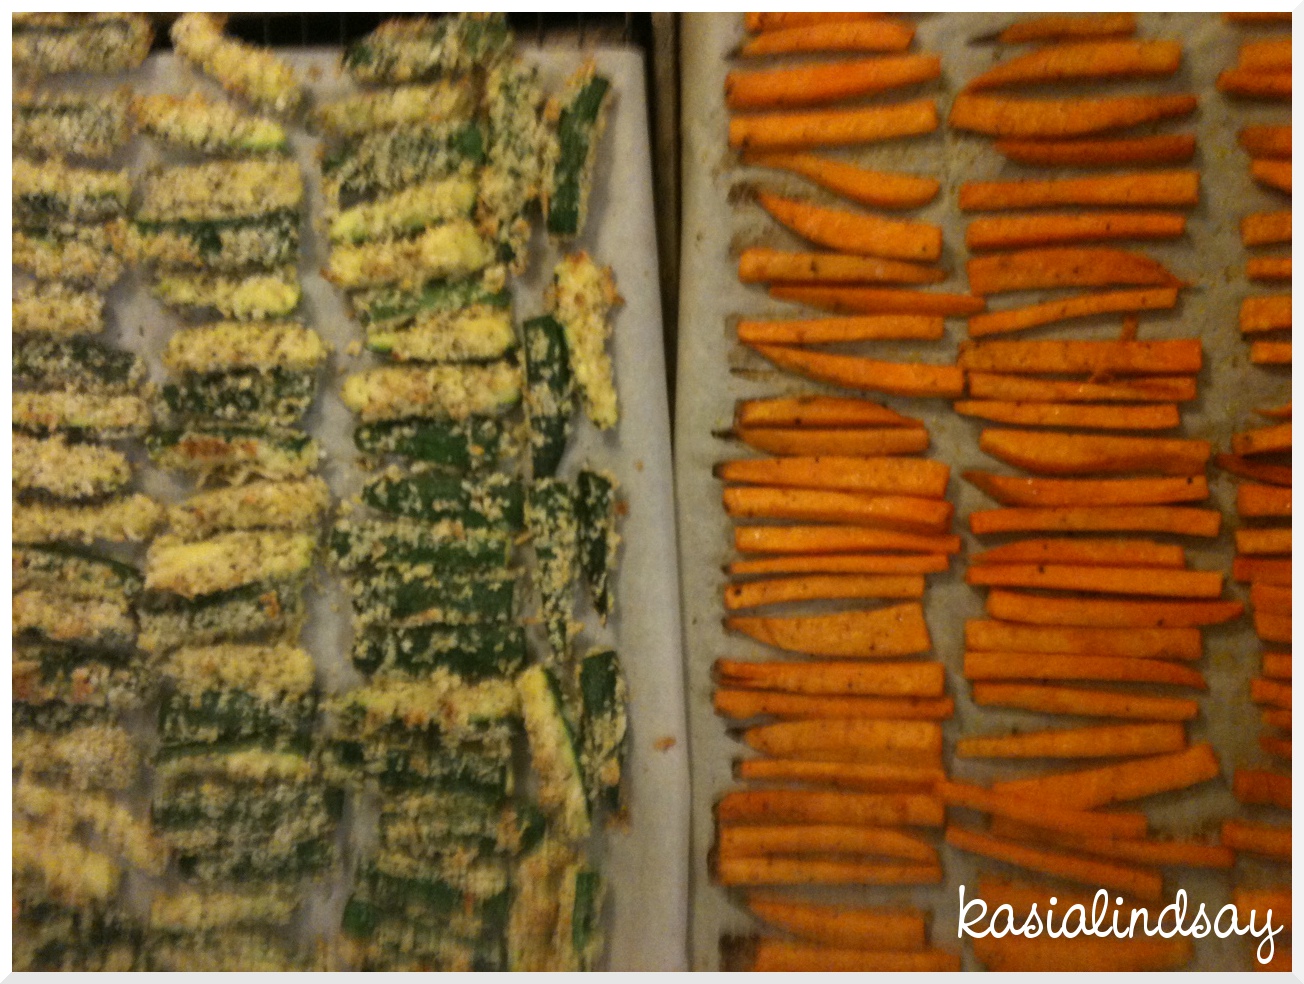
This week for Meal Prep Monday Off I made some lovely make ahead Breakfast Burritos. I also cut up a lot of veggies, prepped tomorrow’s crock pot meal, AND made Nutella Fudge Pops. Don’t worry, the recipe is coming tomorrow(ish). 
You should definitely make these burritos. They are only 5 points each on Weight Watchers, so good, so easy, and very filling. (And yes, your calculations are correct. There hasn’t been a morning since I made them, which does mean I had one for a meal snack.)
Breakfast Burritos
My recipe was inspired by Recipe Diaries (another healthy version using turkey sausage, 7-9 points) who was inspired by Pioneer Woman (a not so healthy version that looks amazing if you aren’t counting points).

Makes 8 servings. 5 Points Plus per serving.

Ingredients:

  • 1 1/2 cups Egg Beaters
  • 3 tbsp of liquid egg whites (or 2 egg whites)
  • 1/4 cup skim milk
  • 20 slices of thinly sliced deli ham (I use Land O’ Frost brand), chopped
  • 4 slices Oscar Mayer Fully Cooked Bacon, chopped
  • 1/2 cup chopped onion
  • 1 tbsp Brummel & Brown butter
  • 1/4 cup shredded reduced fat cheese (I used fiesta blend)
  • 1 green onion, chopped (optional)
  • 8 Mission Low Carb Tortillas
  • 2 tbsp dried chives
  • Tony Chachere’s Seasoning (or any all purpose seasoning salt)
  • salt & pepper
Directions: 
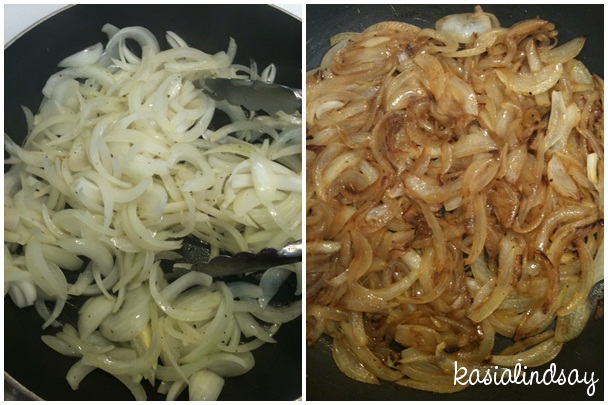
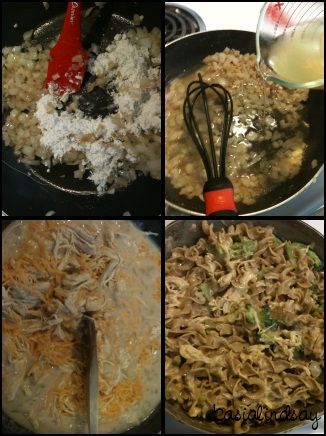
In a large bowl combine Egg Beaters, egg whites, and milk. Whisk until combined. Add cheese and chives. Salt and pepper to taste. Stir until combined. In a large skillet heat butter over medium heat. Saute onions in butter until they begin to turn translucent. Add chopped ham and bacon. Season to taste with seasoning salt.

When the edged of the ham start to brown, turn the stove down to medium low heat and slowly add in the egg mixture. Cook, stirring frequently, until eggs are cooked and no liquid remains. In the very last few minutes add in the chopped green onion, stirring to combine. Remove from heat and let the egg mixture cool slightly, and then you can begin rolling.

If you’ve rolled burritos before, you know how to do it and can skip this part. If not, I’ll give a few tips. I lay out a piece of wax paper next to the stove so my work surface and burrito stuffing are close. I used a 1/2 cup measuring scoop and added a heaping 1/2 cup of the mixture to each tortilla. 
Add the mixture towards the bottom of the tortilla because it will move a bit when you roll. Fold in the left and right sides. Grab the bottom end of the tortilla and start rolling. Fold it over the mixture and then over again, tucking in the mixture completely. Continue rolling until all of the tortilla is rolled. 
These are easy to freeze and have available any time. I intend to eat one for breakfast every day this week, so I didn’t freeze mine. If you want to freeze them wrap them in tin foil and lay them on a baking sheet in the freezer. After several hours, they can be transferred from the sheet to a ziplock bag (or to roam free in your freezer if you aren’t as OCD about organization as I am). To heat from frozen state, remove from tinfoil and microwave for 2 minutes. 
If you aren’t going to freeze them, plastic wrap will do the trick. I used the tortilla bag to store my plastic wrapped yummy burritos in. To reheat microwave for 45 seconds – 1 minute. Serve with fruit for a 5 point filling breakfast. 
What’s your favorite breakfast food? 

Meal Planning 101: Week 3

Can I hire a cute boy to make me fresh squeezed orange juice every morning? I’m certain mornings would be much better if I could. 
I didn’t squeeze these oranges for drinkable glass of fresh orange juice sadly. Their destiny was to saturate some angel food cake for a Strawberry Shortcake Trifle that I took to the Easter Celebration # 2. 
I also made an Orange Jello Pretzel Salad. My aunt made it for our family Easter celebration and I loved it so much I had to make it too. I absolutely adore fruity desserts and desserts with a sweet and salty combo. I love this! The crust is salty buttery pretzels, the middle is cream cheese, sugar, and cool whip, and the top is orange jello with crushed pineapple and mandarin oranges. I piped on cute little cool whip dollops. 
It’s a good thing I like it because I have a lot left! Apparently everyone else doesn’t like weird combos as much as me. However, if you do you should try it! I didn’t calculate the points for this because I don’t count on holidays. I did use some low calorie and fat ingredients though. I used reduced fat cream cheese, fat free cool whip, and Splenda sweetened mandarin oranges and crushed pineapple. If I make it again (and not for a potluck), I’d use yogurt butter instead of the real stuff and sugar free jello. I was serving it to mixed company, including one of my dear pregnant friends, and didn’t want to serve anything with artificial sweeteners. 
Now to the real reason for this post! It’s Sunday which means time for me to share my weekly OCD meal plan. The written and planned meal plan has a meal on the agenda for tomorrow, BUT I have so many leftovers I may end up shifting everything over a day. 

I “decorated” with my two favorite Easter candies. 
Monday:
Tuesday: 
Leftovers

Wednesday:

Thursday: 
Leftovers

Friday:

Saturday:

Leftovers

Sunday:

Crock Pot Caesar Chicken on Buns & Caesar Salad
I’ll also be making a batch of Skinny Breakfast Burritos (without the potatoes) to have for easy breakfast for the week and Nutella Fudge Pops (from frozen bananas and Nutella)! 
Notes: 
-I will “skinny” the pasta dish with yogurt butter and whole wheat penne.
-I’m using the meatball recipe as a base, but changing the flavors up a bit by using teriyaki sauce. 
-Ginna at Skinny Taste posted a “perfect” brown rice recipe last week. I’ve never made brown rice I actually liked because of the texture, so let’s keep our fingers crossed for her recipe! 
What are you making for dinner this week? 

Easter Goodness

This year for Easter my family (due to schedules) decided to have Easter Dinner on Saturday instead of Sunday. Thus, I get to go to two celebrations! My coworkers are getting together tomorrow night and I’ll get to attend since I already spent time with family. Which also means… getting to make more goodies! Today my family did potluck style. I brought Skinny Potato Casserole, Skinny Deviled Eggs, and Coconut Macaroons. Tomorrow is more of an assigned food type thing. I have been asked to bring dessert. I’m bringing more of the Coconut Macaroons, Strawberry Shortcake Trifle, and Orange Pretzel Salad. I am also required to bring Sweet Tea to any event with them. I’ll post those offerings tomorrow. 🙂

Coconut Macaroons
exact recipe from skinnytaste.com
I saw Gina at Skinny Taste post these a couple weeks ago and instantly had to make them. I didn’t even take the time to pin the recipe to make later. I literally went to my kitchen and made them. I love coconut. Today I doubled the recipe to have enough to take to both events. However, the recipe below is for a single batch. I also displayed them a top some pretty green Easter basket grass. The first time I used real egg whites, the second I used liquid. I really couldn’t tell a different and felt less guilty about wasting yolks with the liquid. 
Ingredients: 
  • 10 oz sweetened coconut flakes
  • 3/4 cup egg white (or 5 large egg whites)
  • 2/3 cup white sugar
  • 1/2 tsp almond extract 
  • 1/4 tsp vanilla extract
  • pinch of salt
Directions: 
Preheat oven to 300. In a saucepan combine the coconut and sugar over medium low heat. Slowly stir in egg whites until combined. Note: DO NOT turn the stove eye higher. DO NOT pour the eggs in first. You will end up with coconut scrambled egg whites. Trust me. I almost did. Stir until completely combined and not soupy. About 7-12 minutes. It will still be sticky and wet. Place pan in the refrigerator on a plate or towel and let cool for 30 minutes. If you double the recipe, it will take longer. I ended up putting mine in the freezer. Spoon packed tablespoons full on a parchment lined baking sheet. You can put the cookies close together because they don’t spread. Bake for about 30 minutes. Bottoms will be golden and look like toasted coconut. The tops will start to brown just slightly. 
They are 3 points on Weight Watchers for 2 cookies. 

————————————————–
Skinny Cheesy Potato Casserole
recipe from EmilyBites.com
I used her recipe exactly, I just put in extra onion (I love onion). 
Ingredients: 
  • 32 oz bag of frozen cubed potatoes, defrosted
  • 1 medium chopped onion (she said 1/4 cup)
  • 1 cup fat free sour cream
  • 1 can of 98% fat free cream of chicken soup
  • 1 cup 2% sharp shredded cheddar cheese
  • salt and pepper to taste
  • 1 cup corn flakes, slightly crushed
Directions: 
Preheat oven to 350. Mix all ingredients in a large bowl except corn flakes until well combined. Don’t forget to add salt and pepper. Spread evenly into a lightly sprayed 9 x 13 baking dish. Top with corn flakes and bake for 1 hour.
For 8 servings it’s 5 points per serving. However, at a potluck no one is eating 1/8th of the casserole so it’s probably less. 1/8th is a hearty portion for a side. 
————————————————–
Skinny Deviled Eggs
recipe from RecipeDiaries.com

I used her recipe exactly, even the egg cooking method! The only thing I did differently was double the recipe and use 1/2 green onions and 1/2 chives. The recipe below is for a single batch. 
Ingredients: 
  • 12 large hard-boiled eggs, peeled
  • 1/3 cup fat free cottage cheese
  • 1/4 cup low-fat mayo
  • 3 tbsp chopped green onion tops or fresh chives (or 2 tbsp dried chives)
  • 1 tbsp sweet pickle relish
  • 2 tsp yellow mustard
  • 1/8 tsp salt
  • paprika, for garnish
Directions: 

Okay. I know this may sound crazy. It did to me at first too, but when I realized it was Alton Brown’s method for hard-cooked eggs, I decided to give it a try. These “boiled” eggs weren’t boiled at all! I preheated the oven to 325,  sat the eggs straight on the oven rack, and baked them for 30 minutes. Put a sheet pan under it just in case one cracks. One of mine did indeed crack, but I let it cook anyway. I was so excited to break it open and see that it actually worked!

The little guy who didn’t quite make it. 


Immerse the eggs in an ice bath and let them cool down for about 30 minutes. If you want to do the tried and true boiling way, you can too! But these made the creamiest yolks, perfect for deviled eggs. Once your hard cooked eggs of choice are cooked and peeled, cut them in half and discard the yolks of 4 of the eggs. Add the remaining 8 egg yolks (16 halves) in a food processor. Add all other ingredients except egg white halves. Process until smooth and creamy. Spoon mixture into a ziplock bag. Arrange egg white halves on a plate in a pretty fashion. Cut the tip off the ziplock bag and pipe the mixture into each half. Sprinkle with paprika for garnish. 


They are 1 point on Weight Watchers per egg half. These were so good! Everyone in my family loved them, no one could tell they were lighter at all, and no one could guess the secret ingredient (cottage cheese) either! 


Enjoy your Easter celebrations. The meaning of this holiday truly is one of my favorites and the greatest. He is risen and we are forgiven. What are you cooking for your celebrations? 


My Perfect Iced Coffee [& Monkey Bread]

We established during our BLT discussion that my brain and taste buds have their own strange set of odd rules (no soup and grilled cheese unless it’s cold outside, BLTs and melons are only for Spring and Summer, etc.). I discovered two new ones. Apparently I don’t feel like crafting unless it’s Fall/Winter. I’ve totally failed at keeping DIY Club going this Spring. I also made up a rule somewhere along the way that I’m not allowed to wear red on Easter Sunday.

I have this really cute wrap dress I’d like to wear as my Easter dress this year, but I’ve been having this internal battle that I can’t wear it because it’s in the red family. It’s one of the Spring pop colors apparently, the tomato tangerine red orange color, and I love it! Where the heck did I get this concept from?! I have a feeling it’s somehow to be blamed on my Southern roots and upbringing. Maybe I just associated the numerous pastel Easter dresses I had growing up with being the opposite of red.  Who knows. Regardless, I’m forcing my brain to get over it and wearing the dress. I might even try to make a soup between now and September.

However, there is one weird quirk I’m not willing to let go of and fully embrace. I can’t drink hot beverages from mid February to mid September (which is pretty much the Mississippi version of Summer). However, I love and must have coffee! Financially, I can not rely on my Starbucks Batista to provide my coffee for me every day. I’ve experimented with making my own iced coffee for several years. A fellow food blogging friend led me to a great way to make coffee concentrate for iced coffee last year. I liked that a lot, but it does take some effort and time. I also experimented with low cal frappes using instant coffee last summer. But I finally concocted the perfect (for me) iced coffee.

It uses Starbucks Via Iced Coffee packets. Depending on where you get them, they can be on the pricey side. They are more expensive at Starbucks, but you can get them at Kroger and Walmart as well. I happened upon them at Sam’s for a really great deal! Normally one box of five packets is close to $5. Last summer at Sam’s they sold them in two box packs (10 packets) for $2.81! I loaded up! I’m still using my stash from last summer. Unfortunately they aren’t selling them at Sam’s right now (I called), but sometimes things are seasonal there so I’m hoping they will bring them back for the summer. I like using these because they dissolve in cold water. Regular instant coffee has to be dissolved in hot water first.

Easy Iced Coffee

  • Servings: 5
  • Difficulty: EASY
  • Print

I was inspired by Pioneer Woman‘s Perfect Iced Coffee Recipe. However, I wanted a easier and more Weight Watchers friendly version. It’s 3 points for a good sized (16 oz) serving! (Which is less than any flavored specialty beverage that my favorite barista can make.) 

INGREDIENTS:

  • 2 packs of instant Starbucks Via Iced Coffee
  • 2 cups of skim milk (I use Great Value organic because it has a longer shelf life)
  • 4 cups of cold water
  • 1/4 cup of Bailey’s Fat Free French Vanilla Coffee Creamer (or any of your favorite liquid coffee creamers)
  • 3 tbsp fat free sweet condensed milk (I use Great Value)

DIRECTIONS:

I use my cute little 2 quart jug from Target. You could use any container you have. Pour the Via packets in your container of choice. Add creamer and 1 cup of milk. Shake shake shake. Shake until the Via dissolves or almost is completely dissolved. Add remaining milk. Add water one cup at a time. Via is strong just like Starbucks brewed coffee. I’m not a fan of uber strong coffee. So this combination is perfect for me. Each packet calls for 16 oz of liquid. I double that amount and it’s a perfect strength and taste for me. Tastes similar to the strength of McDonald’s iced coffee or has a similar strength of a Starbucks frappuccino vs. the brew. Once you get all the liquid in, you may be able to shake it a little, but I advise stirring.

And then… I made something unhealthy(ish), but I highly recommend that you make this one a day when you are having a cheat day. The pictures are awful! It was dark, daylight pictures are better. Some day soon (very soon) I’ll be making these again, making them healthier, calculating the points, and taking better pictures. I lightened up the original recipe a little, but one of my RAs assisted me and brought out the real butter. I used fat free sweet condensed milk instead of regular. There’s no turning back when that happens. I made biscuit dough from Heart Healthy Bisquick instead of using regular canned biscuits. Next time I’ll also use Brummel and Brown yogurt butter.

Monkey Bread Muffins

  • Servings: 12
  • Difficulty: easy
  • Print

Inspired by Pioneer Woman’s recipe.

INGREDIENTS:

  • 3 cups Heart Healthy Bisquick
  • 1 cup of skim milk
  • butter (can substitute yogurt butter)
  • cinnamon
  • sugar
  • fat free sweet condensed milk

DIRECTIONS:

Preheat oven to 375. Mix Bisquick and milk until combined. Place dough on a floured surface and knead, folding over and over about 10 times. Spray your muffin tin. Add a little pad of butter, about 1/2 tsp, in each muffin cup. Sprinkle cinnamon and sugar on top of each. Pull walnut sized balls of dough off and roll in the palms of your hands. Place three dough balls in each muffin cup. Add another little pad of butter, about 1/2 tsp, on top of each. Sprinkle each with cinnamon and sugar. Bake for 15 minutes or until golden brown. Immediately drizzle LOTS of condensed milk on top. Let soak in for 1 minute. Spoon out and enjoy!

Meal Planning 101: Week 2

It’s that time again! As promised, every Sunday I will post my weekly meal plan. AND technically it’s still Sunday. It’s a mostly simple promise to make and follow through because I do it anyway. Every week (or two weeks to be exact) I sit down and plan out my meals, shop for the needed ingredients, write them out on my cute little listy things, and do my happy meal prep. (For meal planning basics, tips, and tricks see the first Meal Planning 101 Post.)

Yes. I am an UBER dork and have a meal planning list for
dinners AND lunches.  It helps me make healthy choices! I also
write down breakfast options on the kitchen dry erase board.

Monday:
Key West Grilled Chicken Kebabs, Grilled Mushroom Skewers, Grilled Peppers and Red Potatoes

Tuesday:
Leftover Grilled Smorgasbord

Wednesday:
Key West Chicken Salad (Round 2 Recipe*) and Grilled Corn

Thursday:
Turkey BLTA* Panini and Chopped Spring Salad*

Friday:
Grilled Lemon Peppered Tilapia, Grilled Squash, and Tomato Quinoa Salad (a variation of this IF I can find quinoa)

Saturday:
Leftovers

Sunday:
Easter Dinner with the family! We do it entire family style at my Aunt’s. I’ll likely bring coconut macaroons, coconut cupcakes, skinny deviled eggs, and skinny red potato salad.

Notes:
*Round 2 Recipe – The term came from Sandra Lee. She always makes meals and then does a 2nd meal with the leftovers. I try to do this when it’s an option because it’s saves money and time.
*BLTA – Bacon Lettuce Tomato + Avocado.
*Chopped Spring Salad – Salad greens and normal salad ingredients like cucumbers and tomatoes + chopped apples, pears, cranberries and other fruity springy things.

What are you making this week? What are your family’s Easter Dinner traditions? 

Veggie Fries & Skinny Sweet Onion Dip

As a meal planning maniac, I’m always on the look out or new ways to do veggies. Veggies are good for you and many are free points on Weight Watchers. I also hate being repetitive in my cooking or getting bored with the idea of anything I want/plan to cook. Therefore, I mix it up often. As I meal plan, I always start with the main dish and build around it. When I picked BLT Lettuce Wraps as a main dish for the weekly menu, I thought it would be a good time to incorporate something still healthy, but a little less healthy than my normal zero or as close to zero point veggie side attempts.

This past September a friend and I had just discovered Pinterest. We were obsessed and looking at recipes and DIY projects like crazy. She found a baked zucchini sticks recipe with a rich onion dipping sauce. I found a cute wreath idea. And thus began our afternoon. The sticks and dip were divine! I knew someday I’d make them again. The baked zucchini sticks were perfect as is, low fat and tasty. The dip however, needed some Weight Watcher friendly adjustments calling for 1 cup of full fat mayo in the original recipe (which is exactly how we made it the first time).

I like things in threes. It’s more pleasing to the eye and it just makes sense. A meal doesn’t feel rounded to me unless it has three. What pairs well with BLT Lettuce Wraps and Baked Zucchini Sticks? Sweet potato fries of course. It officially became a meal I was super excited to make.

Anything that stars with caramelized onions is a winner in my book. Onions cooking on a stove top truly is one of the best smells in the world to me. So let’s start with the dip. (In actual chronological cooking/prep order, I wouldn’t do the dip first. Cut the veggies and let them do their assigned marinating/liquid shedding tasks first. While they do that, work on the dip.)

Skinny Sweet Onion Dip

  • Servings: 8
  • Difficulty: EASY
  • Print

adapted recipe from kingarthurflour.com’s

INGREDIENTS:

  • 2 yellow or white onions, sliced
  • 1 tbsp olive oil
  • 1 tsp powdered sugar (optional)
  • 2 tbsp cider vinegar
  • 2 tbsp honey
  • 1 tbsp spicy brown mustard
  • 1 cup Kraft Fat Free Mayo
  • 1/4 tsp salt

DIRECTIONS:

Heat oil over medium-low heat. Add onions and cook, stirring occasionally. Even though it’s tempting, don’t turn the temperature up to cook them faster. Medium-low, 4 or 5 on my stove, is perfect. Let them get caramelized and browned. You want to see brown. It’s essential for the flavor and color of the dip. They should cook for 25 minutes. When there is 5 minutes remaining, you can sprinkle some powdered sugar over the onions. I feel like this helps them brown a little more and adds to their sweet caramelized flavor.

Add vinegar, honey, and mustard into a small food processor. I used my big one because I enjoy using it. A blender would also work if you don’t have a food processor. When the onions finish add them to the processor. Pulse until it sort of resembles the consistency of apple sauce. Fold in mayo until onion mixture and mayo are combined, smooth, and creamy. Stir in salt.

Now to go with our amazing savory sweet oniony dip, we need things to dip.

Baked Zucchini Sticks

  • Servings: 4
  • Difficulty: moderate
  • Print

Original recipe at kingarthorflour.com. I pretty much followed her instructions and recipe exactly, but I used egg beaters instead of eggs, Italian seasoning instead of pizza seasoning, and part reduced fat parmesan and part regular shredded.

INGREDIENTS:

  • 3 – 4 small to medium straight zucchinis
  • 1 tbsp salt
  • 1/2 cup Egg Beaters (or 2 large eggs beaten)
  • 1 cup Panko bread crumbs
  • 1/4 cup shredded parmesan
  • 1/4 cup reduced fat parmesan

DIRECTIONS:

Wash zucchini and cut into 3 inch sticks. She posts a perfect picture on how to cut them (I forgot to take one during that step). The way it worked best for me was to cut it in half, not lengthwise, but down the middle. Think hamburger cut not hot dog cut. Cut off the ends. Stand each half on a flat end. Cut in nines. Like a tic tac to board sort of. Two cuts north to south and two cuts across west to east. You’ll end up with 9 pieces from each half, 18 per each zucchini. Put all the pieces in a strainer and place a bowl under it. Sprinkle the entire tablespoon of salt over the sticks. Sit the zucchini in the refrigerator for at least an hour and let the salt work it’s magic. DON’T skip this step! It’s essential for ending up with firm crisp sticks and not soggy wet ones. It really does drain a lot of water (see above picture with odd light green looking liquid).

Once the hour passes, preheat over to 425. Discard zucchini liquid and rinse the sticks well with cold water. Lay them out on a clean kitchen towel and dry. Pat gently to remove any excess liquid. Dip sticks one by one in the egg and then roll in the crumbs. Use the one wet hand one dry hand method and really do them one at a time. If you dump them all in the crumbs mixture it will get gloppy and you’ll have to add more. Place on a parchment lined baked sheet close together. Bake for 12 minutes and then flip them. You can use a spatula to flip, but I find it easier to just quickly do it by hand. Bake an additional 15 minutes until browning and crisp. To reheat leftovers bake for 10-15 minutes on 375.


Spicy Baked Sweet Potato Fries

  • Servings: 3
  • Difficulty: moderate
  • Print

Original recipe at tastykitchen.com. I followed the recipe exactly. I just subbed the cayenne for Tony’s like a true Mississippian/Louisianan would do.

INGREDIENTS:

  • 1 sweet potato
  • 2 tbsp olive oil
  • 1/2 tsp kosher salt
  • 1/4 tsp freshly ground black pepper
  • 1/2 tsp Tony’s

DIRECTIONS:

Preheat oven to 425 (I cooked the potatoes and zucchini at the same time and same temp). Wash and peel sweet potato. Cut into 1/2 inch sticks. Toss the sweet potato sticks, olive oil, and seasonings in a bowl until coated. Arrange fries evenly on a parchment lined cookie sheet. Bake for 15 minutes and turn them. Bake for 15 minutes longer or until firm and crisping.

Happy April Fools Day! Fool some people with these healthy baked “fries.” They’ll never miss the oil and deep fryers.

BLT Goodness

I’m not the world’s top expert at saying no. Yes eases off the tongue a good bit easier for me. Saying no is something I have to practice and be intentional about. If not I’ll end up on 23 committees, with 47 projects, stressed and way over committed. 
However, some things are easier to say no to. Can you give me your username and password so we can share the account that you pay for? No. Can I drink the last bit of your milk. No. Can I drink your last Dr. Pepper 10. No. Can you fold my clothes? No. Can I use your toothbrush? No. Okay. I’m mildly being silly. I probably would let you drink the last of my milk and my last Dr. Pepper 10. But I have to give myself a pep talk every time I fold my own clothes, so good look with that. And no. I really won’t give you my password and username or let you use my toothbrush. 
Even if you don’t have the Can’t-Say-No-Syndrome like me, there are just some things you don’t want to say no to. You could call them impossible to say no to. Red Velvet cake for breakfast. Just can’t say no. Starbucks iced and blended beverages. Nutella on a spoon out of the jar. And…
One word. 

Bacon. Who can resist? Not me. I actually don’t eat bacon often. I do “real” bacon bits on my salads and in green beans, but I don’t crave/need/want/must have bacon until Spring and Summer. Why? Thee letters.
B – L – T. So simple. So classic. So perfect. So irresistible. I actually don’t enjoy the traditional bacon or way of cooking it. It’s greasy and poppy and makes the entire house smell like grease. However, when I started Weight Watchers I discovered Oscar Mayer Fully Cooked Bacon. It’s center cut [read less fat], microwavable, AND only TWO points per serving. And a serving? FOUR slices! I haven’t bought or had it since fall arrived. 
My taste buds and brain are weird about crossing things I consider to be seasonal foods over to other seasons. (Examples: I can’t eat soup or grilled cheese unless it’s Winter or Fall. I can’t drink hot beverages in Spring and Summer. I don’t eat guacamole, watermelon, avocados or pineapple in the cold weather seasons.) So, I equate BLTs with Spring and Summer. Fresh tomatoes from my Pawpaw’s garden are probably to blame for this. 
Here in the HOT great South, we’ve been in full Spring swing since January. (A slight exaggeration but not by much.) I pinned Skinnytaste’s BLT Lettuce Wraps long ago, in anticipation of seasonal BLTs. I pretty much followed her recipe exactly with a few minor alterations. I used fat free mayo, the aforementioned microwaveable bacon, romaine lettuce leaves, and chopped grape tomatoes. I recently attempted my first Lettuce Wraps with iceburg leaves as she suggests. I failed! They broke and did not work at all for me. A head of romaine is $1.00 at Wal-mart and seems to be a little more substantial to me. 
BLT Lettuce Wraps
original recipe from skinnytaste.com
Ingredients: 
  • 16 slices Oscar Mayer fully cooked bacon
  • 1 1/2 cups grape tomatoes
  • 3 tbsp Kraft Fat Free Mayo
  • 6 romaine lettuce leaves, hard ends removed
  • 1 cup chopped lettuce
  • salt
  • black pepper

Directions: 
Microwave 8 slices of bacon at a time for 60 seconds. Blot off excess oil. Chop and set aside. Chop grape tomatoes. I cut them in half, then little circles and discard the excess seeds and juice. Stir mayo into tomatoes. Add salt to taste to tomato mixtures. I wouldn’t add too much, because the bacon has a natural saltiness. Add fresh cracked black pepper to mixture.

My recipe yields 3 servings of  2 wraps per serving. To build a wrap sprinkle a little chopped lettuce in the romaine cup. Spoon 1/6th (a couple tablespoons) of the tomato mixture on top of the lettuce. Sprinkle 1/6th of the bacon on top. Tuck the bottom harder end in a bit and then roll the lettuce wrap over from side to side. It’s a little flimsy still, so I just wrapped mine in a napkin.

Each serving (2 wraps) is 4 points on Weight Watchers according to the recipe builder.

I served these with baked zucchini sticks and baked sweet potato fries dipped in skinny caramelized onion dip (recipes coming soon). 

Chicken and Broccoli Noodle Casserole

If you’ve been following, you know that one of this week’s meals was Skinnytaste’s Chicken and Broccoli Noodle Casserole. Oh my goodness was it good! I served it to four RAs and myself for one of their birthdays this week. They all LOVED it. They had seconds and thirds and raved about it the entire time. I even got a few more comments from the eaters the next day. You know you made a good meal when people still talk about it days later.

Chicken Broccoli Noodle Casserole
adapted from skinnytaste.com

With some basic ingredients and a little effort you can have a yummy, filling, impressive casserole. It’s a creamy casserole with absolutely NO cream of anything canned soups. I only changed the recipe just slightly. I used skim milk instead of 1% and Great Value whole wheat extra wide noodles instead of the more expensive brand. The other changes were minor as well and just based on my personal preferences. I’ll write the recipe with the changes I made, but please see the above listing for the original.
I make my own bread crumbs from lower calorie bread, freeze them, and always have them on hand for recipes.

Doing a little prep work the night before or on your prep work day is a great way to make this meal take less time to prepare. Things you can do before: make bread crumbs, make chicken stock, make shredded chicken and pre-measure it out, and chop onions to keep on hand for recipes. 
I used the shredded chicken I made on meal prep day on this recipe. I also rely on my good scale OFTEN! 

Ingredients:

  • 6 oz Great Value extra wide whole wheat noodles
  • 2 tsp olive oil
  • 2 tsp minced garlic (I used the jarred kind)
  • 14 oz bag of frozen broccoli
  • 1 tbsp butter
  • 1 medium sweet onion, minced
  • 3 tbsp all purpose flour 
  • 1-3/4 cups fat free chicken broth
  • 1 cup skim milk
  • 12 oz cooked shredded chicken breast
  • 4 oz shredded reduced fat cheddar (I used half sharp, half mild)
  • cooking spray
  • 3 tbsp shredded parmesan cheese
  • 2 tbsp seasoned breadcrumbs
Directions: 
Cook noodles in salted water until soft with a little bite. Drain and set aside. Noodles will cook in the oven too, so under cooking them just slightly is okay. Preheat oven to 375. Heat oil in a skillet. Add garlic and cook on medium heat until golden brown. Add frozen broccoli and saute with oil and garlic until broccoli gets soft and a few sprigs are just barely turning brown. Set aside. In another skillet heat butter until melted. Add minced onion and a little salt to sweat the onions, cook until translucent and soft. Add flour. Cook 2-3 more minutes coating onions in the flour. I like to multitask to minimize time, so I was cooking noodles, broccoli, and onions all at the same time. I recommend doing it that way, but if it stresses you out do it at your own pace and own way. 
Add chicken broth to the onions and flour. Whisk in slowly. Stir in milk and bring to a boil. Simmer, stirring occasionally until thickened. Remove from heat and stir in cheddar cheese and 1 tbsp of the parmesan cheese. Mix until cheese is almost completely melted. Add the shredded chicken, broccoli and noodles. Stir until everything is coated and pour into a sprayed 9 x 13 baking dish. Top with remaining parmesan cheese and bread crumbs. Spray cooking spray lightly on top and bake for 25-30 minutes. 
I always have to think really hard about sides for dishes like this. Casseroles often have everything in them! Starch, veggies, dairy. Steam in the bag veggies can be great side dishes if you doctor them up a bit. I served this with two additional veggies, one starchy and one green. I made steam in the bag corn with a tablespoon of yogurt butter, a little salt, a good bit of fresh cracked black pepper. I also made steam in the bag brussel sprouts. I quartered them after they cooked. That part is a little hot, but just do it fast! It’s worth it. People will like brussel sprouts if you chop them up a bit. I sauteed them in some yogurt butter and added Tony’s with a heavy hand (I love that stuff!).

I didn’t calculate the points for my version, but it would be equal to or less than hers since I used skim milk. Her recipe is 8 points for 1/6th of the recipe.