5 Minute Fruit Crisp

As you surely know, I love Weight Watchers. It’s the only “diet” that works for me, even if it’s not working so well right now. Okay well even if I’m not doing it so well right now. Shhhhh. Don’t judge my lack of motivation and efforts. Students will be gone soon and there will be no more late night parties, end of the year celebrations, midnight movie premiers, or “hey look, I bought a dozen Krisy Kreme donuts and I’m bringing them to your apartment to share” moments until August! Don’t get me wrong, I will totally miss those faces like crazy. In trying to be positive about summer transitions, I got super excited about the mostly unlimited possibilities to eat healthier for a few solid months and catch back up on my weight loss. 
However, weight loss doesn’t exist or work for me without dessert! Call me crazy, but I definitely loose more weight knowing I can have dessert than cutting it out. I love to make healthy desserts and made over desserts. Without RAs or students here to feed made over (or not so made over in some cases) desserts to, a problem arises! Even healthy made over desserts have leftovers. Desserts are good for treats, not constant access! So what do we do? Oh I know! Make individual 5-minute microwaveable desserts. 
5-minute microwaveable desserts are totally in right now. This summer without RAs and living in a foreign kitchen, microwaveable desserts will be my weight loss dieting life savers. I was inspired for this particular recipe by Jo and Sue’s Blog. Check them out! They have a ton of 5-minute desserts. This one is my new favorite, inspired by their 5 Minute Apple Crisp
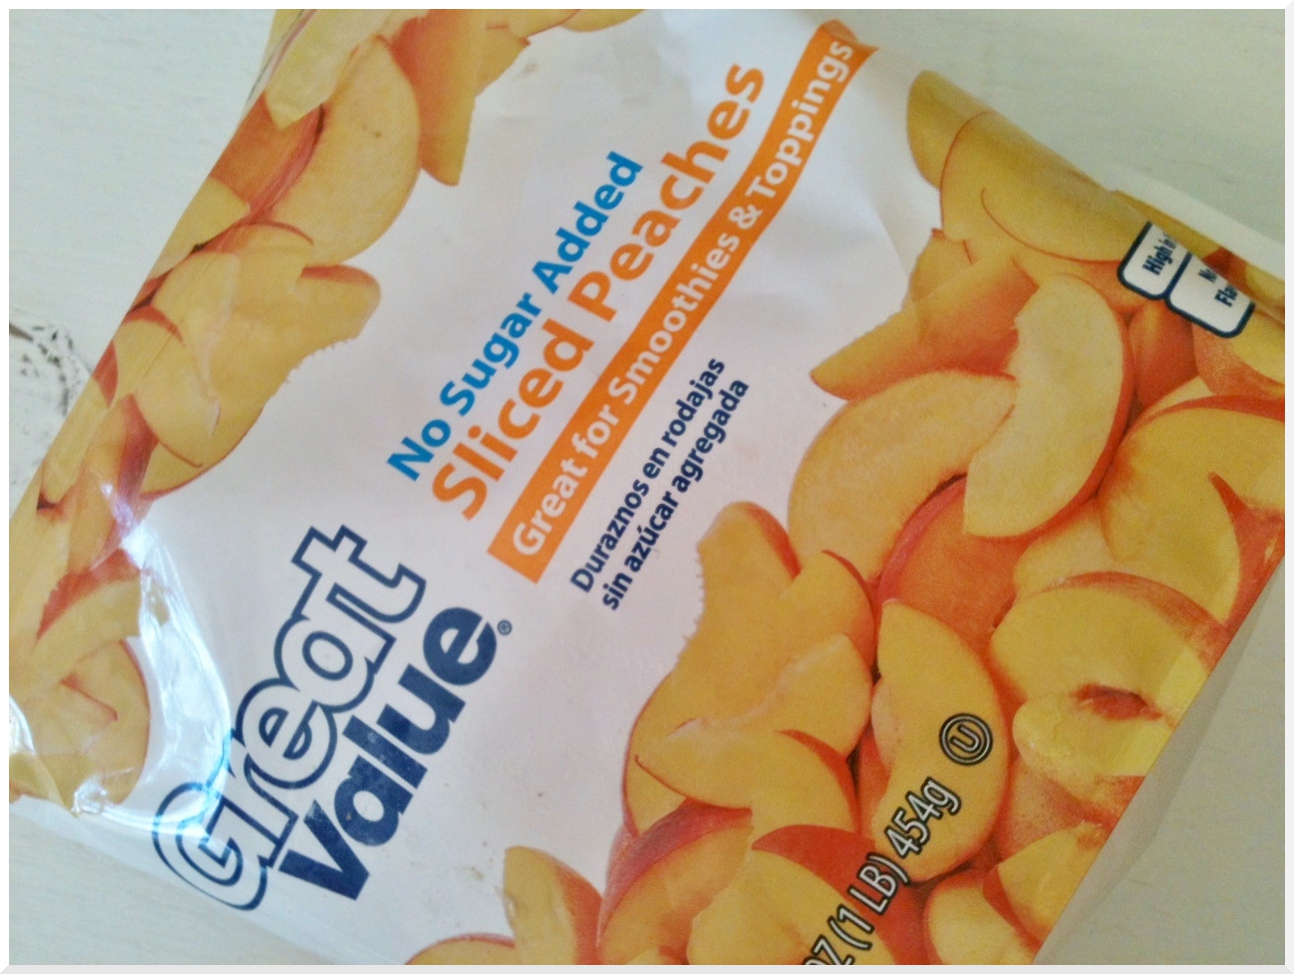
Pro tip – keep these in your freezer! I’m fairly certain there are endless dessert and treat possibilities found in this bag. 

5 Minute Peach Berry Crisp

Kasia’s Kitchen original, inspired by Jo and Sue

Ingredients: 

  • 3/4 cup of frozen peaches, chopped
  • 1/2 cup strawberries, chopped
  • 2 packets of Splenda
  • 2 teaspoons of cornstarch
  • 2 tablespoon brown sugar, packed
  • 3 tablespoons quick oats
  • 1 tablespoon Brummel and Brown yogurt butter
  • 1 tablespoon whole wheat flour
  • 1/4 teaspoon cinnamon
  • splash of vanilla
  • dash of salt

Directions: 

Microwave chopped peaches in a ramekin for 2 minutes. FYI – the peaches are really easy to chop even in their frozen state. Add strawberries, Splenda and cornstarch to the peaches and stir until well combined. Return to microwave and heat for 1 minute. 
In a separate bowl combine the remaining ingredients. Mix with a fork until combined and crumbly. (Or you could just jump in there with your fingers and get messy like I did. It was fun.) 
Top peach and strawberry mixture with the crumble. Return to microwave for 1 minute. Tip – put a napkin in the microwave for this step! The first time I didn’t and had spillage all over the microwave plate. This time I did, see? The napkin caught the spill. 
Yields one large serving. On Weight Watchers recipe builder if you could the fruit it’s 8 points and if you don’t it’s 6. I choose not to count the fruit because fruit is free if it’s without your 5-8 servings a day! You can make that choice for yourself. 
Remember when I made frozen yogurt bites? Three of the little bites make this perfect quick and easy treat even better. It feels like a fruit crisp with ice cream, but way healthier! 

Pin It

Meal Planning 101: Week 6

This week’s meal plan was an easy one for me and regretfully not very helpful for you! There are a few crazy weeks in the Higher Education world for the life of a Resident Director. The beginning, middle and end tend to be a good bit busier than the rest. From last week until next Saturday life is crazy here. 
Crazy life does have its benefits though. I actually love the end of Spring semester because everyone is in a jumbled mix of making the most of every moment before summer, studying for finals, packing and sleep deprivation. Good memories are made. Another plus? Free meals! This week there is a banquet and two lunches I won’t have to pay for. There’s also a last meal with my RAs, a meal together because they can’t eat in the Caf anymore, and some of them have points left to use up in the Caf, so that usually involves free things for me too. 
This time next week when I post my weekly plan, I’ll likely be more rested and a little sad. My RAs will be gone. Some will be returning in the fall, some are moving on or getting married. I’ll also probably be pouty. I have less than two weeks to completely pack up my apartment, put most into storage, and live in a student apartment for the summer while they renovate my building and apartment. In July when I get to move back in, I’ll be happy to have a renovated apartment. For now, moving stinks! Don’t be surprised if next week’s plan has either comfort food, lazy food, chocolate or McDonald’s as I cope with change. 
I would apologize for my lack of meal ideas for this week, but I’m never sorry about free food. (Except for maybe on weight in days and the aftermath of the free food, eek. Maybe I won’t weigh in this week…) I’ll use the extra time I have from not cooking meals to make the most of my moments this week. Okay and maybe I should pack a little. Wanna help? I’ll bake you something! 

Highlights From Last Week’s Meals


Baked Tilapia with Jalapeno Cream Sauce, Pea Salad & Roasted Squash. 

Baked Taco Shells! Put them right on oven rack.
They were perfect carriers for Crock Pot Salsa Chicken Taco Salads. 

Another batch of the Perfect Brown Rice. Look at it? It really is perfect! 

Mexican Brown Rice Casserole (without spinach, replaced corn with). 

Monday:

Ground Beef Stroganoff Casserole and Roasted Snow Peas & Carrots (didn’t get to it last week)

Tuesday:

Leftover Casserole

Wednesday:

Dinner Out with RAs

Thursday:

Residence Life End of Year Banquet

Friday:

I want to go see the Avengers! So I’m hoping someone else will want to which will involve friends, dinner and a movie OR leftovers before friends and a movie.

Saturday:

Melt In Your Mouth Chicken, Oven Baked “Fried” Okra and Country Potatoes

Sunday:

Some combination of leftovers and snack at my first time attending small group

What are you eating this week? Also, help me think through the kitchen essentials I should most definitely bring with me and not leave in storage for the summer? 

Pin It

Pineapple Right Side Up Cupcakes

Did you know that April 20th is National Pineapple Upside Down Cake Day? I totally didn’t! The moment I found out (via a tweet or blog or something), I became mildly obsessed with the notion that I MUST make something involving pineapple, cherries, cake and brown sugar. And so I do! I find a healthy pineapple cupcake recipe on my favorite healthy eating blog, skinnytaste.com, and adapted it to be a pineapple upside down cake-esque dessert. I fed these to a bunch of college girls and they all loved them.

Pineapple Right Side Up Cupcakes

Original recipe by Skinny Taste (I made mine to be more Pineapple Upside Down Cake-ish).

Ingredients

Cupcakes:

  • 1 box of yellow cake mix
  • 20 oz can crushed pineapple in juice (do not drain)
  • 1/4 cup brown sugar

Frosting:

  • 8 oz 1/3 less fat cream cheese
  • 20 oz can of pineapple in juice, drained (squeeze really well in your hands to get out all the juice)
  • 1 1/2 cup marshmallow cream
  • maraschino cherries for garnish (optional)

Directions

Mix cake mix and 1 can of pineapple WITH the juice. I used my KitchenAid stand mixer. Use an ice cream scoop to fill lined cupcake tins about 2/3 full. Bake according to cake mix directions or until a toothpick inserted comes out clean. Set aside to allow to cool completely on cooling racks.

Drain the other can of pineapple. Like super crazy drain! I drained it in a mesh strainer and then put it in my hands, freshly washed of course, and squeezed out the excess juice. Combine cream cheese, crushed pineapple and marshmallow cream and mix until combined well. Again, used my stand mixer. Spread on completely cooled cupcakes.

For a fun garnish and to get the Pineapple Upside Down Cake Day theme across, I added maraschino cherries. I took the stems off half of the cherries and stuffed one inside each cupcake for a little filling surprise. I garnished each with a stem on cherry. On a couple that I presented to others, I dusted a little brown sugar on top to set in the purpose of the cupcake even more.

Cupcakes with no icing are 3 points each according the Weight Watchers Recipe Builder. With just icing they are 4 points each. With icing and cherries they are 5 points each. Even at their highest, they are way better than any regular cupcake a far as points values go.

Yields 24 servings. 

Pin It

Homemade Garlic Herb Croutons

Do you like salads? If you do, I bet you don’t like them with just lettuce or only green things (and if you do, I’m impressed). How do you feel about croutons? I happen to love them. They add a nice crunch and flavor. Croutons are to salads as pearls are to a cute sundress. It’s true. Salads need accessories too.

Now let’s talk about bread. I bet you have it. I bet on occasion you end up tossing some pieces that get old or moldy. Allow me to share my collection of bread tips.

1. If you do end up with moldy bread on occasion, you can lengthen the life of your bread like whoa by keeping it in the fridge. I’m just me with no husbands or kids to eat bread and a loaf usually last me a month.

2. Don’t care for the ends? Don’t toss them! Keep a bag in a the freezer and collect any bread butts (that’s what I call them), funky pieces or smooshed pieces. Things to also toss in that bread freezer bag: extra bread of any sort that will soon go bad – hotdog buns, hamburger buns, white bread, wheat bread. ALL THINGS BREAD.

3. Don’t like the texture of your refrigerated longer shelf life bread? Two options. 1 – Toast it. I love a sandwich on toast. I also just love toast. Toast with Nutella, toast with peanut butter and bananas, toast with yogurt butter, cheese toast, cinnamon toast. 2. Microwave it for 5-10 seconds. It will be as fluffy and soft as new.

4. So you have a bag of frozen bread… Now what? My favorite choices are bread puddings, homemade bread crumbs (which I also keep in the freezer after I make them and have for the many recipes that call for them), and now… CROUTONS!

I am almost certain you have everything you need to make your own croutons which means… A. FREE, sorta. I mean you bought the stuff you have to make them at some point. But in comparison to buying croutons, FREE. B. You can make them healthier. C. They taste way better. 

Homemade Garlic Croutons

Recipe inspired by Savory Sweet Life

Ingredients: 

  • 6 slice of bread (I used Sara Lee Delightful 45 Calorie Wheat Bread)
  • 3 tablespoons melted Brummel and Brown yogurt butter
  • 2 teaspoon garlic powder
  • 1/4 teaspoon salt
  • 1 1/2 teaspoons dried parsley flakes

Directions: 

Preheat oven to 300 degrees. Cube the six slices of bread. If you don’t like crusts, you can removed them, but I like them and leave them on. I cut them in threes each way. Mix melted butter, garlic powder and parsley flakes together until garlic powder is dissolved. Toss the butter mixture and bread cubes in a large bowl together until the bread is evenly coated. 
Spread the coated bread cubes on a parchments or foil lined baking sheet. Bake for 15 minutes and check to see if they are dry, crispy and golden brown. Stir the croutons around and bake for additional minutes according to your preference. I cooked mine for about 20 minutes total, but I like them with just a touch of softness. Store croutons in a ziplock bag (or any air tight container, I’m partial to mason jars) and they will keep fresh for a few days. 
I like making these because you can make as many as you need, less or more than this recipe even. I even like them as mouth popable little snacks. 
Yields 6 servings of 1/3 cup portions. Each serving is 2 points on Weight Watchers according to the recipe builder. 
I made Crock Pot Caesar Chicken on English muffin rolls with side Caesar salads complete with these yummy croutons. As a Round 2 recipe I did big Chicken Caesar salads with leftover shredded chicken and croutons of course. 

Pin It

Meal Planning 101: Week 5

A day late, but as promised, a weekly meal plan! 
You know I love my lists and organization. I have this fear that when I run out of my days of the week notepad, I won’t be able to find a new one. So far, I’ve been lucky. I’ve been able to find them (in different forms) for several years. However, if you happen upon days of the week notepads, I wouldn’t hate it if you bought one for me. I also love when you get the the last page of a notepad and get to open a new one! Today I got to open the lovely lemon grocery list pad complete with categorized sections. 

Proof that I do cook healthy most days (in case the whoopie pies tricked you). Greek turkey burgers, sweet potato & beet hash, melon salad. 

Monday:
Greek Turkey Burgers, Sweet Potato & Beet Hash and Watermelon & Cantaloupe Salad (didn’t get to this last week)

Tuesday:
Grilled Tilapia with Jalapeno Sauce, Roasted Squash and Spicy Pea Salad

Wednesday:
Leftover Tilapia

Thursday:
Crock Pot Salsa Chicken Tacos and Mexican Brown Rice Casserole (sort of – making it without spinach or corn)

Friday:
Leftover Chicken Tacos

Saturday:
Chicken Taco Salad in Baked Taco Shells (Round 2 Recipe)

Sunday:
Ground Beef Stroganoff Casserole and Roasted Snow Peas & Carrots

I’ll also be making some Chocolate Banana Bread. I got a big bag of bananas at Wal-mart for $1! They were beginning to brown so I guess they were trying to get rid of them.

My apology bribe for being a day late? A sneak peak of the healthy Pineapple Right Side Up Cupcakes I will post soon. Did you know last Friday was Pineapple Upside Down Cake Day? Well it was, and I partook. 
What’s on your menu this week? 

Perfectionism & Oatmeal Whoopie Pies

I have a confession…
I’m not perfect.
I’m just not. I try to be, even though I shouldn’t try to be and in no way can I ever be. I struggle with perfectionism. It’s true. 
I just want to say out loud that I’m not perfect. I also want to say that I’m not always okay with not being perfect, but I’m trying to be.
In case you didn’t know, not every thing I cook comes out so well. It just doesn’t. One time I tried to make a homemade angel food cake and it looked far more like a flat frisbee than a fluffy angel cloud. 
Sometimes I drink coffee in the afternoon and stay up too late (like right now as I write this at 1AM). Sometimes I forget to put an item in my budget and it messes up my money plans. I’m really bad at calling friends. I’m even worse at sending letters. I freak out a little when plans change. I leave shoes on the floor. I lock my keys in my car. I rarely iron my clothes. 
So I just want you to know, even though I probably come across as trying to look like I have it all together with my meal plans, color coded Google calendars, documents, labels and folders, hair accessories and organized cabinets and refrigerator, I don’t. Fact – it’s hard for me to admit that! 
I know you don’t expect me to be perfect. But the beasts called perfectionism and the enemy tell me that you do, society does, the world does, Christians do, and the church does. I need to say that I know you’ll still like me despite being not perfect and not having it all together. 
I know that I’m far more disappointed that I didn’t post my meal plan on Sunday as promised than you are. However, I do promise it’s coming. The meals are planned and tomorrow morning (probably when you will read this) I will make my grocery list and shop. I have no good reason other than lack of motivation for writing for not posting. 
Sometimes motivation is so free flowing. Other times it’s just not. And sometimes it hits at random times in the wee hours of the morning. I’m encouraged. I’m reading a devotion book recommended by a dear friend called It’s a Wonderful (Imperfect) Life. Tonight I read, 
“God isn’t the one who pressures us. He wants us to delight in our life and work – whatever it is at this season. Satisfaction and enjoyment are God’s gift to us.”
Through church and this book God is tugging at my heart. Tugging for me to surrender, to yield, to release, to trust, and to allow him to change things in me. I’m not perfect. It won’t happen overnight. But I’m encouraged and this burst of encouragement again reminded me of the gifts and desires God has given me. Cooking, baking, writing, and blogging to name a few. And thus… inspiration. 🙂 Confessional inspiration? 
Of course, I can’t leave you empty handed. I probably should post an imperfect recipe to go along with this post, but I’m not gonna lie. This recipe is pretty darn great. Can we call it imperfect because it could be healthier? We’ll go with that. 
I really do cook healthy most days. I promise I do. Even when feeding small groups of people or people who I feed all the time, I do make “healthy” desserts and they never complain (like the healthy pineapple upside down cupcakes I’ll post soon). But… every once in a while for a special event (or because I had a bad day or just because), I make a non-altered (or minimally altered) recipe. 
Monday night my apartment hosted a Dips & Dessert night for my current RAs and new RAs for next year. The current girls brought either a dip or a dessert. I made both. The dip was my go to, no biggie. The dessert however, total biggie. As in deal. Not size. They were actually quite small little bite sized pieces of heaven. 
Oatmeal Whoppie Pies
Recipe adapted from Pioneer Woman
Ingredients: 
For cookies: 
  • 2 cups brown sugar
  • 1/2 cup butter, softended
  • 1/4 cup shortening
  • 1 large egg
  • 1/4 cup egg beaters
  • 1/2 teaspoon salt
  • 1 teaspoon ground cinnamon
  • 1 teaspoon baking powder
  • 3 tablespoons boiling water
  • 1 teaspoon baking soda
  • 1 1/4 cups whole wheat flour
  • 1 1/4 cups all purpose flour
  • 2 cups quick oats
For filling:
  • Marshmallow cream 
Directions: 
Preheat oven to 350 degrees.
Cream brown sugar, butter, and shortening. Add eggs and egg beaters. Mix. Add salt, cinnamon, and baking powder and mix. Mix baking soda and boiling water. (I’ve never done this before, but the Pioneer Woman said to, so I did. I didn’t notice a difference, but the cookies were good.) Add baking soda and water mixture to the bowl and mix. Add flours and oatmeal and mix well.
Scoop dough onto parchment-lined cookie sheets in rounded heaping teaspoons. Bake for 10 minutes. Remove from oven, transfer to a cooling rack, and let the cookies cool completely. 

Okay let’s talk about filling. Do as she did and not as I did unless you want to be sticky and get an arm workout! She used pre-made marshmallow cream, which would have been MUCH easier. I had a bag of marshmallows I wanted to use, so I made a marshmallow cream by melting down the marshmallows and corn syrup over a double boiler. One of my coworker friends, Christine, said she liked it better that normal marshmallow cream, which she normally doesn’t like. If you want to do it my way it’s 1 bag of marshmallow to 6 tablespoons of light corn syrup. When I make these again, I’ll probably actually make real homemade marshmallow cream from egg whites. 

If you use the pre-made stuff, just scoop on careful teaspoons full (I always type teaspoon fulls first – without fail). I tried scooping and ended up wearing far more of the filling than the cookies. I messily filled a gallon ziplock with the homemade marshmallow cream and piped a dollop on the cookies. 
Step Almost Done – Sandwich the cookies and the messy stuff. The End – EAT & ENJOY! And probably share. I lost count of how many this made, but over 30. 

Roasted Sesame Cabbage Wedges

I have to quickly share these, just because they were probably my favorite recipe from last week!

I love cabbage. Love love it in most forms. However, this is probably my new favorite and best way to love cabbage. I found the original recipe and idea on Pinterest. I adapted it to make it a zero point side and to fit with the theme of my meal. It was an Asian(ish) night, so I added sesame and soy to the recipe. I liked it so much I think I’d probably keep the sesame and soy even if it wasn’t an Asian night.

Roasted Sesame Cabbage Wedges
Inspired by Martha Stewart’s roasted cabbage wedges recipe.
Bad after daylight picture, but I had to share this recipe!

Ingredients:

  • 1 head of cabbage
  • olive oil cooking spray
  • Tony Chachere’s Seasoning Salt (or salt & pepper)
  • sesame seeds
  • soy sauce
Directions: 
Preheat oven to 400. Rinse cabbage and slice cabbage into 1 inch thick rounds. I cut of the end and sliced it in half and then sliced each half into rounds. Line a baking sheet with foil and lightly spray with cooking spray. 
Season each wedge LIGHTLY on both sides with Tony’s (or salt & pepper). Lightly spray cooking spray over the wedges (just the top, the bottoms will get the cooking spray from the pan). Sprinkle with sesame seeds and roast for 40-45 minutes, or until cabbage is tender and edges are browning. 
When mine came out of the oven, I splashed them with just a tad of soy sauce. I didn’t plug them into the recipe builder, but sometimes when you cook with veggies or fruits it makes them be points. But all the ingredients I used were zero points and under the appropriate serving to be zero points, so I’m calling them zero points for me! 

I served mine with perfect (finally!) brown rice and teriyaki meatballs (I used this meatball recipe, but used teriyaki sauce instead of bbq sauce).

Meal Planning 101: Week 4

Last week was such a great meal week. This week has it’s work cut out for it to compete! Highlights: breakfast burritos, crock pot ranch ribs (I used a bottle of Light Kraft BBQ sauce instead of making homemade), nutella fudge popsasparagus brown butter penne, roasted cabbage wedges, and finally perfecting the cooking of brown rice.

Some of my favs from last week – roasted cabbage wedges, crockpot country ribs, asparagus brown butter penne. 
Even if the week isn’t AS good, it will still be a good one. I’m pretty excited about my meals and some of the extras. I am hosting two parties in my apartment this week. I love party food and am super excited about the things I’ll be making for them, particularly the oatmeal whoopie pies! 

Sunday:

Shrimp Boil at friend Brittany’s (I brought the sweet tea.)
Monday:
Dinner Out with Aunt Sandy & Uncle Jeff

Hosting a Dip & Dessert night at 9 o’clock for my current RAs and next year RAs. My offerings will be Chicken Ranch Dip* & Oatmeal Whoopie Pies.

Tuesday:

Crock Pot Caesar Chicken on English Muffins & Caesar Salad (Didn’t get to this one last week because of free meals at other places.)
Wednesday:
Leftovers

Hosting a bridal shower at 8 o’clock for one of my RAs. My offerings will be another batch of Chicken Ranch Dip (it’s just so easy) & Nutella Dip with strawberries. 

Thursday:
Baked Tilapia, Roasted Squash & English Chick Pea Salad*

Friday: 
Leftovers

Saturday: 

Grilled Turkey Burgers on English Muffins & Sweet Potato Beet Hash*
Sunday:
Grocery Day! (Which probably means I’ll grab something quick or eat leftovers.)

I ran out of daylight which means… bad picture! Apologies. 
Notes:
*Chicken Ranch Dip – Also know as chicken ranch cheese ball, just deconstructed. It’s can chicken, cream cheese, and dry ranch mixed together. Super simple and easy, but a crowd pleaser. 
*English Chick Pea Salad – I giggled when I came up with a name for this and pictured Adele, you know, English Chick. It’s a totally made up take on an English pea salad based on me looking in the cabinets, fridge, and freezer and trying to come up with sides I didn’t have to buy stuff for. Chick peas + English peas + onion and some other things. I’ll let you know how it goes. 
*Sweet Potato Beet Hash – Watching the Food Network pays off again! I saw one of the chefs make a version of this, and decided I’d try my own version since I recently discovered I actually do like beets. 
What are you making for dinner this week? 

Nutella Fudge Pops

I’m not a huge fan of ice cream unless it’s my Papaw’s homemade ice cream. I have, however, always had a soft spot for popsicles. My favorite by far has always been the fudgesicle. It’s such a creamy, sweet Spring/Summer treat. When I saw this super easy and mostly healthy recipe for homemade ones, I knew I had to try it. Thanks Chocolate Covered Katie
Nutella Fudge Pops
(recipe from Chocolate Covered Katie – I only used different Nutella)

Ingredients:
  • 3 frozen bananas
  • 1/2 cup chocolate hazelnut spread (I used 1/4 cup creamy & 1/4 cup crunchy of the Kroger brand)
  • 1 tbsp cocoa powder
  • 1/2 tsp vanilla
Directions: 
I froze my bananas with the peel on. It was a tiny bit hard to peel them, but not impossible if you cut them in half down the middle and then sliced them long ways in half. The peel came off pretty easy that way. Place all ingredients in a food processor and pulse, pulse pulse, blend, blend, blend for a long time until all ingredients are combined and smooth.
You can eat it straight out of the food processor as a yummy, creamy ice cream, or you can freeze them for fudgesicles! I used paper mouth wash cups to refreeze mine in. They were quite large servings to me, but I don’t know of any smaller cups to freeze in. 
Yields 5 servings. If you count the bananas in the Weight Watchers Recipe Builder they are 6 points each, if you don’t, they are 4. 

Roasted Asparagus Penne with Balsamic Butter

I highly, highly recommend this meal! I am a meat eater. I love it. I love meat. However, I do try to incorporate vegetarian meals in my planning every other week. It seems like a healthy and right thing to do. 
A dish must be pretty fantastic and noteworthy for me to not really miss the meat. I can fake it, but usually, I am quite aware it isn’t there. This dish definitely made me forget about meat. 
I lightened it quite a bit by using a whole wheat penne, yogurt butter, olive oil spray, and reduced fat Parmesan. Oh my, it’s good! Asparagus was on sale in my neck of the woods too. You could also do roasted broccoli if you don’t like asparagus or it’s not in season.

Roasted Asparagus Penne with Balsamic Butter

(recipe inspired by a less healthier version found on Pinterest)

Ingredients:

  • 1 lb asparagus
  • olive oil cooking spray (I use Great Value)
  • 2 tsp salt
  • 1/2 tsp fresh-ground black pepper
  • 1/2 cup balsamic vinegar
  • 1/2 tsp brown sugar
  • 1 lb whole wheat penne (I use Great Value)
  • 1/2 cup Brummel & Brown yogurt butter
  • 1/3 cup reduced fat Parmesan cheese
Directions: 
Preheat oven to 400. Wash the asparagus and snap the hard ends off. (Tip: Softly bend the asparagus spears towards the bottom, there will be a natural give against where the good part and the hard end meet and it will easily break off.) Cut the spears into 1-inch pieces and place on a foil lined baking sheet. Spray with olive oil cooking spray about 5 times. Toss in spray and 1/4 teaspoon each of the salt and pepper. Roast until tender, about 10-15 minutes.

While that cooks, put the vinegar in a small saucepan. Simmer and reduce until 3 tablespoons remain. Stir in the brown sugar and the remaining 1/4 teaspoon of pepper. Remove from heat. At the same time your pasta can be cooking. Cook the penne in a large pot of boiling, salted water until just done, about 11-13 minutes. Drain the pasta and return to pot. 
Toss the pasta with the butter, vinegar mixture, roasted asparagus, Parmesan, and remaining 1 3/4 teaspoons of salt. Top with the chopped green onion tops and additional Parmesan. 
Yields 7 servings of 1 1/4 cup portions. Each serving is 8 points. Serve with salad. I made a quick chopped salad with diced pears, sliced strawberries, romaine, and a light sesame salad dressing.